






L'installazione di pannelli solari sul tetto offre un'eccellente possibilità di attingere a questa fonte di energia rinnovabile mentre guadagna terreno come alimentazione sostenibile ed economica Con un'enfasi sugli aspetti tecnici del fissaggio dei pannelli a diversi sistemi di copertura, questo manuale fornirà ai lettori una descrizione dettagliata del processo di installazione dei pannelli solari Questa guida copre tutto, dalla valutazione se il tetto è adatto all'energia solare alla conoscenza di quali permessi, strumenti e attrezzature sono necessari, nonché alla comprensione delle procedure di installazione, tra gli altri passaggi necessari, prima di prendere qualsiasi decisione in merito Che tu sia un proprietario di casa che guarda il sole per la prima volta o un appaltatore che desidera maggiori conoscenze su come possono essere montati meglio questo articolo dovrebbe servire al suo scopo agendo come una risorsa professionale che aiuta le persone a comprendere i vari modi attraverso i quali possono essere posizionati i collettori solari.
Quali sono i diversi tipi di supporti a pannello solare?
Supporto per tetto: Pro e contro
Punti positivi:
- Efficienza spaziale: Ciò sfrutta al massimo lo spazio sul tetto, risparmiando così l'area del terreno.
- Efficace in termini di costi: Normalmente ha costi di installazione inferiori rispetto ai supporti a terra.
- Integrazione estetica: I pannelli si fondono con la linea del tetto, mantenendo così la bellezza della proprietà.
- Protezione dai danni: I sistemi situati sui tetti sono solitamente meno inclini ad atti di Dio e atti vandalici.
Punti negativi:
- Compatibilità del tetto: Non tutti i tipi di tetto possono essere dotati di pannelli solari senza rinforzo.
- Orientamento limitato: L'efficienza della cattura dell'energia solare è influenzata da quanto è inclinato o esposto a sud un tetto.
- Potenziale danno: Il tetto potrebbe perdere se questa procedura di installazione non viene eseguita correttamente, soprattutto se si decide di installare pannelli solari su di esso.
- Accessibilità alla manutenzione: A volte l'accesso a queste schede per la pulizia o la riparazione può diventare difficile.
Montaggio a palo: è giusto per la tua casa?
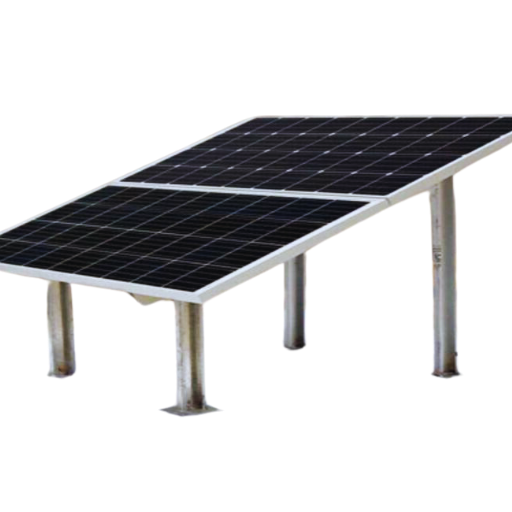
I supporti per pali possono essere una buona scelta per i proprietari di case che desiderano installare pannelli solari, soprattutto quando non hanno abbastanza spazio sul tetto o quando non è adatto per l'installazione Sono progettati in modo tale da posizionarsi correttamente verso la luce solare a causa della loro altezza e capacità di inclinazione Ciò significa che possono catturare più energia durante il giorno poiché possono muoversi con il sole Un altro vantaggio dell'utilizzo dei supporti per pali è che riducono l'ombreggiatura di altri edifici o alberi intorno a loro, ma tuttavia, ci sono alcune cose che dovrebbero essere prese in considerazione dai proprietari di case, come la stabilità del suolo nel sito e le normative locali sulla zonizzazione, perché queste possono influenzare se si può montare il proprio pannello solare o no. In conclusione, a condizione che la tua proprietà abbia un'area aperta sufficiente senza blocchi e tu sia in grado di ottenere le autorizzazioni necessarie, quindi il montaggio del palo potrebbe aiutarti a ottenere il massimo dall'energia solare.
Montaggio a terra: vantaggi e installazione
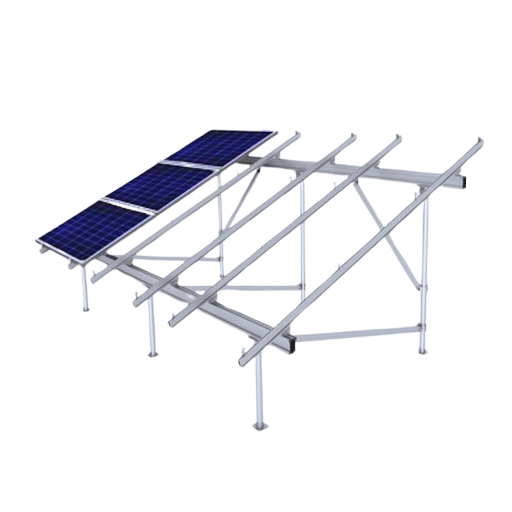
Montato a terra energia solare i sistemi, in alcuni casi in cui le installazioni sul tetto non sono adatte, offrono una serie di vantaggi ai proprietari di case Uno è che possono ottimizzare l'accesso al sole Queste unità possono essere posizionate strategicamente in modo da ricevere la luce del giorno per tutto il giorno, potenziando potenzialmente la produzione di energia rispetto alle alternative montate sul tetto.
L'installazione di supporti a terra di solito richiede più superficie che può essere un problema per chi ha uno spazio limitato D'altra parte, sono facili da mantenere poiché i pannelli possono essere facilmente raggiunti per la pulizia e le riparazioni a differenza di quando installati sopra le case Inoltre, i supporti a terra possono essere progettati con angoli regolabili che consentono l'ottimizzazione stagionale della cattura della luce solare.
Prima dell'installazione è importante effettuare una valutazione del suolo e uno studio di stabilità nel sito garantendo al contempo il rispetto delle leggi e dei permessi di zonizzazione locali Tutto sommato, un sistema montato a terra fornisce un modo efficiente e pratico per generando solare potenza in particolare laddove tali ambienti sono favorevoli.
Come Scegliere il Miglior Sistema di Cremagliera Solare
Comprendere gli angoli del tetto e il racking solare
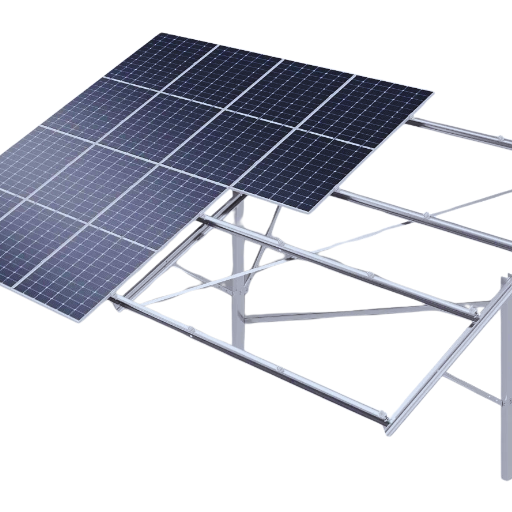
Quando si valutano le altezze del tetto delle strutture di montaggio solare, è importante determinare la migliore inclinazione per catturare la luce solare I pannelli solari sono più efficienti se inclinati a vari angoli di pendenza che vanno da orizzontale a verticale poiché dovrebbero catturare quanto più sole possibile Inoltre, idealmente, in relazione alla generazione di energia tutto l'anno, i moduli fotovoltaici devono essere situati su una superficie con un angolo pari alla sua latitudine sulla Terra Altrettanto importante è avere i tetti rivolti verso sud se si ha sede nell'emisfero settentrionale perché ciò influisce in modo significativo sui loro livelli di prestazione.
Per quanto riguarda i sistemi di scaffalature solari, l'installazione deve tenere conto del passo particolare del tetto in modo che rimanga stabile e duri a lungo. A seconda del tipo di tetto che si ha e di come il sole si muove nei cieli durante un giorno o un anno, possono esserci staffe di montaggio a inclinazione fissa o regolabili, tra le altre cose come questa. Il peso degli array fotovoltaici combinato con i carichi del vento da loro imposti richiede una valutazione della solidità strutturale rispetto alla capacità dei materiali utilizzati per rendere i tetti sufficientemente resistenti contro tali forze, che può derivare dall'aggiunta di più peso sugli edifici durante il processo di installazione.
Racking solare fai da te: è fattibile?
Diversi fattori determinano se è possibile utilizzare un Solare fai da te sistema di scaffalature o meno; tra questi ci sono conoscenze tecniche, materiali disponibili e conformità alle norme di sicurezza. È necessario effettuare indagini approfondite sui codici e sulle regole edilizie locali prima di avviare qualsiasi progetto di questo tipo poiché potrebbero specificare cosa è richiesto per un rack solare.
Da un punto di vista tecnico, la costruzione di sistemi di scaffalature solari necessita di una forte comprensione della progettazione strutturale in modo che possa essere in grado di resistere a diverse forze ambientali come carichi di vento o neve. Ad esempio, IBC prescrive generalmente che le installazioni sui tetti debbano avere almeno 30 psf (libbre per piede quadrato) di resistenza al vento, che deve essere inclusa nella progettazione delle scaffalature.
La selezione dei materiali ha un grande impatto sulla resistenza e sull'efficienza dei rack fatti in casa I materiali comunemente usati includono acciaio zincato, alluminio e plastica durevole aventi ciascuno i propri vantaggi rispettivamente in termini di ponderazione, capacità di resistenza alla corrosione ed efficacia in termini di costi Un buon design consente anche la regolabilità nei supporti per consentire regolazioni inclinabili in base ai cambiamenti nella posizione del sole nel corso delle stagioni.
I risultati della ricerca indicano che le installazioni eseguite professionalmente di solito danno risultati migliori di quelli fatti dagli individui stessi, in genere, circa 5-10% maggiore efficienza grazie a progetti migliorati così come le tecniche di installazione adottate Tuttavia, tali progetti possono ancora risparmiare denaro se fatti correttamente, ma c'è bisogno di uno di considerare il livello di abilità richiesto insieme alla potenziale perdita di output contro i guadagni previsti dalla riduzione delle spese, tra le altre cose, prima di optare per loro.
Confronto tra diversi sistemi di montaggio
Quando si tratta di valutare i sistemi di montaggio solare, ci sono tre tipi che dovrebbero essere considerati primari: supporti fissi, regolabili e di tracciamento. Ogni tipo ha i propri vantaggi ed è adatto a diverse applicazioni a seconda delle condizioni in una determinata posizione.
- Supporti fissi: Questo è il tipo più comunemente usato di sistema di scaffalature solari, che fornisce una base sicura per i pannelli che utilizzano rotaie ottimizzate in base alla latitudine del sito di installazione. I supporti fissi costano meno, richiedono relativamente meno sforzo per l'installazione e richiedono una manutenzione minima. Tuttavia, non riescono a sfruttare le fluttuazioni stagionali della luce solare, con conseguente riduzione della potenza complessiva.
- Supporti regolabili: Questi possono essere spostati manualmente o automaticamente in modo che seguano la posizione del sole per tutte le stagioni cambiando gli angoli del pannello I supporti regolabili catturano più energia di quelli fissi ma potrebbero aver bisogno di investimenti iniziali più elevati e procedure di installazione complesse Le parti mobili li rendono inclini anche a richieste di manutenzione più elevate.
- Supporti di tracciamento: I sistemi di tracciamento possono aumentare significativamente l'efficienza energetica di 20-3 rispetto a 20-1TP3 T rispetto ai sistemi fissi di 20-3 T attraverso il tracciamento del percorso del sole attraverso il cielo durante le ore diurne. Tuttavia, ciò comporta costi maggiori sia in termini di installazione che di mantenimento in funzione nel tempo. Oltre ad essere più costosi di qualsiasi altra opzione menzionata sopra, potrebbe essere necessario progettare soluzioni di tracciamento più forti rispetto a vari modelli meteorologici, come i forti venti, che potrebbero destabilizzare le loro strutture.
Pertanto, considerando gli effetti a breve e lungo termine nonché le implicazioni finanziarie coinvolte; si dovrebbe scegliere il tipo di monte in base ai limiti di bilancio, alle specificità dell'ubicazione e alla quantità desiderata di potenziale di generazione di elettricità, tra gli altri fattori.
Qual è l'angolo di inclinazione ideale per i pannelli solari?
Calculating Tilt Angle Based on Latitude
The ideal tilt angle for solar panels can be established with the latitude of the place where they are installed. For best annual performance, it is suggested that the inclination be set at a number equal to that of the site’s latitude. In order to maximize the capture of sunlight in colder months, it is advisable to use a tilt of about 15 degrees more than this figure. On the other hand, during hotter times when we need maximum efficiency, then, it may also work if we employ an angle that is approximately 15 degrees less than or equal to the latitudes itself . However additional tweaks can optimize performance further by taking into account local weather patterns and changes in daylight duration throughout different seasons.
Adjustable vs Fixed Tilt Angles
When choosing whether to use a fixed or adjustable tilt angle for solar panels, many technical considerations must be taken into account. Fixed tilt systems are so named because they remain at one angle all year round. They tend to be easier to install and require less maintenance than their adjustable counterparts, which makes them cheaper in most cases. However, this can mean that they produce suboptimal amounts of energy at certain times of year when the sun’s path across the sky deviates most from perpendicularity with respect to the panel’s surface.
On the other hand, an adjustable slope system allows panels’ angles to be changed throughout a year so as to maximize collection per season. In fact, this ability may significantly raise such capture – by 25% annually more than any stationary setup, as shown in some surveys done within regions having severe weather changes over time – but it also comes along with higher costs during installation and necessary manual readjustments on periodic basis entailing extra labor hours added.
What has been gathered from different sites is that the closer towards poles one gets, the better off he becomes using tilts capable of being adjusted, whereas around the equator, such differences might not even matter much since there is always plenty of sunshine available anyway throughout any part of a given day (year). Therefore, selection between adjustability or fixity should depend upon local geography, economics, and specific energy output goals for each particular photovoltaic project undertaken.
Impact of Tilt Angle on Solar Efficiency
The efficiency and total energy output of solar panels are greatly affected by the angle at which they are tilted. Studies have shown that the right incline can help capture more solar radiation, which is directly proportional to power generation. To illustrate, reputable sites dealing with solar energy have pointed out that for all-year-round peak performance, it is advisable to tilt them at an angle equal to the latitude where they are being installed.
Additionally, seasonal variation in sun intensity calls for changes in panel positioning relative to earth’s surface. According to some sources, rotating modules so they face specific directions during winter and summer months could spike electricity production by 30% compared with fixed-position systems. Moreover, a review of data proposes that any alterations made on this aspect should seek to maximize exposure when sunlight is strongest thereby increasing efficacy. These findings highlight why one ought to think about slanting strategically vis-à-vis optimizing PV output in any given undertaking.
How do you install solar panels on different roof types?
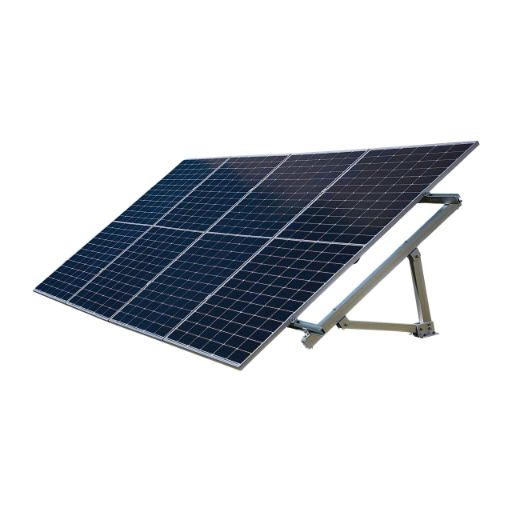
Installing on Shingle Roofs
To install solar panels on these types of roofs, it is necessary to be keen on their structures and make-ups so that the installation will not only last for long but also be strong. Moreover, asphalt shingle roofs are advantageous due to their widespread use and compatibility with solar mounting systems. The entire Solar Roof Installation process encompasses the following steps:
- Evaluation: The roof’s condition should be assessed as part of the preinstallation activities. This includes checking for damages, likely leaks and whether the structure itself can carry extra weight or not. It is important to take good care of the shingles to avoid any future complications.
- Choosing a Mounting System: The choice of mounting system is crucial at this point. Rail-based mounting systems that clamp directly to the roof are extensively used for asphalt shingles. These allow fine tuning adjustments and different panel sizes without any difficulties involved. Consequently, it is mandatory that you choose mounting hardware that matches your shingles so as not cause any harm when fastening your solar panels.
- Flashing: Flashing must be installed around the mountings for water proofing purposes. Normally, flashing consists of metal or a durable synthetic material which deflects water from entering into the system through weak spots such as gaps in walls and valleys among others. This step ensures no dampness occurs which may ruin both rooftops and photovoltaic modules.
- Fixing Panels: Finally, with everything set up, i.e., mounting system and flashing, among others, our solar modules get screwed down tightly enough to ensure they do not fall off during inclement weather conditions if there were loose ends somewhere in between. Over-tightening needs to be avoided by following manufacturer instructions on recommended torque so as not spoil shingles or even break panels.
- Electrical Connections: The final step involves connecting electrical components from solar arrays to inverters (and ultimately home power supply). Usually, safe and compliant electrical installations must be done by professionals who are electricians.
According to solar installation data, the most efficient angles for solar energy generation are at 30°-45° slopes facing south. On the other hand, maintenance instructions advise that regular inspections should be carried out especially after severe weather events in order to ensure that both the roof and the photovoltaic system are intact. By following these guidelines, homeowners can achieve a successful solar installation that maximizes energy production while safeguarding their roofing investment.
Installing on Metal Roofs
When establishing solar panels on metal roofs, a few things need to be considered for them to function well and last long. Initially, the mounting system must be compatible with the kind of metal roofing being used which could either be corrugated or flat among others. For standing seam roofs, there are special clamps that can be used which attach directly onto the seams without puncturing through the roof hence keeping its waterproofing intact while in contrast; for corrugated or flat metal roofs this might require traditional mounts that anchor through the metal but with necessary precautions taken such as sealing off properly around any penetrations so as not to allow for leakage.
Also, one should select suitable fasteners able resist corrosion due exposure these will have towards different weather elements throughout various seasons . The installation process should strictly follow what has been stipulated by manufacturers concerning load capacities and spacing thus ensuring firmness against wind pressure and snow weight. Following these steps will enable homeowners carry out safe solar installations on their metallic roofs which in turn increases energy production while safeguarding the structural integrity of such covers.
Proper Fasten Techniques for Various Roofs
When you’re setting up solar panels, ensuring stability and durability means using proper fastening methods that match the type of roof being worked on.
- Asphalt Shingle Roofs: It is recommended that you make use of lag bolts or screws manufactured for roofing applications, particularly those long enough to go through the roof trusses. They must be inserted in a staggered pattern so as to distribute weight evenly and minimize strain on any one area of the roof.
- Tile Roofs: On tile roofs, it is suggested that a mounting system that allows tiles to remain undisturbed should be used. Installation brackets need to be fixed onto the underlying roof deck or trusses thus providing strong anchorage points while still maintaining integrity of overlying tiles.
- Flat Roofs: Typically, when dealing with flat roofs, ballasted mounting systems are employed in order not pierce through roofing membrane by evenly spreading weight of solar panels over the surface. This requires the use of concrete blocks or other weights compliant with local building codes to secure array against wind uplift.
These fastening techniques not only improve performance of solar system but also extend life span of roofing material. Therefore during installation process strict observance of manufacturer’s instructions as well as local building regulations is necessary for utmost safety and efficiency.
What Are the Steps for a DIY Solar Panel Installation?
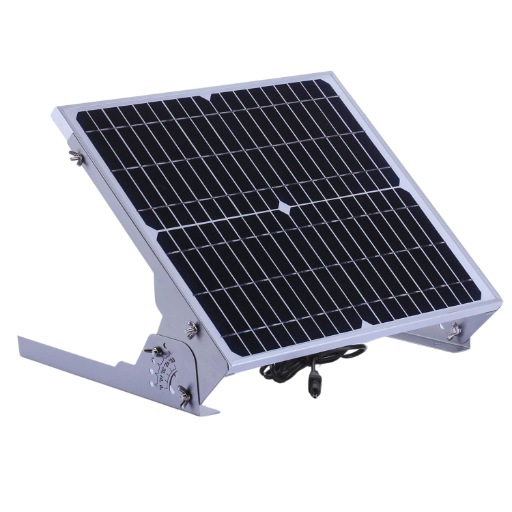
Planning Your DIY Solar System
- Examine Energy Demands: Discover an ordinary year’s worth of energy utilization by examining your utility bills. Find out the total wattage hours used in order to see what size solar system you need.
- Appraise Roof Space: Measure the roof area available for panel installation. Ensure there is no shade on it during any part of the day caused by trees, buildings or other structures.
- Choose Solar Panels: Select solar panels based on their efficiency ratings and the amount of energy calculated that you will need. Base this decision on whether you want to pay more upfront costs for higher-performing monocrystalline panels or save money with less efficient polycrystalline ones.
- Look Into Local Regulations: Look up local permitting requirements and building codes for solar installations so that everything is legal. You should also check if there are any incentives, rebates or financing options offered in your area.
- Decide On System Type: Figure out which type of system (grid-tied, off-grid, or hybrid) will work best for your needs depending on how much power is necessary each month as well as whether or not excess electricity should be stored up for later use.
- Plan For Inverter And Battery: Choose an inverter compatible with your solar panel output if applicable. If you plan to store electricity, then select a battery system that meets these requirements as well as is suited to them based on what kind of setup I have here.
- Design Layout: Make a drawing showing where each module should go according to which way they face and how much tilt angle each one should have because we want them all facing towards the sun but some parts might get shaded otherwise so we gotta figure out where those spots are at; also try not having too many modules bunched together because then it creates uneven load distribution across my roof which isn’t good either!!!
If executed meticulously at this stage, following these instructions can create a solid base for an effective self-made solar panel placement.
Strumenti e materiali necessari
A range of equipment and tools is necessary for a DIY solar panel installation to be successful.
Tools:
- Multimetro: This device measures electric output and ensures correct connections.
- Wrench Set: It is used to tighten mounting brackets and connections.
- Drill with Bits: These are needed to install panels and mounting structures.
- Level: The purpose of this tool is to make sure that panels are mounted at an angle which is accurate.
- Ladder: You need this to safely access the roof for installation purposes.
Materials: Make sure your solar equipment is made from durable materials that can withstand environmental factors.
- Pannelli Solari – Get enough quantity based on your energy needs.
- Mounting Hardware – Brackets, rails, fasteners etc., used in securing the panels on the roof.
- Inverter – Used to convert DC power produced by the panels into AC power which can be used at home.
- Battery Storage System – If you want to store some energy, ensure it works well with your solar setup.
- Cablaggio Elettrico – Appropriate gauge wiring should be used when connecting panels to the inverter & house power supply.
- Safety Equipment: Hard hats, gloves, and safety goggles should be worn during installation for worker safety.
It is important that you have all of the right tools and materials so as not only to speed up but also to ensure reliable conversion into electrical energy through sunlight.
Guida all'installazione passo passo
Installation of solar panels consists of several crucial stages to ensure its safety and effectiveness. This guide will take you through the most important steps during installation process:
- Valutazione del sito: The initial stage in the installation process is to make a thorough site assessment to determine suitable positions for solar system mounting. Start by assessing your roof or site where you want to install the solar panels. Look out for any obstructions like trees, buildings or other structures that may cast shadows on your solar equipment during peak sunlight periods.
- Progettazione del sistema: Determine your energy needs and come up with a design that matches them. It includes getting the right number of panels (or solar modules), inverter type and storage solutions based on how much electricity you use at home and how much sun is available.
- Secure Permits: Check if all necessary permits are obtained before mounting a solar system since they may vary from one locality to another. Before beginning installation, obtain required permits from local authorities. This could involve presenting your system design for approval just to ensure compliance with local regulations as well as safety standards.
- Mounting Framework Installation: You should follow manufacturer’s instructions when installing brackets and rails used in mounting. They must be correctly installed, leveled, and able to support the panels properly.
- Solar Panel Installation: Place your finished frames on top of this framework slowly but carefully. Fasten these using appropriate fasteners; this should be done tightly so that they can resist wind action among other weather factors.
- Wiring & Electrical Connections: Use electrical wiring tools to wire the solar panel into an inverter device. Ensure all connections are covered such that no electrical dangers can occur.
- Inverter Setup: Put it in a location where it will be easily accessible particularly under shades with sufficient ventilation. Follow all safety procedures while connecting it to your home’s power outlet feeders.
- Testing and Commissioning: After completion, test the system for the correct functioning of all electrical outputs using multimeter measurement tools. If necessary, check that the inverter is working and communicating with the grid.
- Safety Checks and Documentation: After installation, the whole process must be thoroughly reviewed to ensure compliance with all codes and standards. This helps you in documenting on what was done during the entire installation for future reference of maintenance or improvements.
By following these guidelines, you will have a successful DIY solar panel installation which would boost your system’s efficiency as well as its reliability.
How to Ensure Proper Grounding and Safety?
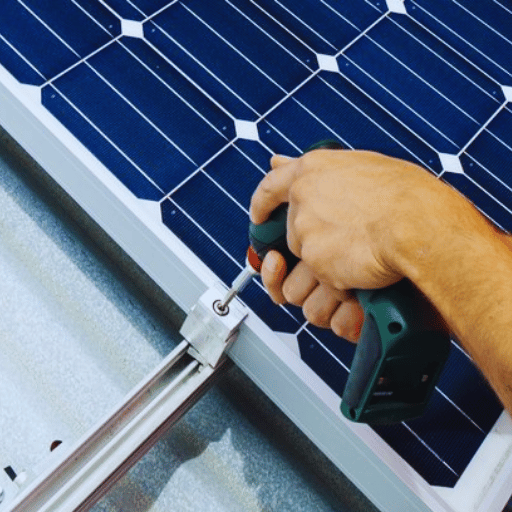
Essential Components for Electrical Grounding
- Earth Rods: Metal rods, often copper or galvanised steel, that are hammered into the ground to connect an electrical system with the earth.
- Ground Wire: A wire of low resistance that connects the electric circuit with earth electrodes, which ensures safe discharge of excessive current.
- Grounding Clamp: A grounding clamp is fixed around an earth rod and grips an earthing conductor to achieve good electrical contact as well as secure mechanical connection.
- Earthing System: This refers to a combination of ground rods and conductors that provide a path for fault current.
- Equipotential Bonding Strips: Conductive straps used for joining various metal parts in an electrical installation so as to minimize potential differences between them thus reducing risk of electric shock.
- Circuit Breaker: It is a device designed to automatically interrupt power flow through an appliance or other device when it detects overcurrent protection failure thereby safeguarding people from being injured by electricity and also protecting equipment against damage caused due to short circuits or overload currents.
- Ground Fault Circuit Interrupters (GFCIs): These devices shut off power supply whenever they sense any leakage currents flowing along unintended paths such as human bodies connected across live conductors hence making wet locations safer.
If these units are followed, then one can be guaranteed with a reliable grounding system, leading to more secure electrical installations.
Safety Precautions During Installation
When installing a solar panel system, personal safety and the integrity of the system should be given priority. Here are some of the things that you can do:
- Use Personal Protective Equipment (PPE): Always put on the right PPE, such as gloves, hard hats, and safety goggles, among others, when working to protect yourself from electricity and falling objects.
- Disconnect Power Sources: Before starting with any installation process ensure that all power sources are disconnected hence no electric shock can occur.
- Ensure Safety By Using Insulated Tools During Roof Attachments To The Mounting: Use insulated tools for protection against electrical shock while conducting electrical component works on roof attachments to mounting.
- Work With Another Person: Whenever possible let someone else work alongside you so that in case an accident happens they can offer immediate assistance.
- Secure Work Area: Clear away anything that may cause accidents around where the panels are being installed and keep tools or other materials used during installation safely to avoid tripping over them accidentally or getting hurt by them unknowingly.
- Segui le linee guida del produttore: Always follow instructions provided by manufacturers about how best their products should be handled during installations this will not only ensure safe use but also help meet set safety standards as well as legal requirements.
- Carry Out Regular Inspections: Make it habit of inspecting everything systematically both before and after any part is fixed so as to identify potential hazards or failures which might compromise overall safety.
Putting these measures into practice significantly reduces risks involved in solar panel installations, thereby improving operational efficiency and ensuring people’s welfare.
Maintaining Your Solar Panel System
Maintaining a solar panel system means paying attention to its weight. Here are some of the practices you need to observe:
- Cleaning on a Regular Basis: You should make sure that the panels are clean and free from any kind of dirt like dust, leaves, or bird droppings. In particular after severe weather conditions, it can be washed gently with water or a soft brush.
- Routine Inspections: At certain intervals inspect solar panels as well as other related components such as inverters and wiring so as to identify signs of tear and wear. Check for loose connections, corrosion; also ensure that trees overhanging do not shade off sunlight.
- Performance Monitoring: Energy produced by the solar panel system should be tracked using monitoring systems. This helps in early detection of performance problems which can then be solved before they cause significant loss of power.
- Professional Maintenance: Arrange for professional checkups once per annum. Well trained experts are able to carry out comprehensive tests and fix any faults thereby optimizing its operation.
These maintenance tips guarantee long life and efficiency in service delivery from your investment in solar energy technology.
Fonti di riferimento
Domande frequenti (FAQ)
Q: How do you mount solar panels on your roof?
R: Il metodo che utilizzi per montare i pannelli solari sul tetto dipenderà dal tipo di tetto che hai e dal sistema di montaggio solare che scegli Alcuni metodi comuni includono l'utilizzo di sistemi di montaggio solare tamarack, staffe per ironridge o altri tipi di scaffalature e prodotti di montaggio È importante assicurarsi che gli attacchi del tetto siano fissati saldamente per sostenere il peso dei pannelli solari.
Q: What are the steps to mount solar panels?
A: In order to mount solar panels, start by planning your solar power system. Measure panel dimensions and select proper solar panel mounting systems. Then, install mounting rails and roof attachments, and mount modules using module clamps onto already installed rails before connecting a solar array to your home’s electrical system.
Q: What tools/materials do I need for mounting my own set up?
A: Solar panel mounting brackets, screws, drill bits (various sizes), measuring tape, ladder or scaffold if necessary; Roof sealant; Mounting rails; A roof rack (if needed); Brands like tamarack solar and iron ridge offer kits that come with most of what you’ll need.
Q: How can I figure out what size panels will fit on my roof?
R: Misura quanto spazio è disponibile sul tuo tetto, quindi considera le valutazioni di efficienza e le dimensioni fisiche quando scegli quali tipi/marchi di moduli fotovoltaici dovrebbero essere utilizzati laddove ‘Utilizza una ’Guida ai pannelli solari" o parla con un installatore che può consigliare di garantire punti di attacco corretti in ogni luogo scelto per l'installazione.
Q: What types of mounts are there for photovoltaic arrays?
R: Esistono molti tipi diversi di supporti per pannelli fotovoltaici, come sistemi montati a terra o sistemi montati su palo, a seconda che siano installati vicino a edifici (sistemi montati su tetto) rispetto ad essi lontani, vale a dire, direttamente nella terra. Ogni tipo ha vari prodotti per il montaggio su scaffalature progettati specificamente per soddisfare questi diversi requisiti. I sistemi montati sul tetto vengono solitamente utilizzati per installazioni residenziali, mentre i tipi possono essere utilizzati in applicazioni commerciali o su larga scala.
Q: Can I put up solar panels on any roof?
R: Sì, i pannelli solari possono essere installati sulla maggior parte dei tipi di tetto, come asfalto di scandole, metallizzato o piastrelle, tuttavia, i particolari attacchi e sistemi di montaggio richiesti saranno determinati dal tipo di tetto che hai; quindi, è importante consultare un professionista che garantirà che siano compatibili e sufficientemente durevoli per le tue esigenze.
Q: Why is it important to install solar panels with proper roof attachments?
A: Gli attacchi adeguati del tetto sono essenziali perché fissano i pannelli in posizione senza danneggiare il tetto Lo fanno fissando saldamente le rotaie di montaggio che devono resistere a vari aspetti ambientali come il carico del vento e il carico di neve tra gli altri La mancata perforazione in questi punti può causare perdite o problemi strutturali ancora peggiori.
Q: How much time does it take to mount solar panels onto a roof?
R: Il periodo impiegato prima di completare il processo di montaggio dipende interamente dalle dimensioni del sistema fotovoltaico insieme alla complessità coinvolta durante l'installazione. In genere, però, una configurazione residenziale di dimensioni medie potrebbe richiedere un equipaggio professionale compreso tra 1 e 3 giorni per essere completata, mentre i fai-da-te potrebbero averne bisogno di più poiché l'esperienza differirà rispetto ai sistemi di montaggio utilizzati adottati.
Q: Can I use my existing racks on the roof to mount solar panels?
R: Sì, ma solo se le tue unità attuali sono state progettate in modo da poter lavorare insieme a staffe destinate a mantenere i moduli in posizione insieme ad altri componenti hardware necessari come binari eccetera, consentendo loro di supportare in modo sicuro l'intero array contro pesi imposti da diverse condizioni climatiche.
Q: What safety measures should I consider when mounting solar panels?
A: Il montaggio dei pannelli solari viene fornito con una propria serie di precauzioni di sicurezza che includono l'uso di indumenti protettivi appropriati come guanti o occhiali soprattutto durante la manipolazione di oggetti appuntiti; utilizzando apparecchiature anticaduta ogni volta che si lavora in alto al piano terra ad esempio; garantire collegamenti elettrici sicuri sono fatti tra gli altri È anche bene chiedere consiglio a fornitori rispettabili che trattano tali prodotti come alte in modo da rispettare i codici e gli standard edilizi locali pertinenti.