






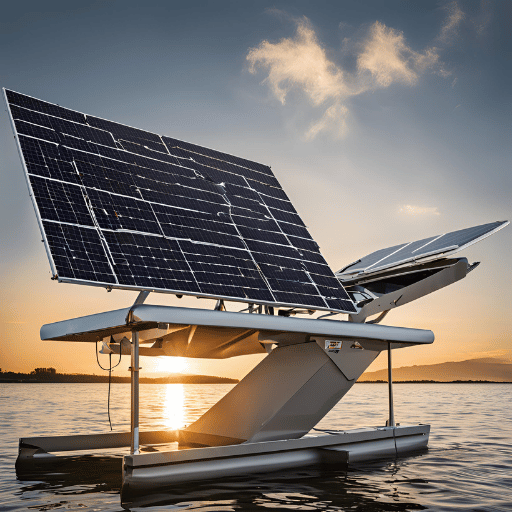
持続可能な技術の使用は、海洋体験の向上を目指すボート愛好家の間で一般的になっています。 「ボートリフトソーラー充電キット」は、ボートの所有者が太陽光発電を効果的に活用して、ボートリフトやその他の必要な機器に電力を継続的に供給できるようにする高度なシステムです。このような環境に優しいイノベーションは、従来のエネルギー源への依存を減らすだけでなく、海洋活動によって引き起こされる生態学的影響を削減します。この投稿では、この製品に含まれる技術性、その利点、および設置方法について説明し、アップグレードを通じて海洋生物を持続可能なものにしたい人全員に完全なマニュアルを提供します。.
ボートリフトソーラー充電キットの利点は何ですか?
ソーラーチャージはボートリフトにどのようなメリットがありますか?
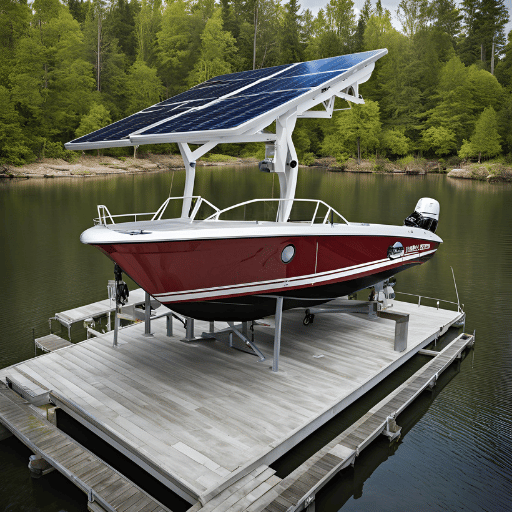
太陽電荷は、それが動作のコストを最小限に抑え、生産性を向上させる強力かつ自給自足の電源を与えるので、ボートリフトのために非常に重要です これは、もはやグリッド電力や燃料駆動発電機のための使用がないことを意味し、したがって、維持費だけでなく、エネルギー料金を低下させることに加えて、, ソーラーパワー 炭素排出量を削減し、持続可能なボート遊びをサポートするため、環境にも役立ちます。継続的な可用性について話すとき、私たちが言いたいのは、湖畔のホイストは、太陽エネルギーのおかげで、電気のない遠く離れた場所や停電中であっても、一日中稼働できるため、所有者だけでなくオペレーターにとっても、パネルが長持ちし、常に良好な状態にあるため、これまで以上に信頼性が高まるということです。.
太陽光充電キットはエネルギーコストを節約できますか?
絶対に、ソーラー充電キットはエネルギーコストを大幅に節約できます これらのキットを使用すると、主電源からの電気を使用したり、燃料を消費したりする必要がなく、太陽光を自由かつたっぷりと使用するため、全体的な光熱費を削減できます さらに、メンテナンスが安価であるということは、時間の経過とともにより多くのお金を節約するのに役立つことを意味するため、コストの点でボートリフトに電力を供給する場合に非常に良い選択肢になります。.
ボートリフトソーラーにソーラーパネルシステムを選ぶ理由?
選択すべき理由はたくさんあります ソーラーパネル ボートリフト用のシステム まず、これらのパネルは、化石燃料への依存を減らすことで地球の維持をサポートする、環境に優しい方法で何度も使用できるエネルギー源を提供します。 第二に、電気代の削減または削減と低メンテナンスコストによってコストを節約します。また、送電網がなくても停電中であっても、ソーラーパネルは継続的な電力供給を保証するため、ボートリフトの運用上の信頼性が向上します。最後に、技術の進歩によってもたらされた耐久性と効率の向上により、このようなシステムは時間の経過とともに効率が向上し、同時に長期間にわたって確実に動作できるようになりました。.
ボートリフトソーラー充電キットを設置するにはどうすればよいですか?
設置に必要な工具や材料は何ですか?
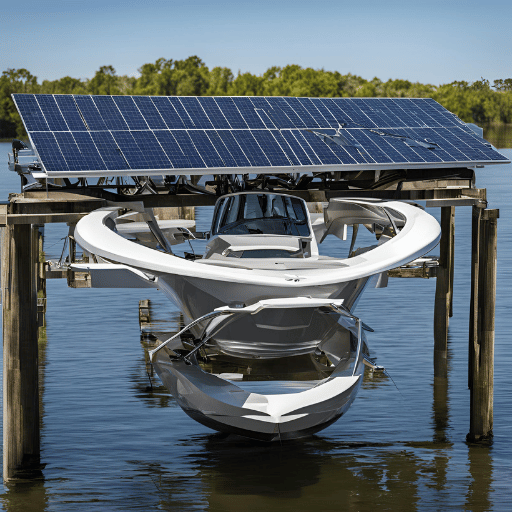
ボートリフトソーラー充電キットを設置するには、次のツールと材料が必要です:
- ソーラーパネル: これらには、エネルギー需要に応じて、通常 10 W ~ 50 W の定格が付属します。.
- 取り付けブラケットとハードウェア: これは、取り付けブラケットをボートリフトまたはドックにしっかりと固定することを目的としています。.
- ソーラーチャージコントローラー: この装置はソーラーパネルからの電圧と電流を制御し、過充電から保護します。.
- ディープサイクルバッテリー: ソーラーパネルで回収されるエネルギーを節約します。その範囲はほとんどが 12V ~ 24V です。.
- 電気配線とコネクタ: ソーラーケーブル、MC4コネクタ、防水ジャンクションボックスは、安全性と効率的な動作を保証する健全な電気接続などに使用されます。.
- バッテリーエンクロージャーボックス: バッテリーは環境要因や物理的損傷から保護する必要があります。この目的のために特別に設計されたエンクロージャーボックスは、バッテリーを最高の状態に保つのに役立ちます。.
- マルチメータ: コンポーネントを正しく接続して適切に動作させるときに必要な電圧、電流、抵抗を測定する装置。.
- ドリルおよびドリルビット: ドリルは取り付けブラケットに取り付けられたマウントに取り付けられた穴を開け、その後、ワイヤーがこれらの穴を貫通します。.
- ドライバーとレンチ: 取り付けプロセス全体を通じて、ネジまたはボルトをそれぞれ締めるためのドライバーまたはレンチが必要です。.
- ヒューズと溶融ホルダー: このヒューズホルダーは、電気回路の過電流を防ぐために使用されます。.
- ワイヤーストリッパーとクリンパー: ワイヤーストリッパーのクリンパーを使用して、任意の接点で固定される直前に電気接続を準備します。.
これらのツールや材料を使用することで、ボートリフトの電源が適切に設置され、確実に役立ちます。.
太陽光発電充電システムの設置に関するステップバイステップのガイド
サイトの評価と計画
- チェックサン露出: 太陽電池パネルを設置して、一日を通して太陽光に最大限さらされるようにするのに最も適した場所はどこでしょうか?可能であれば南に向けるようにし、その場所の緯度に等しい角度で傾けます。これは、簡単に調整できる陽極酸化アルミニウムで作られた取り付けアームによって実現できます。.
- エネルギーのニーズを見つける: ボートリフトは1 日にどれだけのエネルギーを消費しますか? この数字は、ソーラーパネルシステムのサイズを決定する上で非常に重要です。たとえば、1 日あたり 300Wh を必要とする場合、1 日平均 5 日のピーク日時があると仮定すると、約 30W のパネルが必要になります。.
ソーラーパネルの取り付け
- ブラケットを取り付ける: ドック上の選択された点にブラケットを固定するか、ドリルを使用してブラケットを持ち上げます。モジュールをしっかりと保持するために必要な気密性と位置合わせを確保します。.
- PVモジュールをインストールする: 太陽電池モジュールをブラケットに固定し、太陽光を最大限に吸収できるように十分にしっかりと保持され、最適な位置に配置されていることを確認します。.
配線
- PVをCCに接続する: 各ソーラーモジュールの正端子を、充電コントローラーの対応する入力(正)端子とMC4コネクターとソーラーケーブルを介してリンクします。接続は水密であるだけでなく、十分にしっかりしている必要があります。.
- バッテリー&ボックスをインストール: このような用途で使用されるバッテリーを収容するために設計されたエンクロージャーボックスにディープサイクルバッテリーを挿入します。次に、充電コントローラー出力の端子を、正しい極性を観察しているバッテリーの端子と接続します。.
- ヒューズの取り付け: 充電コントローラーとバッテリー バンクの間の過電流を防ぐために、適切な定格ヒューズをホルダーに取り付け、配線のこのセクションに沿って挿入します。.
接続負荷
- CCに参加してリフト: これらの回路を介して電力が供給される機器から予想される定格電流に応じて、ワイヤ ゲージ サイズを使用します。チャージ レギュレーターにある負荷出力端子間で、ボート リフト コントロール ボックスまたは電気を必要とするその他のデバイスにある電力入力に向かってワイヤを走らせます。必要に応じて、長距離の伝送中に過熱したり不必要に電圧降下を引き起こしたりすることなく、そのような電流を処理できる正しいサイズの導体を使用していることを確認してください。.
- 安全な電気接続: クリンパーを使用してワイヤーから絶縁を剥がした後、すべての接続が適切に固定されていることを確認し、誤って接触したときに短絡を引き起こす可能性のある、緩んだ導体や裸の導体が露出したままになっていないことを確認します。これは、特に誰かがライブ回路で作業中にそのような点の近くでショックを受けた場合に危険です。.
システムをテストします
- 電気パラメータを確認してください: マルチメータを使用して、システム内のさまざまなポイントでの電圧、電流、抵抗、つまりソーラーパネル出力、充電コントローラーの入力/出力、バッテリー端子などを測定します。予想される電圧が太陽光の下で PV モジュールによって生成され、バッテリーが仕様に従って充電レギュレーターによって適切に充電されていることを確認します。.
- ボートリフト操作を試してみてください: 重量ボートや空のボートを持ち上げるなど、さまざまな負荷の下でボートホイストの動作をテストしますが、常に太陽エネルギーのみを使用します。信頼性の側面についても満足するまで、セットアップ全体の一般的なパフォーマンスとともに、時間の経過とともに使用されるバッテリーの充電レベルを数日間監視します。.
これらの簡単な指示に従えば、ソーラー充電を通じてボートリフト用の信頼性が高く環境に優しい電源を設定できます。.
一般的なインストールの問題とそれらを回避する方法
- ワイヤーサイジングが不十分: 小さなワイヤの使用は、それらが加熱され、電圧を失う可能性があり、それによってシステムの効率が低下する ケーブルサイズに関する製造業者の推奨事項に常に従い、その長さに関してゲージを考慮してください。.
- 極性接続エラー: パネル、バッテリー、コントローラーを間違った極性で接続すると、太陽光発電システムが損傷する可能性があります。これを防ぐために、メーカーの配線図を注意深く参照し、接続を確定する前にマルチメーターを使用して確実にクロスチェックしてください。.
- バッテリーの換気の欠如: ディープサイクルバッテリーの換気がうまくいかない場合、過熱する傾向があるため、寿命だけでなく性能も低下します。したがって、バッテリーエンクロージャー内に適切な空気の流れを提供し、密閉されたエリアや適切な動作をするには温度が高すぎる場所に置くことを避けてください。.
これらは、ボートリフトシステム用の信頼性が高く長持ちするソーラー充電器を入手するために取り組むべき最も頻繁な問題です。.
ボートリフトソーラー充電キットの主な特徴は何ですか?
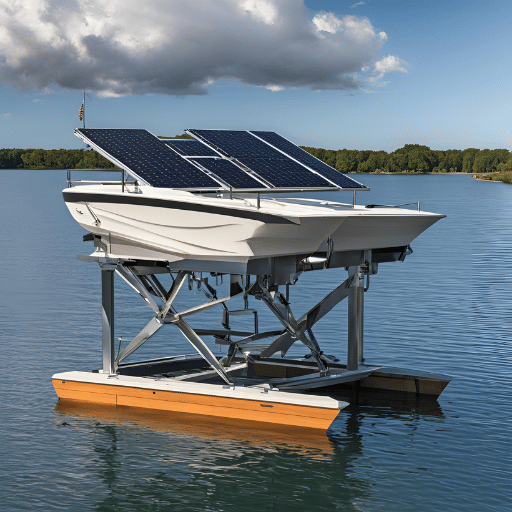
ボートリフトソーラー充電キットの主要コンポーネント
- ソーラーパネル ――彼らは太陽からの光を捉えて、それを電力に変えます。.
- チャージコントローラ ・バッテリーを過充電しないように、ソーラーパネルから流出する電圧と電流を調整します。.
- ディープサイクル電池 ・これらは、夜間や太陽光がないときに使用するために、ソーラーパネルによって生成された電力を蓄えます。.
- 取付金具 ーソーラーパネルをしっかりと押し下げ、太陽光への露出を最大限に高めます。.
- 配線とコネクタ ¤充電コントローラーやバッテリーとソーラーパネルが通信できるようにします; さらに、それらはすべてが1 つのシステムとして連携することを確認します。また、さまざまなシステムニーズに合わせて、さまざまなサイズの充電キットを検討してください。.
12vと24vのオプションを理解する
12v から 24v のオプションの間でボートリフト用のソーラー充電キットを選択するには、電力要件と一般的な効率を考慮する必要があります。.
小さいアプリケーションの場合、それは多くの異なる部品で動作するため、通常は12 ボルトシステムで十分です しかし、あなたが大きなアプリケーションを扱っている場合は、代わりに24 ボルトシステムを使用することを検討してください 12 ボルトであるアクセサリーや交換部品を見つけるのが簡単です そのため、人々はそれらを小型ボートリフトに使用することを好みます、これだけでなく、その設置プロセスは一般的にはるかに単純であり、限られた技術的知識を持つ人でも簡単に管理できます。.
一方、長い配線距離にわたる電流損失の減少により、24 ボルトの効率は、大規模なシステムをセットアップするときに 12 ボルトよりも大きくなります。これは、この種の配置により、より高いエネルギー負荷をより効率的に供給できることを意味します。さらに、悪天候の季節によく経験される、あまり好ましくない日照条件でもパフォーマンスが向上する可能性があるため、そのような期間を通じてボートリフトへの継続的な電力供給が保証されます。.
私の主張を要約すると、次のように言わせてください。最適なパフォーマンスとそれに応じた効率を実現するには、12 ボルトまたは 24 ボルトを選択しながら、ボートのサイズ、特定の電力需要、設置環境を考慮する必要があります。.
海洋環境と耐紫外線材料の利点
海洋環境は厳しい天候に常にさらされているため、厳しい状況にあります。強い太陽光線、塩水、温度の変化などが含まれます。海洋用途で耐紫外線材料を使用することには多くの利点があります。まず、紫外線を遮断する材料は、海洋コンポーネントの摩耗やこの放射線による変色を防ぎ、海洋コンポーネントの保存に役立ちます。このような長持ち性により、頻繁な交換の必要性がなくなり、メンテナンスコストも節約されます。第二に、これらの物質は、長期間太陽の下に置いても引張強度や柔軟性などの機械的特性を保持するため、海洋機器が構造的に健全に保たれるだけでなく、ワイヤーや保護コーティングなどの重要な部品の信頼性が確保され、システムの故障を防ぐことができるため、安全性にも貢献します。したがって、最終的には、耐紫外線材料を海洋環境に組み込むことで、厳しい条件下での耐久性が保証され、全体にわたって費用対効果が高くなります。.
ボートリフトソーラー充電システムを維持するにはどうすればよいですか?
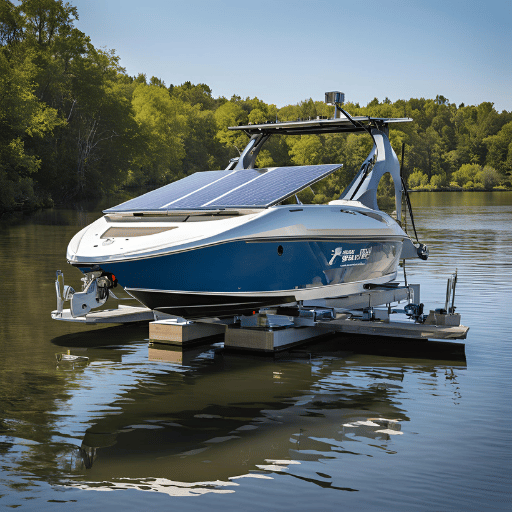
ボートリフトソーラーの定期的なメンテナンスのヒント
- ソーラーパネルを定期的に清掃する: できるだけ多くのエネルギーを吸収できるように、柔らかい布と一緒に中性洗剤と水の溶液を使用して、ソーラーパネルからほこりや破片を除去する必要があります。.
- 電気接続を検査する: すべてのワイヤ接続に腐食や摩耗がないか探して、しっかりと固定され、良好な状態であることを確認してください。.
- バッテリーの状態を確認する: バッテリーの充電レベルを監視しながら、頻繁にバッテリーを検査して、漏れや硫酸化などの問題の初期兆候を特定します。.
- テストシステムのパフォーマンス: 時折、システム全体のテストを実行して、各コンポーネントが適切に動作していることを確認し、どの部品も正しく動作しない場合はトラブルシューティングを最適化します。これにより、システム全体の効率を維持できます。.
- 悪天候から保護する: パネルを所定の位置にしっかりと固定して強風から保護します。大雨の際にはバッテリーをシールドします。.
ソーラーパネルを検査して掃除する方法は?
ソーラーパネルを確認して維持するには、次の操作を行います:
- 精密検査: ソーラーパネルの綿密な観察から始めます。亀裂、破片、ホットスポットなどの目に見える損傷がないか確認してください。太陽光を遮る可能性のある塵の蓄積、鳥の糞、破片の兆候がないことを確認してください。.
- 安全対策: 安全性は常に最初に来るべきである従って洗浄する前に太陽電池システムのスイッチを切って下さい。 (PPE)適切な個人用保護具を使用することを特に高所で働くとき覚え、製造業者が推薦するものに従って下さい。.
- クリーニングツール: 柔らかい布やスポンジ、中性洗剤が必要です。パネルの表面に傷がつく可能性のある研磨材や強力な洗剤は避けてください。.
- 穏やかなクリーニング: これらのパネルの表面を軽く拭き取り、粉塵粒子やそこに存在する可能性のある他の種類の汚れを取り除きます。過度の圧力をかけないようにしてください。圧力はパネルに損傷を与える可能性があります。.
- すすぎ: すべての石鹸の痕跡が除去されるまできれいな水で洗い流してください この目的のために、鉱物の堆積を避けるために脱イオン水が推奨されます。.
- 乾燥: 自然乾燥させるために屋外に放置するか、糸くずのない柔らかい布を使用して拭き取り、効率に影響を与える可能性のある縞が残らないように注意してください。.
- 再検査: 洗浄が完了したら、再度検査し、光がセル領域に到達するのを妨げるものがないことを確認しながら、洗浄による損傷の可能性も確認します。また、洗浄した損傷は長持ちするためです。さらに、電源を入れた後、システム全体ですべての電気接続がしっかりと接続されていることを確認します。.
バッテリーメンテナンスのベストプラクティス
太陽光発電ストレージ システムのバッテリーが長持ちし、良好なパフォーマンスを発揮するようにするには、以下のベスト プラクティスを遵守し、要件に応じてさまざまなサイズの充電キットを使用する必要があります。.
- 定期的にチェック: 摩耗、腐食、破損の兆候を検出するために、頻繁に視覚的に検査します。腫れ、漏れ、その他同様のものに注意するだけでなく、すべての接続がきれいできつく締まっていることを確認してください。.
- 右の充電: バッテリー寿命に大きな負担がかかる可能性があるため、深い放電や過充電から遠ざけてください。充電サイクルを調整し、バッテリーの充電状態を監視する優れた充電コントローラーを利用してください。.
- イコライゼーション: 浸水した鉛蓄電池を均等化することは、セル電圧レベルのバランスをとる制御された過充電を伴うため重要であり、それによって硫酸化と成層の防止にも役立ちます。.
- 温度管理: バッテリーは 50° F ~ 77° F (10° C ~ 25° C) の範囲の最適温度で保管してください。極度の高温または低温は、バッテリーの性能効率と寿命に悪影響を与える可能性があります。.
- 清潔さ: 必要に応じて乾燥を確実に行うだけでなく、適切な手段を使用して汚れ、ほこり、腐食を除去し、端子周囲の清潔さを確保します。.
- 電解質レベル: 浸水した鉛蓄電池の適切なレベルを維持しながら、定期的に点検してください。セルには蒸留水のみを充填し、規定の最大レベルを超えないようにすることをお勧めします。.
これらのヒントにより、太陽エネルギー システムのバッテリーの効率を高め、使いやすさを拡張することができます。.
ソーラーボートリフトの寿命は何ですか?
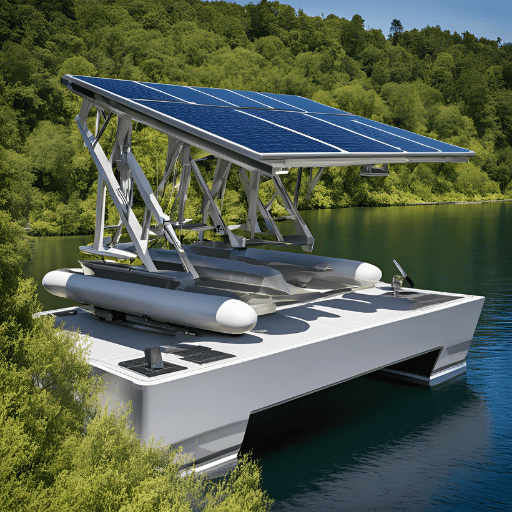
ボートリフトモーターとソーラーパネルシステムの寿命に影響を与える要因
ボートリフトモーターやソーラーパネルシステムは、いくつかの要因により長期間持続する可能性があります。.
- コンポーネントの品質: より長持ちする製品は通常、高品質の材料とより優れた製造技術を使用して製造されます。.
- 環境条件: 塩水や高湿度レベルなどの海洋環境にさらされると、摩耗や腐食が早まる可能性があります。.
- メンテナンス: 定期的な洗浄、潤滑、検査など;これらにより、システムがピーク状態に留まり、寿命が大幅に延長されます。.
- 使用パターン: 使いすぎや過負荷は頻繁に使用すると摩耗が早くなるため、この要因も考慮する必要があります。.
- インストール: 何をしているかを知っている資格のある専門家によって正しく取り付けられると、パフォーマンスが最適になり、耐久性が保証されます。.
ボートリフトソーラー充電キットの寿命を最大化するにはどうすればよいですか?
ボートリフトソーラー充電キットを長持ちさせるために、次のヒントに従ってください:
- 定期的な検査: システムのどの部分が摩耗、損傷、腐食していないか定期的にチェックします。問題が検出された場合は、状況が悪化しないようにすぐに修正してください。.
- 適切に掃除する: ソーラーパネルから汚れやその他の異物を取り除き、ソーラーパネルの清潔さを確保します。そのためには、柔らかいブラシまたは布に中性洗剤を塗ったものを使用してください。粗い物体が表面を傷つける可能性があるためです。.
- バッテリーメンテナンス: 電池の健康に目を保つ; 漏れ、端子のまわりの腐食だけでなく、他のそのような兆候の中で電解質の十分なレベルに注意してください 適切に充電し、あまりにも頻繁にそれらを過放電しないようにします。.
- タイトな接続: 短絡を回避し、異なる部品間のエネルギーの流れをスムーズにするために、すべての電気接点がしっかりと保持されていることを確認してください。.
- 過負荷にしないでください: ボートリフトの重量容量を超えると、モーターと充電器の両方に負担がかかる可能性があるため、超過しないでください。.
- 極端な条件に対する盾: 塩水噴霧(海水)、高湿度、さらには強い紫外線(UV)が腐食性のため損傷を引き起こす可能性のある敏感な領域に到達しないように、必要に応じて保護カバーやエンクロージャーを使用してください。.
これらのヒントに従うことで、ボートリフトソーラー充電キットの堅牢性と効率が大幅に向上します。.
交換の時期が来たことを示します
ボートリフトのソーラー充電キットをいつ交換するかを意識することは、その効率と安全にとって不可欠です。以下は、交換する時期が来た可能性があることを示すいくつかの兆候です:
- パフォーマンスの低下: ソーラーパネルの出力が大幅に低下したり、バッテリーが充電を蓄えられなかったりすると、システムのコンポーネントが摩耗していることがわかります。.
- 物理的な損傷: 損傷したソーラーパネル(ひび割れまたは破損)、ほつれたワイヤー、腐食した接続は、その動作を妨げるだけでなく、危険をもたらす可能性があります。これらの問題を簡単に修正できない場合は、交換が必要になります。.
- 廃止された技術: 時間の経過とともに太陽光発電の充電は継続的に進歩しているため、現在のセットアップが 10 年以上使用されていれば、新しい設計によって提供される効率が向上するため、設計を更新することが賢明な投資となる可能性があります。.
- 頻繁な修理作業: 古いマシンのランニングコストを他のマシンの購入よりも高く維持する場合があり、特に定期的なサービスチェックが実施された後でもそのような問題が頻繁に発生し続ける場合はそうです。.
これらのインジケーターは、ボートリフトのソーラー充電が効率的で信頼できるものであることを保証するのに役立ちます。.
参照ソース
よくある質問 (FAQ)
Q: ボートリフトソーラー充電キットとは何ですか?また、それは私にどのようなメリットがありますか?
A: ボートリフトソーラー充電キットは、太陽を使用してボートリフトのバッテリーを制御する装置です。これにより、通常の電源への依存を減らしながら、ボートリフトの強力な活動が保証され、特に遠隔地や電気アクセスが制限されている場所で役立つことがわかります。.
Q: ボートリフトにソーラーパネルの使用を検討する必要があるのはなぜですか?
A: ボートリフトに太陽光指向のボードを使用すると、サポート可能で経済的に精通したエネルギー手配が提供されます。深刻な海洋状況や紫外線による被害による故障を発生させずに、かなりの区間にわたって理想的に実行するには、過酷な海洋環境と紫外線に耐えることを目的とした最高品質の太陽光ベースのボードのみを使用します。最もメンテナンスの手間がかからないビーム。.
Q: ボートリフトソーラー充電キットは海洋環境にどのように耐えますか?
A: 海洋での使用に適したものにするために、ボートリフトソーラー充電キットは、残酷な海と確かな太陽の光に耐えることを目的とした部品に付属しています。これらには、他の伝統的な戦略が定期的に機能しない海洋条件下で確実に機能するように、比類のない太陽光ベースのフォースエイジイノベーションと組み合わされた陽極酸化アルミニウム取り付け装置が組み込まれている場合があります。塩水の浸食によってもたらされる消費。.
Q: 利用できるボート リフトの太陽充満キットの異なったタイプがありますか?
A: はい、必要性や資金計画に応じて、さまざまな種類の船舶用リフト太陽指向充電パックを利用できます。中には、PWC リフトや DC 駆動水上バイク リフトなど、さまざまなスタイルに適合するさまざまな種類の取り付けフレームワークで結合された高級 PV モジュールを備えたものもあります。.
Q: ボートリフトソーラー充電キットにはどのようなメンテナンスが必要ですか?
A: 原則として、これらのユニットは過剰なメンテナンスを必要としませんが、残留物がユニットに集まらないように時々掃除する必要があり、これにより熟練度が低下する可能性があります。また、すべてがうまく接続されていることを確認してください。防止されない場合、フレームワークの無駄な活動が促進されるため、このような事態が発生する可能性があります。.
Q: ボートリフトに太陽光発電の充電キットを取り付けるにはどうすればよいですか?
A: 通常、これは陽極酸化アルミニウム製のマウントを使用して、または近くにある他の構造物上のソーラーパネルをホイストに固定することによって行われます。必要なアイテムと指示はすべてキットに含まれています。何をすべきか迷っている場合は、正確なセットアップを支援できるように、経験のある人を雇用することをお勧めします。.
Q: 曇りの日に、ソーラーパネルでボートリフトのバッテリーを効率的に充電することは可能ですか?
A: はい。 boatホイスト太陽充電キットは十分な日光がないときでも発電するために特に設計されている現代ケイ素の細胞のパネルを使用します; 従って、それらは曇った条件の下で最もよく働きます、余りにそれらの有効性はそれから減るかもしれませんが、それでもあなたのボート リフト電池を充電したままにします。.
Q: ボートリフトソーラー充電キットの評判の良いブランドは何ですか?
A: Lake Lite'sとLake Lifter'sは、ボートリフトソーラーパネルキット用の高品質の製品を製造することで知られています。これらは、一流の材料のみがさまざまな海洋環境にわたって耐久性と効率を高めることを保証します。.
Q: ボートリフトソーラー充電キットはさまざまなボートリフトに使用できますか?
A: はい、これらの充電キットは、PWC リフトや吊り上げシステムなど、さまざまな種類のボートに適応できるように作られています。さまざまなタイプのボートリフトの特定の要件を満たすように、さまざまな充電キットが設計されています。.
Q: 最高のボートリフトソーラー充電キットを選択する際には、どの機能を考慮する必要がありますか?
A: ボートリフトソーラー充電キットを購入するときは、最高品質のソーラーパネル、過酷な海洋環境での耐久性、アルマイト仕上げのアルミニウム製取り付け、特定のボートホイストシステムとの互換性を探してください。これらの機能を確実にして、太陽エネルギー貯蔵システムから信頼性が高く効率的なソリューションを得ることができます。.