







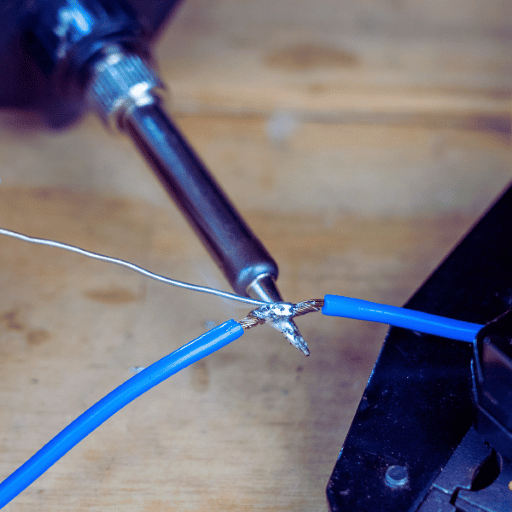
Soldering is an essential technique one should know when tackling the electrical/electronic component. Soldering provides the means of joining wires to devices and vice versa. This manual aims to walk the beginner through the soldering procedure, including understanding the soldering wire, how to use it, and the measures necessary to properly connect the cables. Learning to perform soldering will increase an individual’s capacity to make repairs and create as wide applications as household appliances or more advanced equipment’s printed circuit boards. This manual will also teach how to choose soldering consumables, prepare the wires, and make reliable solder joints. Whether you are a hobbyist or are looking forward to being a professional, your project will not be a reality without developing some skills in soldering.
What tools do I need for soldering wires?
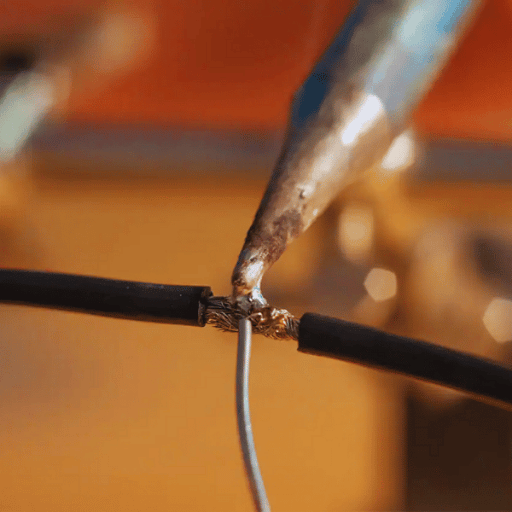
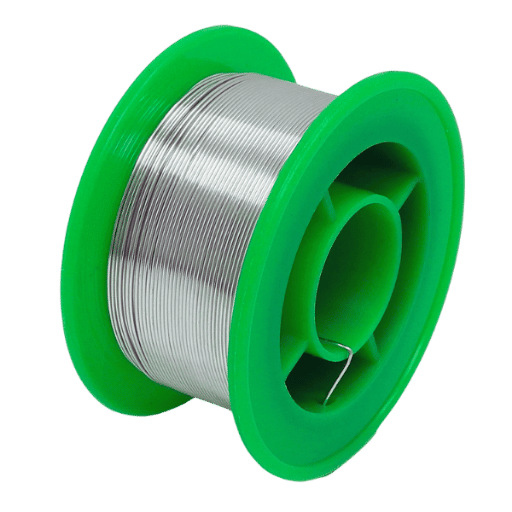
Effective soldering of wire requires the use of several equipment and supplies. First of all, there is a soldering device. It is used to melt the solder. Make sure there is an adjustable temperature for every task. Solder wire will connect the wires as it is made of either lead-tin alloy or lead-free, which has a rosin core to strengthen the soldering wire, ensuring a bonding surface. A stand or a holder for the soldering device when not in use, especially one with a cleaning sponge, is necessary to use a soldering iron and properly clean its tip effectively. It would be ideal to have wire strippers and wire cutters to facilitate the task of preparing the wires.
Moreover, a third-hand tool or regulator is handy for holding the workpiece. A fume evacuator or proper ventilation helps comply with regulations and minimizes exposure to harmful fumes. Finally, heat-shrinkable materials or electrical wires for insulating the connections after they are done are very important.
Essential soldering iron features for wire work
A few important considerations must be made while buying a soldering iron for wire work. First, choose an iron with a built-in and adjustable temperature control. Such handles ensure that one can work on various 電線類型 and sizes. Fine-tipped and chisel-tipped soldering irons help to work in tight spots, and detailed work removing metal is needed to enhance its sharpness. Look out for a soldering iron that tends to be worked on comfortably and will provide overwhelming inputs inferable to control and comfort maintenance. Consider a soldering iron that quickens the heating process, maintains its temperature for long periods, and is the world’s indoor for efficient or speedy processes. You may also want to include a soldering stand with a cleaning sponge as an added advantage where maintenance safety is necessary while at work.
Choosing the right solder wire for your project
The significance of using appropriate solder wire in your work cannot be understated if the intention is to make practical, durable joints. Start by deciding on the solder type to use – lead and lead-free. Typical lead-containing solders such as 60/40 (60% Tin, 40% Lead) have lower melt temperatures or decent joint holding capacity, making them more competitive for numerous electrical tasks, although their use remains restricted. For healthy and green ideas, pick solder wires with no lead, which often contain tin, silver, and copper. The next thing you need to tackle is the thickness of the solder wire; high precision and delicate tasks will require a thinner solder wire, while thick solder wires are used for thicker and heavy-powered joints. Finally, check whether it has a rosin core. The front facilitates soldering by cleaning and priming the targeted surfaces for an ideal attachment.
Additional tools: flux, wire strippers, and heat shrink tubing
Meeting the increasing demands for quality work in soldering always requires certain tools like heat shrink tubing with solder sleeves, wire strippers, and selected compounds. The purpose of the flux in soldering is to act as a metal cleaning solvent to remove oxide layers from the metal surfaces and thus help the solder adhere to the metal more effectively. Choose those that best suit your solder and application in cases about soldering and usage of flux. It shaves off the insulation material from the wires mindfully without hurting the conductor, effectively prepping the wires for soldering. To wrap up, heat shrink tubing covers and insulates Ya bottle wires and protects/sustains the solder joint from any tension/force. It comes in several dimensions, and for use, it is slid over the joint, and with heat, it shrinks, creating a compressive cover over the joint. These additional items are essential for attaining the best soldering work or operation results.
How do I prepare wires for soldering?
Proper wire stripping techniques
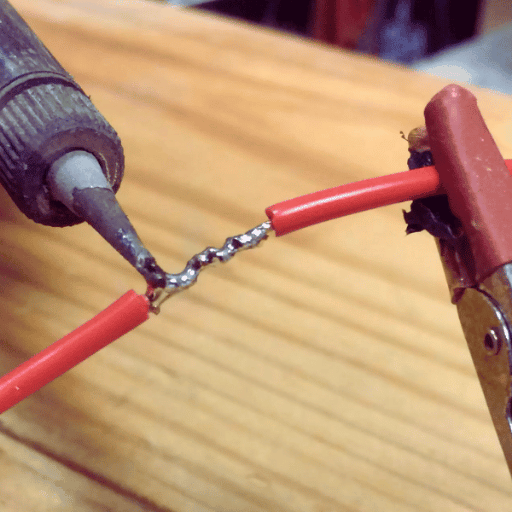
If you want to learn how to strip wires for soldering, start by using a wire stripper of the right size according to the wire gauge you are working with. Make sure to set the cutting blades of the tool correctly to cut the insulation and not to cut the wire itself. Insert the wire into the hollow of the wire stripper’s jaws so that the blade is kept at the required stripping length of approximately 0.25 to 0.5 inches as per the needs of your task. Apply pressure to the handles and cut through the PVC to the strands, but do not cut the strands, then pull the insulation back. Examine the freshly stripped wire to ensure no broken strands are present, as this weakness may create inferior soldering repair after soldering. Stripping correctly and at an appropriate level will contribute to more reliable soldering joints made after that, thus making it the first and perhaps the most essential step in the soldering procedure.
Tinning wire ends for better solder adhesion.
In preparation for soldering wires, when I tin wire ends, I usually begin by cleaning the wire ends to be tinned. Then, I am ready to use the soldering iron by setting it to a comfortable temperature (usually about 350 C (662 oF) is enough for most). Depending on the type of wire used and how hot the soldering tool is, there may be more solder with some solder-aiding iron (hard, soft solder) applied to the tip of the wire. For a few seconds, while keeping the wire firmly in something heat resistant, say with a hand tool or clamp, I warm the soldering iron tip against the wire. Then, I place a bit of solder on the tip of the wire and let the solder flow evenly along the strands. Proper solder immersion is done so that the whole outer wire is put under the solder. The dressing-up portion, referred to by those terms, improves the wetting of the solder by offering a clean and even surface, making it easier and more proper to place contacts across components where required.
Using flux to improve solder flow
The soldering operation would be incomplete without using flux as it offers excellent contact between the solder and the base metals and enhances the solder flow. It works by cleaning the joint’s surfaces by removing the oxides or other materials that could stop the joint from being made. In this regard, they enhance the soldering of the two components with the solder to obtain a stronger joint. Additionally, flux has hydraulic properties that virtually modify the molten solder’s surface tension, aiding in the even distribution of the solder on the soldered elements. The addition of flux is necessary for the soldering operation since it can function to alleviate the occurrence of solder problems like solder bridging. Generally, flux is offered in different types, for instance, liquid, paste, and even core solder wire, which helps to meet specific requirements during the soldering process. There is improvement in soldering performance and the reliability of the solder joint when the appropriate flux is used.
What’s the correct technique for soldering wires together?
Positioning and securing wires for soldering
In creating a solder joint, the placement and holding of wires are two essential parameters to be observed. To do this, strip off approximately a quarter-inch or a half-inch from each of the ends of the cables without damaging the core strands. If necessary, twist the wire strand cut-off ends to avoid shredding the strands inside the joint. Use a third-hand tool or helping hands to hold the wires while making the solder joint. If the wires move, water under the bridge of the solder joint may result in a poor splice. Adjust the wires so they run parallel to one another or let them cross each other slightly, depending on the connection you intend to achieve. Like pennant pre-tinning, wire ends that have been tinned could lend themselves towards good solder flow, which in turn enhances the electrical connection. However, With proper positioning and securing of the wires, cold soldering is no longer a risk; as a result, the joint created can be much better and stronger.
Applying the right amount of solder
The bond with wires must be reinforced enough to withstand harsh environments that require solder to the wires holding the mechanical part. To begin with, let the solder metal and the two wires in question be warmed with the soldering iron appropriately, and this can be quickly done by observing whether the solder makes contact. Instead, apply the solder directly toward the joint at a particular angle to ensure that the joint is thoroughly wet with the solder. You should be careful with the amount of solder applied to the joint. A highly polished curvilinear side will be exhibited without bond signs if you cover it with excess. Bypass makes a solder bridge with excess solder as it creates a short in the neighboring leads due to bridging with corrective solder. A good solder joint should be nice and smooth with no gaps or bubbles, as it satisfies mechanical and electrical requirements.
Creating a strong and reliable solder joint
Proper heat and solder control are paramount to preparing a rough yet skillfully applied solder joint. According to the information on Electronics Weekly, Adafruit, and SparkFun, these general steps are followed.
- Cleanliness: Start by cleaning the joints to be soldered. Isopropyl alcohol will be used to scrub off any oxide or contaminants that may prevent solderability.
- Temperature Control: First, the soldering iron is set at the required temperature depending on the type of solder used; this is about 350 – 4000C for lead-based solders and 370 to 420 for lead-free solders.
- Tinning the iron: Before masking, apply a morsel of solder onto the tip of the soldering iron (referred to as thinning) to enhance joint heating for solder attachment.
- Proper joint heating: Apply heat uniformly until the solder liquefies, then fill the joint with solder. Ensure the component lead and pad are heated to a specific temperature.
- Soldering: The solder should be added to the joint where the wire is joined rather than the soldering iron. This will form a smooth fule as the solder covers the joint completely.
- Cooling down: Allow the newly formed joint to cool slowly without interference, lest a cold joint or, worse, a weak joint form.
Following these steps logically, the obtained solder joints will possess structural solid and electrical characteristics necessary for the reliable operation of the circuits.
How can I ensure a good electrical connection when soldering wires?

Recognizing signs of a proper solder joint
Reliable electrical contacts in electronic circuits are made through good solder joints. Proper solder joint features include:
- Appearance: A good solder joint should appear smooth and lustrous, meaning that the right amount of solder was applied and the joint has been heated enough. It should also exhibit a rounded convexity meniscus, indicating good wetting.
- Shape: The joint should take a volcano or cone shape, with the solder fillet neatly swept in from the pad to the component lead, signifying good soldering and sufficiently strong adhesion.
- No Gaps or Voids: There should not be any hole, void, space, or gap within the joint. This will provide the best electrical conduction and mechanical strength of the joint, which we can apply to some wire splicing. This sign shows that the amount of solder used and the technique applied were appropriate.
- Mechanical Integrity: The union’s strength is such that an easy mechanical force can be applied without cracking or breaking the bond apart. Specifically, this stresses the internal bond within the joint.
Regarding this, it is easy to evaluate the quality and exercise cost-effective soldering technology to the level defined to be acceptable for efficient circuit operation, as per the guidance from Adafruit, SparkFun, and other electronics resources.
Common mistakes to avoid during wire soldering
Wires are not secured or twisted together as they should be manufactured in a pre-wired system or sockets added. It must be observed these corresponding errors:
- 熱量不足:大多數時候,接頭區域加熱不足,焊料熔化不正常,導致接頭冷,導電性差。確保焊料尖端加熱良好,使焊料不會黏附在接縫表面,而是在接縫內流動。.
- 過多的焊料:此階段的錯誤會導致救援人員使用過多的焊料,這可能會形成連接 PCB 上兩個或多個漏洞的斑點,這意味著短路。必須使用最佳的焊料量,以確保連接完成,而不會在整個接頭上產生過多的焊料。.
- 髒表面:士兵不能很好地黏附在變色或髒表面上。為了有效焊接,應使用異丙醇等溶劑清除所有電線和零件表面的污垢,例如氧化污垢。.
識別並避免這些錯誤將有助於您提高焊接質量,從而確保電氣連接的耐用性和有效性,正如Adafruit、SparkFun 等知名網站,甚至您可以在專門介紹電子產品的網站上找到的一些直接指南所指出的那樣。.
焊接後測試連接
應測試焊點完整性,以確保其工作並滿足可靠性要求。首先,尋找明亮、乾淨、光滑的焊點;這意味著接頭處有牢固的物理連接。然後,使用萬用電表檢查連續性;這是透過切換到萬用電表上的連續性模式並檢查電流是否流過電路來完成的。此外,檢查萬用電表的歐姆數;過多的歐姆表示連接打開、鬆動或死路。至於其他更複雜的措施,請在需要時向電路供電並檢查其是否正常運作。.
焊絲時應採取哪些安全預防措施?
適當的通風和防護設備
這些措施,以及適當的通風和防止焊絲時健康危害的方法,稱為安全措施。防毒面具或適當的現場通風可以避免在焊接過程中吸入可能損害健康的煙霧。必須解決非實驗風險;使用安全眼鏡等個人防護裝備(PPE)來避免熱焊料濺到眼睛的風險,也可以使用耐熱手套來保護眼睛免受焊槍燒傷。此外,還需要一件實驗室外套或圍裙,以免穿著有焊料濺的衣服。.
安全處理熱烙鐵
使用熱烙鐵時,必須遵循最基本的安全原則,以防止設備受傷和損壞。首先,烙鐵應握住手柄,切勿用手觸摸設備的金屬部分。當烙鐵不使用時,建議將其放置在烙鐵站上,以避免無意中放下烙鐵並被燒毀或引發火災危險。據了解,一個人不應離開烙鐵熱焊並無人看管。此外,工作台上不應堆滿物品,因為這可能會帶來被擊倒或與熱熨斗接觸的風險。 Adafruit 和 SparkFun 等強大的來源向後代闡述了這些考慮因素,以確保用戶的安全和焊接過程中工作空間的有效性。.
處理鉛基焊料與無鉛焊料
在比較鉛焊料和自由焊料時,必須考慮這兩種類型的後果,包括智力和健康問題。在大多數情況下,含鉛焊料是一種錫鉛合金,具有良好的潤濕性和低熔點後果,這使得焊接過程不那麼極端。由於鉛對健康和生態平衡的不利影響,導致非鉛焊料替代品的使用增加。由於錫、銅和銀等常見的無鉛焊料材料需要更高的熔化溫度,對設備壽命和設備部件的熱衝擊造成挑戰。然而,奇怪的是,採用任何標準也包括對人們購買鉛更環保和安全。採用任何標準,奇怪的是,還包括遵守考慮焊料中鉛的標準。這是各國現有指南的重點,包括 Adafruit 和 Spark Fun 批准的指南,只要鉛在焊接中實用,就不需要包含鉛,因此提倡使用 RoHS 指令等永恆概念。.
如何完成和保護焊絲連接?
應用熱收縮管進行絕緣
在接縫絕緣的情況下,使用熱縮管需要做的第一件事是管子的尺寸合適,這樣它就不會鬆散地安裝在電線或您想要絕緣的任何其他接頭上。在嘗試安裝在連接器上或完成電線連接之前,將管道放置在焊接接頭上是非常有幫助的。一旦定位,就會使用熱槍或任何此類裝置對管道施加受控劑量的熱量,從而在已安裝的管道範圍內將管道收縮到電線上。覆蓋物被緊緊地壓縮在配件上,形成密封,最大限度地減少各種元素、水和污垢對接頭的損壞。 Adafruit 和 SparkFun 等行業的最佳實踐有助於教育人們如何正確絕緣電氣接頭。長期以來,熱縮管的使用技術已得到更多實踐。.
保護焊點的替代方法
除了使用熱縮管之外,您還可以使用什麼來保護焊點:
- 矽膠共形塗層:在這方面,在可固化焊點上塗上一層薄薄的矽膠塗層。它增強了防潮、防塵和防黴等環境壓力的保護,並增強了隔熱效果。 Adafruit 和 SparkFun 的一些資源促進了電子產品中非腐蝕性塗層的使用,就顯示了這種情況。.
- 液體電工膠帶:這是一種非常有用的液體橡膠,其應用方式可以是噴漆、上墨或噴塗。正如一些 DIY 電子說明中所指出的那樣,這種移動密封件可以覆蓋接頭中的灰塵和濕氣,而不會可見或損壞表面。.
- 環氧灌封:這是一種更強大的解決方案,其中焊點被封裝在硬塑膠外殼中,以保護其免受物理傷害,並允許其在極端惡劣的環境中使用。這種方法通常用於需要高可靠性的應用,這已得到互聯網上提供的一些技術說明的證實。.
每種方法都有助於延長焊點的使用壽命和可靠性,並且除了熱縮管實踐之外還可以使用。.
正確清理和儲存焊接設備
有必要採用最佳實踐,以確保工具在焊接過程中的實際使用和壽命以及材料和設備的正確清理和儲存。正如業內權威人士所說:
- 清理:首先,在每個炒鍋結束時清潔烙鐵頭非常重要。必須使用黃銅海綿或濕海綿擦掉多餘的焊料和其他殘留物。切勿在尖端周圍使用磨料,因為這可能會造成更大的損壞。在將其放入盒子中之前,尖端還應覆蓋一層薄薄的焊料(稀釋),以避免被氧化。.
- 儲存:使用支撐底座固定焊熱工具,防止工作表面發生燒傷事故。使用焊絲並使其遠離潮濕空氣以防止生鏽。他們用焊接工具燃燒。此外,請注意拔掉工具插頭、冷卻時間以及將工具放在指定位置,以減少發生事故的機會。.
- 環境:考慮到焊接是一項混亂的工作,合格的焊接站應該有序、整潔。為了安全和效率,所有依賴項和設備組件都必須小心地儲存在容器和組織器中。.
這些做法在最佳焊接網站上進行了詳細說明,強調需要定期檢查和負責任的護理,以增強焊接工具的耐用性並避免危險。.
參考來源
常見問題(常見問題)
Q:焊絲需要什麼工具?
答:要學習熱焊接技術,必須具備必要的工具:可選擇帶有乾淨尖端的烙鐵,最好是松香焊料、剝線器、耐熱工作台和用於熱縮管的熱風槍。安全眼鏡和良好的通風也是必要的。.
Q:如何準備用焊料加固電線?
答:在準備電線開始時,如果您需要將任何電線端部焊接在一起,請拿走剝線器並暴露半英寸長的電線。如果使用絞合線,則必須用力扭轉這些鬆散的線端部。少量的松香助熔劑可以通過塗覆暴露的金屬以使焊料更好地粘附,從而在準備暴露的金屬方面發揮很大作用。.
Q:連接時如何確保電線正確焊接?
答:為了將電線正確焊接到一起,焊絲在使用後會迅速硬化,因為繞環繞著焊絲扭轉,且硬化線的端部是均勻的。如果您需要,如果沒有太多焊料來加熱連接線與加熱焊點位置的接縫區域,則一開始就不應使用鐵尖。當焊料可能與硬化線接觸時要小心。硬化後,環具有水平不同的角度;使用扳手狀的附件作為門把手。.
Q:我怎麼知道我什麼時候使用了足夠的焊料?
答:如果接頭焊接正確,界面將呈圓錐形,頂部有球形蓋,線芯周圍有光滑的銀色套環,焊料軟化成線股。它們應該向上延伸成一個小圓錐體或一個小火山。如果你可以看到電線的股線,或者它是一個大焊球,那麼要么使用的焊料太少,要么使用的焊料太多。.
Q:組裝設備時,焊絲與其他焊絲的區別以及焊料組件與電路板的區別是什麼?
答:焊絲時,常見的做法是在焊接前將焊絲的裸端以某種方式扭轉。焊接電路板時,首先將焊絲放入電路板上的孔內或放置在焊盤上,然後施加焊料將焊絲與電路板連接。焊錫電路板比焊絲更精確,使用的焊料更少。.
Q:我該怎麼做才能獲得良好的焊點?
答:要獲得合適的焊點,請確保焊線和烙鐵頭清潔。用加熱的電線潤濕焊料時,首先充分加熱電線。需要適量的焊料才能完成接縫,不要太多或太少。完成後,讓接頭冷卻,不要有任何移動。考慮在焊點上放置熱縮管,使其更具挑戰性。.
Q:為什麼在焊料中使用松香?我還需要施加額外的助焊劑嗎?
答:松香是焊絲內芯中經常含有的一種成分,可作為化學清理劑,增強焊料的流動性和焊料的附著力,這在焊絲拼接過程中至關重要。松香芯焊料中摻入的松香足以滿足大多數焊絲分配的需要。然而,這些松香助熔劑對於更困難的應用或需要附接的已經氧化的表面的應用可能是有利的。.
Q:如何解決常見的焊接問題?
答:由於電線缺乏熱量,如果存在未焊接的電線,焊料可能不會粘在電線上,因為鐵不夠熱,或者電線髒了,因此無法熔化焊料。如果您得到一個鈍的、顆粒狀的接頭,它可能是一個‘冷’焊點,只需嘗試重新加熱焊點即可。大多數時候,如果焊料看起來過量並且容易聚集到水池或斑點中,可能的解釋是要么沒有熔化正確的焊料量,要么已經向焊絲施加了足夠的熱量來啟動焊料。烙鐵頭必須始終清潔且鍍錫良好,以避免氧化。.
Q:使用鉛焊料安全嗎?如果沒有,有哪些選擇?
答:我覺得鉛焊料讓工作變得更容易,但會危害健康和環境。因此,在通風良好的地方進行此操作,並記得使用後洗手。還有無鉛焊料,正在增加。它們通常需要更多的熱量來熔化,並且可能會使接頭看起來暗淡,但至少使用起來是安全的。.
Q:提升焊接技能的最佳方法是什麼?
答:如果您想掌握該技術,每項焊接任務都需要廣泛的練習。始終從最簡單的任務開始,然後處理更困難的任務。透過各種焊接方法和指南的影片教學來平衡它。如果您力所能及,參加課程或指導研討會也是一種選擇。專注於大局,也就是說,獲得焊接技能需要時間,所以如果第一次嘗試時結果不是您期望的,則無需感到沮喪。.