






In the case of towing a trailer, correct wiring is not merely a matter of convenience but also a significant safety and legal compliance component. For most people, the intricacies involved in changing a 5-wire trailer circuit into a 4-wire setup can be really overwhelming. No matter if you are a highly experienced DIY person or just starting with your trailer maintenance, knowing how these systems function and how to adjust them is crucial for the perfect operation of all lighting and signaling. The present guide is meant to clear out the confusion regarding the wiring, and it will also provide you with easy and step-by-step actions to successfully convert your trailer’s wiring without losing the advantages of functionality or safety. After reading this article, you will have the confidence to take on this project, which, in turn, will create a reliable and smooth link between your car and trailer.
Understanding Trailer Wiring
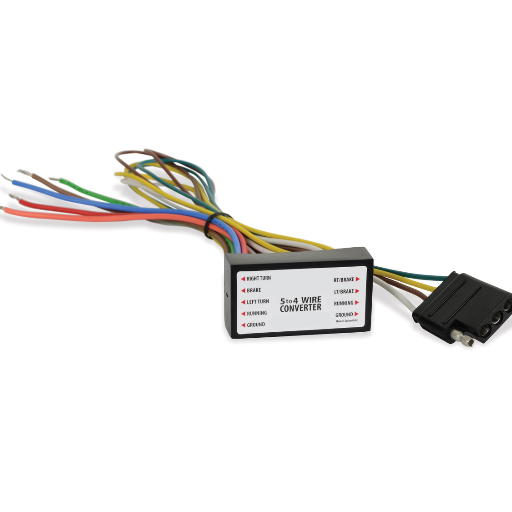
Trailer wiring is that very system which connects all the electrical signals of your car to the trailer and makes sure that all the most important functions like brake lights, turn signals, and running lights are operating properly. The standard trailer wiring transmits these signals through either a 4-pin, 5-pin, 6-pin, or 7-pin connector, where 4-pin connectors are by far the most commonly used ones for basic lighting needs. Each of the pins has one specific purpose, for instance, controlling left or right turn signals, tail lights, or grounding. It is essential to adhere strictly to the type and configuration of the connector of your trailer to that of your car in order to guarantee proper functioning. Always do a test after the wiring has been done to see if all the lights and signals are working properly or not.
What is a 5 Wire Trailer Wiring System?
The 5-wire trailer wiring system builds on the standard 4-wire system by introducing one more wire, which usually performs a specific function depending on the type of trailer. The fifth wire is mostly assigned to electric brakes or auxiliary power, thus increasing the trailer’s usability. The setup consists of wires for:
- Left turn/brake lights (Yellow)
- Right turn/brake lights (Green)
- Tail/running lights (Brown)
- Ground connection (White)
- Auxiliary function wire (Blue or designated color)
Proper fitting calls for meticulous alignment with the vehicle’s wiring system in order to guarantee not only compatibility but also safety. Testing the system after installation is a must for confirming that all signals and components are working correctly.
What is a 4 Wire Trailer Wiring System?
The main distinction between a 5-wire and a 4-wire trailer wiring system is mainly due to their functionality and the types of applications they are designed for. The 4-wire system connects the brake lights and turn signals of the trailer into a single circuit for each side, hence simplifying the wiring layout and making it appropriate for standard trailers devoid of independent systems like surge or electric brakes. The system, therefore, has wires for the left brake and turn signal, the right brake and turn signal, the tail/running lights, and a ground connection.
On the other hand, the 5-wire system provides for the separation of the brake lights and turn signals operation trails, which is done by the introduction of the fifth wire. This is pivotal for trailers fitted with surge brakes since it includes the disengaging of such brakes when reversing by using the fifth wire to activate a reverse lockout solenoid. The 5-wire system gives more accurate control and flexibility; thus, it is ideal for intricate trailer setups.
Moreover, both systems are made in such a way as to maintain the compatibility of the towing vehicle; however, switching to the 5-wire system from the 4-wire one might need an adapter or wiring harness changes, based on the particular electrical configuration of the towing vehicle that is in use. In both system configurations, proper installation and stout connections are crucial in guaranteeing performance and safety.
Key Differences Between 5 Wire and 4 Wire Systems
| 特色 | 5-Wire System | 4-Wire System |
|---|---|---|
| Brake & Turn Signals | Separate circuits for brake lights and turn signals | Combined brake and turn signal circuits |
| Wire Count | 5 wires total (includes auxiliary function) | 4 wires total (basic lighting only) |
| Complexity | More complex, suitable for advanced trailers | Simpler, ideal for standard trailers |
| 應用 | Trailers with surge brakes, electric brakes, or auxiliary systems | Basic trailers without independent brake systems |
| Reverse Function | Can activate reverse lockout solenoid | No dedicated reverse function |
Converting 5 Wire Trailer Wiring to 4 Wire
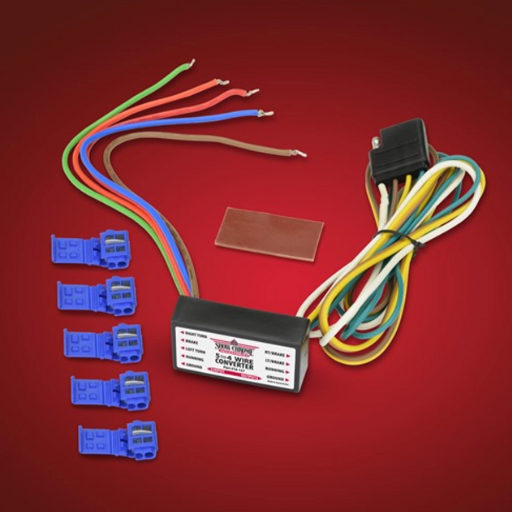
When converting a 5-wire trailer wiring system into a 4-wire one, the most important thing is that the 5-wire system has brake lights and turn signals separated, whereas in the 4-wire the combo has to be brakes plus turn signal. This can be accomplished with a trailer light converter. Here are the steps to follow:
Step 1: Obtain a Trailer Light Converter
Get a good quality trailer light converter which is made to combines the two functions–brake light and turn signal–and facilitates their coexistence.
Step 2: Connect the Wires
The 5-wire system’s input wires are to be connected to the trailer light converter. Usually, there are separate wires for left turn, right turn, brake lights, and taillights. The brake and turn signal functions will be consolidated on the output side of the converter, resulting in a 4-wire setup (left turn/brake, right turn/brake, taillights, and ground).
Step 3: Secure Connections
Insulate and protect properly all wiring connections to avoid any electrical problems.
Step 4: Test the System
After the installation is completed, test the trailer lights to verify that the brake lights, turn signals, and taillights are all working correctly.
總結: Using a light converter, the transition from a 5-wire system to a 4-wire one can be done quickly, with all the necessary lighting functions being preserved.
Tools Required for Conversion
For a 5-wire to 4-wire conversion, the following tools are very frequently needed as the main ones:
Light Converter Kit
It is required to change the wiring system and to make sure that the vehicle and the trailer are compatible.
Wire Strippers and Crimpers
They are utilized for the removal of insulation from the wires and for the crimping of connectors for strong electrical connections.
萬用電表
It is very important for testing the voltage and the continuity to confirm the wiring arrangement and to spot any faults.
Electrical Tape and Heat Shrink Tubing
They are used for the insulation of connections to keep them safe from moisture and electrical shorts.
Screwdrivers and Socket Wrenches
They are used for the purpose of securing the converter and the wiring components in place during the installation process.
Wiring Diagram
It is a trustworthy reference that is especially for your vehicle and trailer configuration for precise implementation.
Step-by-Step Guide to Using a Converter
1Secure the Vehicle and Trailer
First of all, the vehicle has to be parked on a flat and stable surface where the brake parking is to be engaged. The trailer should be in such a position that easy access to the wiring connections is granted.
2Review the Wiring Diagram
Take the vehicle-specific wiring diagram as a reference to point out the right wires for the connections. Check the specifications for both the input (vehicle side) and output (trailer side).
3Prepare the Wires
By stripping a part of the insulation from the wires, the copper strands will be exposed. The purpose of this is to ensure a good connection and also to reduce resistance in the electrical circuit.
4Connect the Converter
The matching wires on the converter have to be connected to those on the vehicle. The wiring diagram should be used to verify the connections (e.g., left turn signal, right turn signal, brake lights, and tail lights). The connections have to be secured either by using butt connectors or soldering, which would last longer.
5Secure Grounding
The ground wire from the converter will have to be connected to a clean, unpainted metal area of the vehicle’s frame. Grounding that is done securely leads to stable electrical communication.
6Test the Connections
The trailer is to be connected to the vehicle, and then every light function (turn signals, brake lights, and running lights) is tested to confirm they are working properly. A multimeter should be employed for troubleshooting if any of the lights do not turn on as they should.
7Wiring Secure
After the wiring is confirmed to be operational, it should be secured with zip ties or cable clamps to prevent stress or abrasion. Also, all wires should be routed neatly to avoid interference from moving parts.
8最終檢查
Make a thorough inspection of the whole setup to ensure that all connections are tight, wires are protected, and there are no exposed areas that could cause shorts or damage.
Important Safety Note
If you follow these steps correctly, a converter will be used properly and a reliable connection for your trailer’s lighting system will be provided, thus keeping safety and compliance on the road.
Choosing the Right 4 Wire Trailer Harness
Selecting the right 4-wire trailer harness is extremely important in order to have the best possible performance and safety. When making your selection, start with the wiring configuration that you need for your trailer, which is usually the same as the 4-wire systems that have a connection for the left turn/brake light, right turn/brake light, and running lights, plus a ground wire. Make sure that the harness is the same type of connector as the one on your tow vehicle, for example, a flat four-pin connector, to ensure compatibility.
Think about the quality of the material and the harness’s durability since it will be functioning outdoors. Consider the weather-resistant insulation, corrosion-resistant terminals, and UV protection that all serve to prolong the system’s lifespan. Furthermore, check that the harness is rated for the right voltage and amperage so that it can carry light for the trailer without risk of overheating.
The simplicity of installation is another necessary aspect. Choose a harness that comes with detailed instructions, has pre-attached connectors, and wire long enough to reach your trailer without putting it under extra tension. Some of the models might even offer the additional features of color-coded wiring or plug-and-play designs to make the installation smoother.
In the end, if you give preference to compatibility, durability, and functionality, it will be very accurate to say that you will finally pick the most suitable 4-wire trailer harness for your needs, which will not only yield reliable performance but also ensure improved safety during operation.
Wiring Harness and Connectors
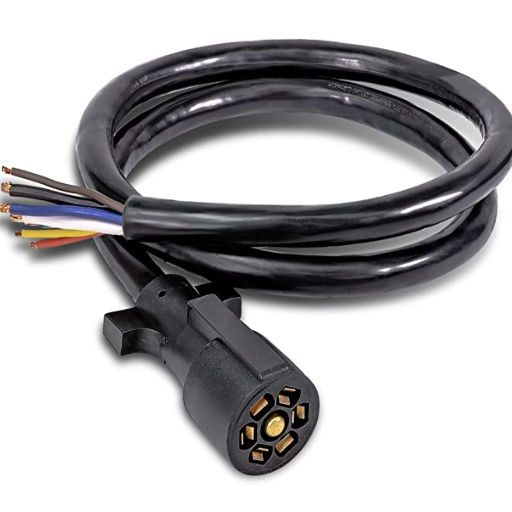
When you pick wiring harnesses and connectors, make sure that they conform to the electrical specifications of your trailer and towing vehicle. To avoid corrosion and keep the functionality of your system over a long period, look for materials that are strong and resistant to weather. Pick connectors that are appropriate for your particular wiring setup, e.g., 4-pin or 7-pin options, depending on the power and lighting requirements of the trailer. Correct installation requires tightly securing all connections and not allowing the wires to be too loose or too tight. Check the parts periodically for signs of wear or damage so as to maintain the performance and safety levels.
Types of Trailer Wiring Harnesses
Trailer wiring harnesses come in various types, each catering to different towing requirements and configurations:
4-Way Flat Connector
The 4-way flat connector is amongst the most ubiquitous types, generally applied to non-braked small trailers. This connector allows for basic light functions only—tail lights, brake lights, and the like. It is not only fastened in an uncomplicated manner but is also a good choice for light trailers since there is no need for further power connections.
5-Way Flat Connector
The 5-way flat connector is quite similar to the 4-way harness, and it has an extra wire that is often utilized for controlling a reverse lockout on surge brakes or for lighting the backup area. Accordingly, this type is good for both boat trailers and trailers that require an extra auxiliary feature on top of the standard lighting that has to be done.
6-Way Round Connector
Technically, the 6-way round harness has even more possibilities, since it supports trailer brake and auxiliary power. It is usually fitted on medium-duty trailers and is very applicable to those situations where power delivery or an auxiliary function of a certain technical specification is needed.
7-Way Round Connector
The 7-way round connector is the most versatile one, and it is thoroughly used for larger trailers or RVs. The wires for tail lights, turn signals, brake lights, electric brakes, backup lights, a 12V power supply, and a ground connection are all included. This harness is not only recommended but also necessary for trailers that need complex electrical systems or heavy-duty towing.
Understanding 4 Pin Trailer Harness Connectors
The 4-pin trailer harness connector is a standard means to connect minimal trailer lighting to a towing vehicle. The wires of this connector are four in number, and each of them has a particular function that is indispensable for the safe and legal operation of the trailer. The wires are as follows:
- 地線 (White): This wire forms the electrical ground connection, and thus, it is the origin of the electrical circuit for all other components to function properly.
- Tail Lights/Running Lights (Brown): This wire lights up the trailer’s tail lights and side marker lights, which ultimately makes the trailer visible at night or during low-visibility conditions.
- Left Turn Signal and Brake Lights (Yellow): The yellow wire is used to wire the left turn signal and brake light, and thus to provide directing and braking signals to other drivers.
- Right Turn Signal and Brake Lights (Green): The function of this wire is the same as that of the yellow wire; it manages the right turn signal and brake light for proper signaling.
A 4-pin connector is mostly suitable for small and light trailers that do not require extra power for electric brakes or auxiliary systems. These connectors are simple to install and take care of; therefore, they are a very good choice for basic towing operations. It is very important that the installation is done correctly, which involves the steps of securing clean, corrosion-free connections and matching all the wiring to the respective terminal. Even though it is simple in construction, the 4-pin trailer harness provides the essential functionality that makes it possible for safe towing.
Common Issues with Trailer Wiring Connections
While towing, trailer wiring systems, which are necessary for safe towing, can still have problems that affect their function. The most common problems are listed below:
Corroded or Damaged Connectors
Corrosion on connectors because of moisture, dirt, and road debris exposure is often the reason for reduced conductivity, leading to intermittent or complete failure. Regular checking and the use of dielectric grease can reduce this concern.
Faulty Grounding
One of the major reasons behind non-functioning trailer lights is improper or weak grounding. A reliable ground wire or secure attachment point is required for all connections to work properly. A poor ground will cause lights to be dim or non-functional.
Broken or Frayed Wiring
Frequent usage or improper routing may cause a wire to break or be exposed. This can lead to short circuits, blown fuses, or even fire hazards. It is essential to keep all wires away from sharp edges and moving parts.
Mismatched Wire Connections
Incorrectly paired or misaligned wires during installation often result in trailer lights not working properly. Misidentifying wires and connecting them incorrectly according to the standard color codes will cause this issue.
Overloaded Circuits
Too many accessories plugged into the electrical system can lead to a power draw that is more than the system can bear, resulting in damage to the fuse or wiring harness of the tow vehicle. Therefore, it is crucial to monitor the system’s load and make sure it is not overloaded while at the same time being able to handle the amperage of all connected components.
Trailer Lighting Considerations.

The legal requirements and safety standards should be the primary considerations when it comes to trailer lighting. Federal and state laws require that all trailers be equipped with operational brake lights, turn signals, tail lights, and reflectors. A functional lighting system enhances the visibility of the vehicle and communicates with other drivers, which is particularly important when visibility is poor or when people are driving in a dangerous situation. It is necessary to check that the trailer’s lights are adequately connected and timed with those of the vehicle before it is driven. Carry out regular inspections to spot and change burnt-out bulbs, cracked lenses, or rusted contacts, thus guaranteeing no interruptions in the lighting operation and safety on the road.
Importance of Proper Trailer Lighting
Legal and Safety Requirements
The right trailer lighting is essential for both legal compliance and road safety. Trailer lighting, consisting of brake lights, turn indicators, and tail lights, plays a crucial role by informing other drivers about the movements of the vehicle, thus minimizing accidents. Poorly maintained or improperly connected trailer lights may lead to accidents, fines, or even penalties for not following the regulations. It is critical to conduct regular checks to confirm that all the lights are working as they should. This will involve checking the wiring connections, replacing bulbs that have gone out right away, and making sure the electrical system is protected from rust or any other harm. Properly functioning trailer lights mean better visibility in bad weather and at night, hence the driver’s and other road users’ safety. Making regular maintenance and keeping up with safety standards are your priorities will not only reduce the chances of accidents but also strengthen the image of a responsible vehicle operator.
Installing Lights on a 4 Wire Trailer
The process of installing lights on a 4-wire trailer is to first connect the trailer’s wiring system with that of the towing vehicle while adhering to the standard color-coding scheme for wires. A simple yet informative guide to carry out the installation is given below:
- Get the 4-Wire System: The 4-wire trailer wiring carries out four different functions: White Wire (Ground), Brown Wire (Tail lights and marker lights on the side), Yellow Wire (Lights for the left turn signal and brake light), Green Wire (Right turn signal and brake light)
- Get the Things Ready: Trailer light kit (compatible with the 4-wire system), Wire connectors or heat-shrink butt connectors, Electrical tape and zip ties, Test the light or the multimeter to find out the connections
- Lights for Trailer Are Installed: Following the manufacturer’s instructions, the tail lights and side marker lights are mounted on the trailer, taking care of visibility in being symmetrical in the area. A ground wire of white color is connected to a metal surface that is unpainted on the frame of the trailer by means of a screw that self-taps, thus forming a good ground connection.
- Trailer Is Wired: The wiring harness is opened up along the frame of the trailer, where it is held in place by zip ties, so that it does not move or get damaged. Match and join the wires in a way that for every one that is a specific function with connectors. For example, the yellow wire should go to the left side light, the green wire to the right side light, and the brown wire to both tail lights and side markers. Make certain that all the connections are solid and covered with either electrical tape or heat shrink to be immune to corrosion or short circuit.
- The Vehicle Is Connected: The harness that is coming from the trailer gets plugged into the 4-pin connector of the vehicle. By testing every single function of the wiring, like turn signals, brake lights, and tail lights, make sure that the vehicle’s wiring matches that of the trailer.
- 系統經過測試: 使用輔助燈或測試燈,驗證所有燈(包括煞車燈、方向燈和尾燈)是否正常運作。根據需要修復任何故障的連接或燈泡故障。.
遵守這些步驟可以實現安全有效的安裝,並滿足道路安全法規規定的要求。定期測試和維護對於保持拖車照明系統長期運作是必要的。.
拖車燈的維護提示
基本維護實務
拖車燈的正確維護被認為是安全、遵守法規和防止潛在危險的重要因素。專家的建議構成了以下綜合提示的基礎:
定期檢查: 使用拖車前後,應檢查燈光,以發現燈泡變暗、閃爍或燒焦等問題。此外,還應檢查接線的磨損和損壞,特別是在長途旅行或崎嶇地形暴露後。.
保持連線清潔: 使用電觸點清潔器或電線刷清潔每個電氣連接,以防止腐蝕,特別是在插頭端和接地點。應在連接器上塗上介電油脂,以增加電導率並保護其免受潮濕。.
防止水損壞: 檢查所有燈光和電線是否適當密封和防水,主要適用於經常暴露在雨中或在下船時被淹沒的拖車。應在脆弱區域使用矽膠,使其更防水。.
立即更換損壞的組件: 由於燈泡燒焦、電線斷裂或外殼損壞,應立即更換。使用高品質、耐候的 LED 燈是提高壽命和能源效率的好選擇。.
定期測試系統: 技術人員應定期對整個照明系統(包括煞車燈、方向燈和行車燈)進行整體測試,或將拖車連接到牽引車。這保證了在駕駛開始之前所有燈都正常運作。.
透過練習這些維護技術,不僅可以延長拖車燈的使用壽命,而且可以可靠地工作,道路安全也將得到整體改善。.
摩托車的特殊注意事項

摩托車照明系統
維護摩托車照明系統的首要任務是能見度和遵守當地法規。確保前燈正確對齊,以免影響其他車輛駕駛員的視力,但同時,道路照明最大化。應定期檢查方向燈和煞車燈的功能,因為它們對於向其他道路使用者傳達您的意圖至關重要。及時用正確的型號更換燈泡,並考慮使用 LED 選項,以獲得更好的可見度和壽命。檢查所有接線連接,以避免騎行過程中振動引起的問題。常規測試和遵守安全標準對於確保性能可靠性和騎士的安全是必要的。.
調整摩托車拖車的接線
修改摩托車拖車的接線包括驗證摩托車電氣系統和拖車照明的兼容性。首先,了解您的摩托車是否有 3 線或 2 線照明系統。 3 線系統具有單獨的煞車和轉向訊號控制裝置,而 2 線系統將它們合併在一起。當系統無法互通時,請應用轉換器使它們協同工作。.
接下來,放入專為摩托車製造的拖車線束,該線束通常具有動力繼電器模組,可保護自行車的電氣系統免於過載。沿著自行車安全地引導接線,而不會前往熱或可能導致磨損的地方;用拉鍊很好地組織它。接地點非常重要,可以確保拖車和自行車之間有非常好的共同點,這樣就不會出現燈光閃爍或故障的情況。.
在開始騎行之前,請檢查所有連接;其中包括煞車燈、方向燈和行車燈。為了提高可靠性,您可能需要在所有連接點塗抹介電潤滑脂以阻止腐蝕。遵循這些程序可確保摩托車拖車牽引所需的安全有效的佈線設定。.
摩托車拖車佈線安全提示
關鍵安全措施
在連接摩托車拖車時,我不斷地把安全放在第一位,重新檢查整個系統並驗證地面是否正確。我在連接器上塗上介電油脂作為防腐蝕措施,並在起飛前檢查所有燈,即煞車燈、方向燈和行車燈。非常小心地遵循這些步驟不僅可以帶來舒適感,還有機會避免以後在路上可能出現的問題。.
摩托車拖車推薦的線束
摩托車拖車線束的選擇必須取決於相容性、製造品質和安裝簡單性等方面。根據最可靠來源的評估,以下是三個不錯的選擇:
霍普金斯拖曳解決方案接線套件
該品牌的安全帶被稱為“即插即用”,安裝方便且工作完美。該套件配備了防風雨且非常耐用的連接器,因此由於內建電路保護,即使在惡劣條件下也能保持良好的性能。.
CURT 5 線對 4 線供電轉接器
該適配器是為具有不同接線設定的摩托車製造的,它透過很好地連接兩個系統來實現這一點。它具有電路跳閘,密封設計使系統能夠很好地免受元件的影響;因此,它被指定為長期使用的選擇。.
Kuryakyn 拖車佈線和繼電器線束
該套件的接線和繼電器線束專為騎自行車者設計,並配有隔離繼電器以防止電氣過載。它不僅保證自行車的電氣系統與煞車、轉彎和行車燈完美配合,而且還保持了該性能水平。.
參考來源
常見問題(常見問題)
從 5 線轉換為 4 線時,拖車接線顏色是什麼?
通常,從5線拖車佈線系統過渡到4線拖車佈線系統時,拖車佈線的顏色與標準顏色代碼一致。最常用的顏色是:尾燈為眉毛,左轉信號燈為黃色,右轉信號燈為綠色,接地線為白色。遵守這些顏色代碼非常重要,以避免任何正常運作的問題。.
如何拼接電線,從 5 線系統改為 4 線系統?
用於 5 4 線轉換的電線拼接應從識別每根相應的電線開始。然後,使用剝線器,將電線的末端暴露出來,然後扭轉它們,並用電線連接器或電工膠帶固定扭曲的接頭。將拖車上的紅線正確連接到用於煞車燈的 4 針插頭中的電線非常重要;否則,它們將無法工作。.
將 4 根電線的扁平拖車連接到卡車的最簡單方法是什麼?
使用 4 針插頭可以以最簡單的方式將帶有 4 根電線的扁平拖車連接到卡車。確保將拖車接線顏色與卡車的接線顏色連接起來。一個好的做法是參考卡車的接線圖來驗證尾燈、方向燈和接地的正確連接。.
我可以在小型貨運拖車的佈線中使用二極體嗎?
當然,二極體可能是小型貨運拖車接線的選擇之一,因為它有助於避免電流回饋。對於單獨的方向燈和煞車燈尤其如此,使它們有機會單獨工作,而不會互相困擾或導致接線系統出現複雜情況。.
如果我的拖車燈的電線無法正常運作,需要遵循哪些正確步驟?
如果拖車燈線出現問題,第一步是檢查所有連接,看看它們是否正確固定和拼接。然後,檢查拖車接線顏色是否有任何不一致之處,並留意是否斷線。使用萬用電表進行測試也可能有助於確定問題是否與電流有關。.
從 5 5 線轉換為 4 4 線時是否可以繞過更換線束的需要?
雖然從 5 線系統轉換為 4 線系統時更換安全帶是個好主意,但這不是強制性的。如果您目前的安全帶狀態不佳或過時,那麼新的 4 針安全帶將使安裝更加容易,並為您的拖車燈提供可靠的連接。.
拖車佈線系統的典型電壓是多少?
拖車佈線系統的電壓通常為 12 伏特。這是大多數汽車應用的標準,包括輕型拖車。至關重要的是,整個佈線系統中使用的所有組件都可以承受該電壓,以便在拖曳拖車時不會發生電氣故障。.
如何解決拖車上的方向燈問題?
為了解決拖車上的轉向燈問題,第一步是檢查連接處是否有鬆動或腐蝕的電線。接下來,透過檢查接線顏色是否匹配來確認卡車的接線是否正確。使用萬用電表測試方向燈打開時是否通電的方法也很有用。.
使用 4 針拖車接線插頭對拖車有什麼好處?
使用 4 針插頭的拖車接線的關鍵和主要優點是安裝簡單且免維護。通常,4 針設定涵蓋最重要的基本功能,還包括不重的拖車,如尾燈、左右方向燈和接地燈。這就是為什麼這種設定越來越受到輕型拖車的歡迎,因為它降低了設定過程中出現問題的風險,而且安裝非常容易。.