








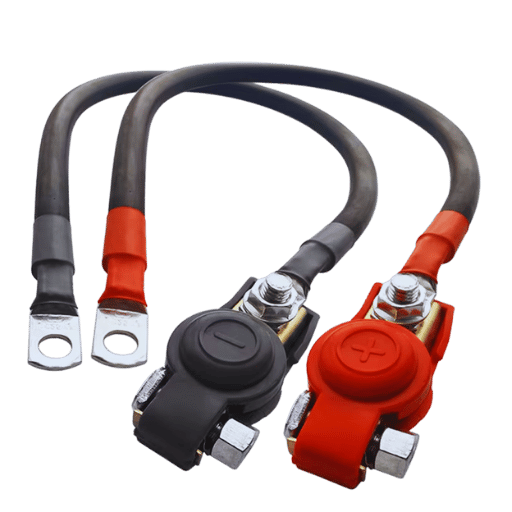
A properly functioning car battery is the heart of your vehicle’s electrical system, and the positive cable plays a crucial role in ensuring its efficiency and reliability. Understanding how to maintain, troubleshoot, and safely handle the positive cable can save you time, money, and potential headaches down the road. Whether you’re a seasoned DIY mechanic or a car owner looking to expand your knowledge, this guide is designed to equip you with essential tips and tricks for mastering the positive cable on your car battery. From identifying common issues to implementing best practices for maintenance, this article offers clear, actionable insights to help you keep your vehicle running smoothly.
What is the Purpose of the Positive Cable on a Car Battery?
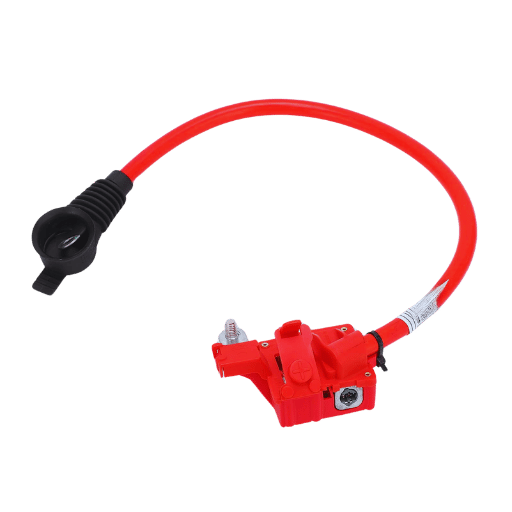
The positive cable connected to a car battery provides electrical energy to the vehicle’s electrical system, which brings power to the starter motor, ignition system, and most vital parts such as lights and infotainment systems. This cable will act as a conduit to transfer electricity. Noth a near flawless operative positive cable and maintenance guarantee performance of the positive cable and starting engine trouble free.
Understanding the Role of the Positive Terminal
To critical systems, the positive terminal of a vehicle’s battery functions primarily as an electrical power source. This terminal serves the purpose of interfacing the battery with the vehicle’s main power distribution systems, and so it interfaces the energy supply. Depending on the type of vehicle, modern automotive batteries are either lead-acid or lithium-ion, and the positive terminal is adorned with a red cover or a ‘+’ symbol indicating importance and polarity.
From the positive terminal, electric currents flow to the alternator, starter motor, and fuse box. For example, in the case of turning on a vehicle, the positive terminal along with other components like the battery and starter motor supply sufficient energy to turn the engine over. Studies suggest that a clean and non corroded positive terminal can greatly improve conductivity and thus performance.
Evidence indicates that even a slight resistance or corrosion on the positive terminal can lead to voltage drops, affecting systems such as the headlights, engine control module, and infotainment systems. Regular maintenance is recommended since research reveals that neglected terminals can reduce the battery’s lifespan by approximately 30%. These issues can be resolved by the application of dielectric grease or terminal protectors which improves long-term reliability, energy distribution across all systems, and mitigates corrosion on terminals.
Wie macht die Positive Cable Connect to the Battery?
The positive cable connects to the battery by being fastened securely on the positive terminal, which is marked with a “+” symbol or identified using a red color. This cable is used to transport electrical current away from the battery to the vehicle’s starting motor, alternator, and other vital components. A strong connection that is free of corrosion at this location is very important for reliable, consistent performance. Research indicates that connections that are rusty or too loose tend to increase resistance and unnecessary voltage drops, which might compromise the perfect operation of the systems.
The conventional method involves creating an electrical link by fixing a metal clamp onto the battery’s tapered positive post. Some modern vehicles feature advanced systems that allow for quick-release connections specifically tailored for ease of use. Automotive manufacturers suggest a tightening torque of 4 to 7 Newton-meters (N·m) to limit the risk of turning the connector too tightly, which leads to damaging the terminal or cable, according to the industry standard. Ongoing maintenance, such as cleaning the terminal face and applying corrosion control chemicals, enables uninterrupted electricity passage, which improves the life span of the battery.
Difference Between Positive and Negative Kabel
In the context of automotive systems, positive and negative cables have both different and interrelated functions in the framework of automotive systems ensuring the vehicles components function properly. The positive cable is most commonly red in color and connects the positive side of the battery to important components like the starter motor, alternator, and fuse box . It provides power to the battery and runs electricals such as the starter and accessories during engine crank.
The negative cable is normally black in color and connects to the vehicle’s chassis or engine block as the ground. Grounding complete open circuits and prevent power surges from venting releasing uncontrolled energy by stabilizing the system. Grounding ensures safe operation of the vehicle’s systems which could otherwise cause damage due to changes in the current.
Choosing replacement or repair cables requires consideration of their gauge size and type. For instance, higher numbered gauges like 4 AWG or 2 AWG are used in heavy duty applications, as such cables are more effective at managing power flow. Furthermore, electrical cables utilize copper or copper clad aluminum due to their conductivity, but pure copper outperforms them both in strength and longevity.
To keep these cables functional, proper placement or maintenance and regular checks are required. Each cable’s loose or corroded connections can result in the voltage falling beneath the required levels, which could make starting the vehicle challenging or lead to damage in some of the more delicate electric parts. Conductivity issues, which can be detected through multimeters, can help in maintaining optimal operational standards for the vehicle and increase the endurance of the battery and electrical systems.
How to Safely Disconnect a Car Battery?
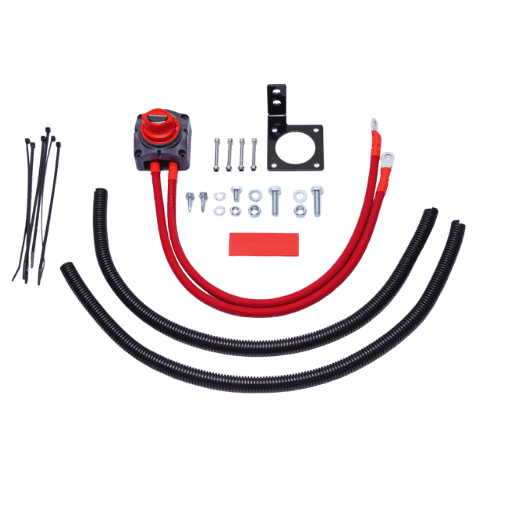
Schritte zu Disconnect the Negative Terminal First
Turning Off The Engine and Removing the Keys
Before anything else, please ensure the vehicle is completely turned off and the keys are not in the ignition. This is important to reduce the possibility of an electrical shock or short circuit.
Identifying The Battery
Check under the vehicle’s hood, as batteries are primarily located there, although some models may place them in the trunk or beneath the rear seats. If the battery is not easily visible, consult the user manual.
Identifying The Negative Terminal
To identify the negative terminal, check if there is a symbol indicating a negative sign present. The terminal will most likely be marked with a “-” while the positive one will contain a “+”.
Checking Tools Required
Put together a socket or wrench which will comfortably fit the nut of the negative terminal. Vehicle makes and models usually differ so ensure you have a 10mm wrench for the job as it is usually the standard.
Negatively Loosening The Terminal’s Nut
Put the wrench on the nut and begin loosening it by turning it counterclockwise. Take care not to touch both terminals with the tool as it will cause shortcuts.
Negative Cable Disconnection
Once the securing nut is loose enough, carefully rotate the negative cable until it detaches from the terminal. Do not attempt to pull the cable as this could rigidly damage the connector or cable.
Prevent the Disconnect Cable From Going Back to the Battery
Once you have removed the negative cable, ensure that it is kept away from the terminal of the battery. If need be, use zip ties or insulation tape to prevent a reconnection from happening accidentally.
Terminal and Cable Inspection
Check the disconnected cable and also the battery terminal for any corrosion, dirt, or other damages. It may be necessary to clean any buildup with a battery terminal cleaning brush and/or a concoction of baking soda and water.
Following the steps will provide proper risk assessment and management so the negative terminal can be safely disconnected without any danger associated with electricity or damage to the car’s systems.
Precautions When Handling Batteriekabel
Working with battery cables mandates compliance with defined safety measures for the avoidance of injury as well as the protection of the vehicle. Integrated safety measures are explained in the following sections:
Schutzausrüstung verwenden
Put on insulated gloves and face shields for the protection against sparks, acid leaks, and pieces of broken glass which are potential risks during cable handling. Combustible gases near sparks can be extremely dangerous and just like sparks can cause fires. It is estimated under safety industry norms that a minimum of 1,400 injuries a year occur as a result of the negligent use of batteries in electronics vehicles.
Remove Negative Terminal First
To avoid short circuiting, never connect negative terminals last, instead, set negative first. This way, all terminals are completed as far as sparking and circuit formation is concerned which means no simulative structures that damage vehicle electronics or sparks could happen.
Derapid
Do not expose battery terminals to metallic tools and bare skin at the same time. This creates a circuit that could be hazardous to the battery with electric shocks as well as damage the battery system. Research indicates that direct short circuits pose a serious threat as they de-energize rapidly, burn, and set the area ablaze while commanding overwhelming energy that is capable of sparking fires and damaging the area.
Proper Ventilation is Important
Hydrogen gas is both highly explosive and volatile. It is emitted during the charging or discharging processes of batteries. Therefore, the workspace must be properly ventilated. Enclosed spaces increase operational risks further. OSHA recommends that personnel work in unobstructed spaces free of airflow restrictions.
Inspect and care for your tools
Exposed metal parts of tools increase the risk of sparks igniting surrounding vapors. For this reason, the hands of the utilized tools must be insulated, as well oxygen-free spaces. These also include working cable areas and sensitive regions of electrical components.
Environmentally Hazardous Waste Disposal
Recycling infrastructure in the United States and Western countries is rapidly advancing. Some regions even encourage citizens to deposit lead-acid batteries directly into vending-like kiosks, which rewards them with tangible financial incentives to protect the environment. Campaigns this aggressive should be fueled, at least by data proving that close to 90% of waste automotive batteries are pulled out of circulation through the recycling incinerators because of their environmental toxicity.
Compliance with these measures enables users to increase the lifespan of the battery system and reduce operational health risks. These measures further guarantee that the stipulated laws and guidelines concerning enhanced standards of safety, all while reducing environmental impact, are met.
Warum Disconnect Die Negative Battery Terminal First?
Unscrewing the negative battery terminal first is important so that you prevent electrical shorts and damage to the vehicle’s delicate electric system. Since the negative terminal is linked to the chassis of the vehicle, which functions as a ground, disconnecting this first terminates all chances of a tool or object creating an electrical circuit if placed on the positive terminal and metal parts of the parts of the vehicle. Since vehicles are no strangers to sparks, this controlled process will limit the chances of dangerous sparks or injury to the technicians working on the vehicle. For optimal safety during maintenance or replacement of the battery, follow this procedure.
Wie man Connect the Positive Cable When Installing a New Battery?
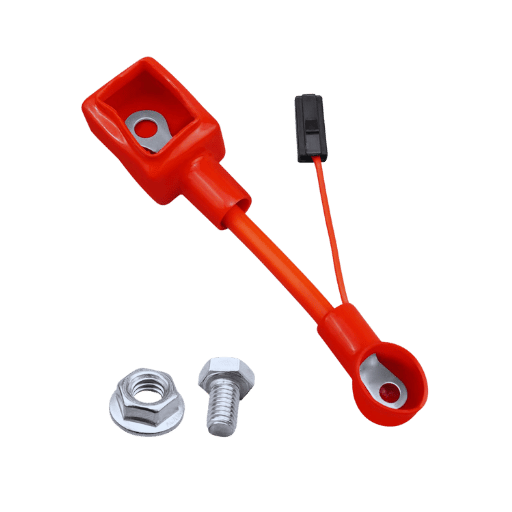
Identifying the Positive Battery Terminal
On vehicle batteries, the positive terminal is usually indicated with a “+” symbol or “POS” on the label. Identifying this terminal is easy as it is often marked red. This color distinguishes it from the negative terminal (usually colored black) which is marked with “-” sign. The positive terminal is connected to the vehicle system to power crucial systems like the starter motor, ignition, and onboard electronics and is critically important when powering components.
The design distinguishes the two terminals, as the positive terminal post is slightly wider than the negative one. This aids connections and avoids wrong linkages. Be sure markings are correct while checking the terminal, as it should also be free of corrosion to ensure safe redox-reaction.
Correct installation sequence dictates that checking the positive terminal should be done before cable attachment. Red caps are now common with modern vehicles to mark positive terminal. Avoiding wrong linkage ensures the vehicle’s redox-reaction components are in order during installation.
Schritte zu Connect the Positive Cable Securely
- Firstly, confirm that the vehicle is completely powered down and that the keys are taken out of the ignition in order to eliminate any chance of an electrical current flowing.
- Identify the battery’s positive terminal, which is usually accompanied by a ‘+’ symbol or covered in red.
- Should any protective covers be present, remove them and examine the terminal for any signs of dirt or corrosion. If needed, clean the terminal with a wire brush.
- With the positive terminal, usually red, securely attached to the positive terminal, adjust it to the correct position to ensure that the connection has no gaps.
- Make use of the correct tool to give the terminal clamp a gentle tighten. This must not be done too much as it will damage the terminal.
- As a final step before going to the negative cable, check that all steps have been followed in securing the connection so that it can be referred to as dependably secure.
Ensuring Proper Clamp Verbindung
For proper clamp connection, it is critical that clamps are cleaned of any debris, corrosion, or oxidation as these factors can impede electrical conductivity. Additionally, corroded clamps can increase resistance in the system which causes voltage drops that might impact system functionality. Studies indicate that the presence of corrosion, even in minimal amounts, greatly reduces efficiency in electrical connections and could lead to permanent damage over time.
When mounting clamps to terminals, it is prudent to use a torque wrench as it ensures the right amount of pressure is applied, typically dictated by the equipment’s manufacturer. Take automotive battery terminals, for example, where the standard torque applied is stipulated to be around 5-7 Nm (Newton-meters); this range balances adequate torque without damaging the terminals. Also, the application of dielectric grease forms a protective layer that prevents the entrance of moisture and oxygen that instigates corrosion.
Adhering to the outlined instructions along with regular maintenance checks enhances the reliability and efficiency of the clamp connection, thus maximizing the lifespan and ideal functionalities of the equipment.
What to Do if the Positive Cable Gets Disconnected?
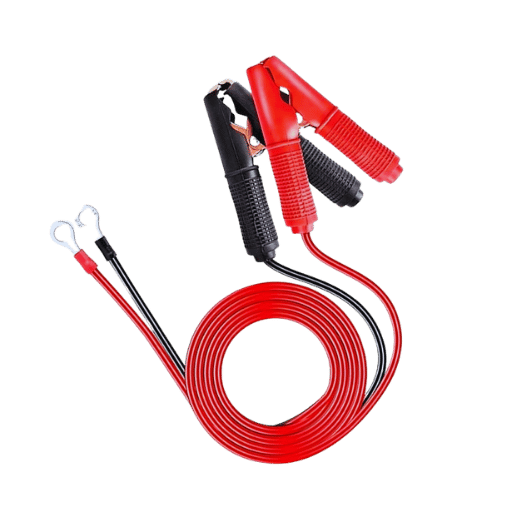
Signs of a Disconnected Positive Cable
Issues such as reduced efficiency and malfunctions in your vehicle or equipment may arise due to a disconnected positive cable. Being able to identify the indicators early on can help rectify the problem on time:
Electrical Power Disruption:
If a positive cable is disconnected, the battery will no longer supply power to the electrical system. This is shown by the total malfunction of electrical systems like the headlights, the dashboard, and even the infotainment system.
Starting System Malfunction:
The lack of connection means the starter motor cannot draw enough power from the battery, meaning that the engine cannot be started. In this case, you may hear clicking sounds or, at worst, no sound at all when the ignition key is turned.
Electrical Volatility:
Loose or disconnected cables may lead to electrical issues that come and go randomly. Lights may flicker and other devices such as the radio or air conditioning may function unconsistently.
Battery Warning Light Turn On:
To alert of electrical faults, modern vehicles come with dashboard indicator lights. With a disconnected positive cable, the vehicle’s battery light or check engine light may turn on.
Erratic Sensor Function:
Eine unregelmäßige Stromversorgung kann zu unregelmäßigen Sensorwerten führen, die bei wichtigen Systemen wie Kraftstoffeinspritzung oder Antiblockiersystem (ABS) auf eine stabile Spannung der Batterie angewiesen sind.
Korrosion oder sichtbare Schäden am Verbindungspunkt
Überprüfen Sie den Batterieanschluss auf Anzeichen von Korrosion, physischen Schäden oder losen Verbindungen. Auch wenn die Verbindungen nicht vollständig getrennt sind, können schlaffe Verbindungen den Anschein von vollständig abgelösten Kabeln erwecken.
Maßnahmen zur zeitnahen Lösung dieser Probleme können dazu beitragen, das Risiko einer Beschädigung des elektrischen Systems oder anderer schwerwiegenderer Betriebsprobleme zu verringern. Das positive Kabel und die gesicherten Verbindungen müssen bei Betriebskontrollen routinemäßig überprüft werden, um Zuverlässigkeit und sicheren Betrieb zu gewährleisten.
Wiederanbringen der Positive Cable Sicher
Verwaltung des Arbeitsbereichs
Doppelprüfung, ob das Fahrzeug auf einer geeigneten ebenen und stabilen Unterlage steht Der Motor muss vollständig ausgeschaltet sein Die Feststellbremse muss eingerückt sein und wenn es möglich ist, die Schlüssel aus der Zündung zu entfernen, so tun Sie dies Dies würde die Risiken während des Prozesses begrenzen Tragen Sie Schutzbrillen und Handschuhe, um die Sicherheit zu gewährleisten, da die Anschlüsse der Batterie korrosive Stoffe enthalten können.
Schauen Sie sich die Batterie- und Terminalverbindungen an
Stellen Sie sicher, dass Sie die Batterieklemmen auf Schmutz, Korrosion oder Beschädigungen untersuchen, bevor Sie das Positivkabel wieder anbringen Korrosion wird meist als weiße, bläuliche oder sogar grünliche Ablagerung angesehen, und um diese zu beseitigen, kann eine Terminal-Reinigungsbürste oder eine Mischung aus Natron und Wasser verwendet werden Die Oberfläche sollte so sauber wie möglich sein, um die Konnektivität zu verbessern und gleichzeitig das Risiko eines elektrischen Widerstands einzudämmen.
Inspektion des Kabels
Das Positivkabel sollte auf physische Schäden wie Risse, freiliegende Drähte und Sprödigkeit überprüft werden. Beschädigte Kabel müssen repariert oder ersetzt werden, um das Risiko einer elektrischen Gefahr zu mindern. Um zu überprüfen, ob das Kabel Strom leitet, testen Sie es mit dem Multimeter und bestätigen Sie, dass es keine Unterbrechungen im Durchfluss gibt. Der Widerstandswert sollte nominal sein, da bei Standardmessungen keine Unterbrechungen nahe Null Ohm zu erwarten sind.
Sichern Sie das Positivkabel
Befestigen Sie zur Sicherung des formschlüssigen Kabels das formschlüssige Kabel auf dem als “+” oder farbbeschichtetes Rot verkabelten Pluspol der Batterie, bestätigen Sie mit einem Schraubenschlüssel das Anziehen der Klemmenklemme, aber nicht zu sehr, dass dieser beim Sichern den Klemmenpfosten bricht, der Kabelgriff passt sich an, während ein leichter Zug ausgeübt wird und benötigt somit keine Bewegung.
Überprüfung auf Sicherheit
Um die richtigen physikalischen und thermischen Eigenschaften innerhalb der Grenzen zu halten, überprüfen Sie jede andere Verbindung, einschließlich der Grenzen positiver und negativer Punkte auf Festigkeit nach der Sicherung des positiven Kabels. Lose Verbindungen sind gefährlich, da sie elektrische Lichtbögen oder Schwankungen im Arbeitsablauf entzünden können. Überprüfen Sie außerdem noch einmal, ob die Kabel richtig positioniert sind und nicht in Bereichen, die möglicherweise von Rotorblättern, beweglichen Maschinen oder extremen Temperaturen bewohnt werden.
Schließen Sie das Negativkabel wieder an
Nach Abschluss der Sicherung des Negativkabels befestigen Sie das Negativkabel an seinen mit einem “-” oder schwarz bezeichneten Anschlusspunkten Ziehen Sie die Schraube am Ende des Bandes fest und sorgen Sie so ebenfalls für kein Durchhängen. Nachdem das Positivkabel das Negativkabel getrennt hat, während die Gleichung auf der ersten Seite beendet wird, überquert es die Leitung sicher und begrenzt die Funkenchancen.
Testen Sie das System
Der Einrast des Automobils sollte in der Lage sein, die Arbeitsreihenfolge zu bestätigen Alles, was angetrieben wird Innerhalb des Autos Überprüfen Sie nach Systemen für das Armaturenbrett, Housekeeping-Leuchten und andere Anzeigen zusammen mit seltsamen Geräuschen, die von der Elektronik kommen, die eine lose Verkabelung oder einen anderen Ausfall bedeuten Gehen Sie davon aus, dass das System reibungslos funktioniert und nach gründlicher Wartung abgeschlossen ist.
Die Einhaltung all dieser Prozesse wird Ihnen helfen, die Integrität des Batteriesystems wiederherzustellen und Risiken im Zusammenhang mit Schäden zu minimieren Batteriewartung zusammen mit regelmäßiger Rückkontrolle wird die Lebensdauer der Batterie erhöhen zusätzlich zu einer zuverlässigen Leistung des Fahrzeugs.
Zukunft verhindern Kabel Verbindungsabbrüche
Um das Risiko einer Trennung von Fahrzeugbatteriekabeln zu verringern, müssen vorbeugende Maßnahmen und ein Wartungsplan befolgt werden. Einer der Schritte umfasst die Überprüfung der Batterieklemmen auf Korrosion, da dadurch die gesicherten Kabelverbindungen beschädigt werden. Stark feuchte Bereiche sind korrosionsanfällig, eine regelmäßige Wartung mit Klemmenreinigungsbürsten zusammen mit Korrosionsschutzlösungen kann diese Korrosionsansammlung jedoch erheblich minimieren.
Sorgen Sie für ein richtiges Anzugsdrehmoment für die Batterieklemmen. Zu viel Kraft kann die Klemmen beschädigen, während zu wenig zu lockeren Kabeln führen kann, die sich unerwartet lösen können. Die allgemeine Spezifikation für die meisten Fahrzeuge liegt bei etwa 7-10 Newtonmetern (Nm); Es sollte jedoch immer auf eine spezifische Fahrzeugdokumentation verwiesen werden.
Andere Faktoren sind gleichermaßen wichtig zu berücksichtigen Raues Fahren und Straßenvibrationen können mit der Zeit auch eng befestigte Abdeckungen lösen. Klemmvorrichtungen wie Schwingungsschutzschalen sind hilfreich, aber die Kontraktion kann die Trennfrequenz dennoch verringern. Es hat sich gezeigt, dass Offroad- oder Hochvibrationsbedingungen Kabelprobleme mit Hilfe dieser Maßnahmen um bis zu 301 TP3T reduzieren.
Schließlich können hochentwickelte Überwachungssysteme wie Batteriemanagementsysteme (BMS) Sie über mögliche Verbindungskomplikationen oder unregelmäßige Probleme informieren. Viele moderne Optionen für BMS umfassen hochentwickelte Analysen, die Warnungen umfassen und umsetzbare Erkenntnisse in Echtzeit liefern. Dieser Ansatz zur Problemverhütung ermöglicht eine schnelle genaue Diagnose von Problemen und gewährleistet eine optimale Leistung bei gleichzeitiger Verbesserung der Langlebigkeit sowohl der Kabel als auch des Batteriesystems.
Wie zu verwenden Pulloverkabel Mit einem Tote Batterie?
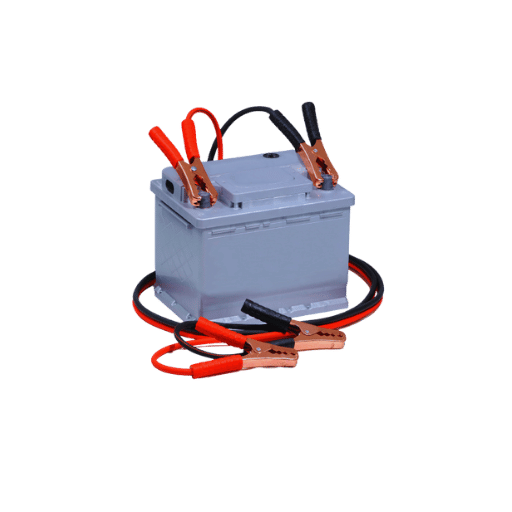
Einrichtung Pulloverkabel Richtig
Überbrückungskabel sind von entscheidender Bedeutung, um ein Fahrzeug sicher und effektiv anzukurbeln, da eine Batterie nicht alleine funktionieren kann. Die folgenden Anweisungen helfen dabei, potenzielle Gefahren zu minimieren und gleichzeitig die Verbindungen zu sichern.
Fahrzeugplatzierung
Das Fahrzeug mit der Arbeitsbatterie muss in der Nähe des Fahrzeugs mit der Totbatterie platziert werden. Die beiden Fahrzeuge sollten ebenfalls ausgeschaltet sein. Die Feststellbremsen sollten ebenfalls aktiviert sein, um unerwünschte Bewegungen zu verhindern.
Kabelabfrage
Irgendwelche Kabel mit freiliegenden Drähten Irgendeine Art sollte sofort entsorgt werden, da sie neben anderen Sicherheitsbedenken auch schwere Überhitzungsgefahren mit sich bringen könnten.
Platzieren der Terminalbatterien
Identifizieren jeder der Batterien Schrauben des Fahrzeugs Die Batterie jedes Fahrzeugs wird auch ein positives (+) und negatives (-) Terminal enthalten, wie zum Beispiel eine gesunde Batterie Das Positive Terminal wird normalerweise einen roten Aufkleber darauf haben, und das Negative wird das Minus-Terminal sein, das ist blankes Metall.
Das Positive zuerst verlängern
Schrauben Sie die rote Klemme an die tote Batterie Anschließen der Kabel mit der negativen Seite wird ein Problem sein, so verbinden wir die andere rote Klemme mit der Seite der stabilen Batterie Stellen Sie sicher, dass die eingestellte Polarität ausgerichtet ist, da ein Verstoß gegen diese elektrische Schäden verursachen kann Vernachlässigung von Schritt 1 der Anweisungen 1 bis 3:
Klemmen Sie ein schwarzes Negativ (-)-Anschlussstück an den Minuspol der gesunden Batterie und befestigen Sie dann den Rest der schwarzen Klemme mit der flachen Batterie an einem unlackierten Metallteil des Motorblocks oder Fahrgestells am Auto. Sicherstellen, dass diese Teile von der Batterie entfernt sind, trägt dazu bei, das Risiko zu verringern, dass Funken gefährliche Dämpfe in der Nähe der Batterie entzünden.
Bestätigen Sie Verbindungen und beginnen Sie Verfahren
Die restlichen Teile des Kabels steuern und sicherstellen, dass alle ordnungsgemäß gesichert sind Bestätigen Sie, dass alle Teile nicht ineinandergreifen und bewegliche Teile nicht berühren Zuerst sollte der Motor des Autos gestartet werden, der ordnungsgemäß funktioniert Danach warten Sie ein bis zwei Minuten, bevor Sie versuchen, das Auto ohne Batterie wieder zu starten, wenn der Versuch funktioniert, warten Sie, bis das Fahrzeug einige Minuten im Betriebsmodus war, damit das Fahrzeug die Stromversorgung im Batteriesystem teilweise wiederherstellen kann.
Anweisungen 1 und 2 zum Trennen der umgekehrten Reihenfolge
Trennen Sie in diesem Fall die Drahtklemmen nacheinander vom letzten Schritt zum ersten Schritt. Dadurch wird sichergestellt, dass die erste Klemme bewegt wurde, die am Fahrgestell des Autos befestigt war, das früher flach war, und die letzte freigesetzte schwarze Leitung diejenige war, die mit der gut funktionierenden Batterie verbunden war. Lösen Sie für den Rest des Prozessablaufs zuerst die rote Klemme von der gut funktionierenden Batterie und schließlich die rote Klemme.
Evaluating the Performance of the Vehicle after Recharging
After starting the vehicle with a dead battery, pay close attention to how it runs. Drive the vehicle for a further 15-30 minutes to charge the battery. If the battery isn’t holding charge, seek professional help.
These comprehensive measures will make sure that you complete the jump starting procedure while ensuring that no harm is done to the electrical systems of the vehicle.
Connecting to the Positive and Negative Battery Terminals
While jump starting a vehicle, correct placement of the cables on the positive and negative terminals of the battery is important for both safety and the vehicle’s electrical systems. In this guide, you will find the suggestions that will help you reinforce the safety of the vehicle while connecting the jumper cables.
Finding The Battery Terminals
Working with safety in mind starts with identifying the positive (+) and negative (-) markings on both the functioning and the dead batteries. In most cases, the positive terminal has a red protective cap, while the negative terminal bearing a minus symbol is usually black.
Attaching The Positive Cable First
Make use of the red positive jumper cable to connect one of its ends to the positive terminal of the dead battery. Then, place the other end of the cable at the positive terminal of the functioning battery. The connections through charge flow can now be considered consistent.
Affix Ground (Negative) Jumper Cable
To complete the circuit, secure the black (negative) jumper cable to the working battery’s negative terminal. However, instead of directly connecting the other end of the negative cable to the dead battery’s terminal, fasten it to a grounded metal location on the disabled car, like an uncoated bolt or an engine block. This method minimizes the chances of sparks igniting near the battery, which is especially important in case the battery emits flammable gas.
Confirm Secured Connections
Confirm that all clamps are fastened on the appropriate locations for the best transfer of energy. Most fastenings that are too loose, or improperly done, will cause incomplete circuits or issues during the jump-starting procedures.
By adhering to the above guidelines on connections, you can seamlessly transfer energy from the ‘alive’ battery to the ‘dead’ one and, in the process, mitigate risks and increase the chances of success for the jump-start. Always be careful to check the polarity to eliminate the risk of damaging the vehicle’s electrical systems.
Safety Tips for Jumper Cable Nutzung
1. Places vehicles accurately
Ensure that both vehicles are parked within range of each other, but do not let them come in contact.
Complete Power Off
Both vehicles must be completely shut down before cable connection to eliminate the risk of shorts or electrical damage.
Jumper Cables Inspection
Before using the cables, check for damage, such as fraying, corrosion, or any other issues that could render them safe and functional.
Connect Cabless Properly
Cover the dead battery and the battery terminal with red clamps. Black clamps should also follow to cover the working battery’s negative terminal and a beige metallic surface on the disabled vehicle far from the battery.
Controlled Vehicle Starts Initiate
Turn the key of the functioning vehicle first, followed by the disabled one. If it doesn’t work after a couple of tries, there may be additional underlying problems.
Reverse Order Removal
Caution should be exercised in avoiding the touch of the clamps to each other while carefully disconnecting in the reverse order of the sequence they were connected in.
Review Upon Completion
After the non-operational vehicle has started, let it idle for a short period to recharge. Check both vehicles’ electrical systems to ensure that automated functions are working properly.
Häufig gestellte Fragen (FAQs)
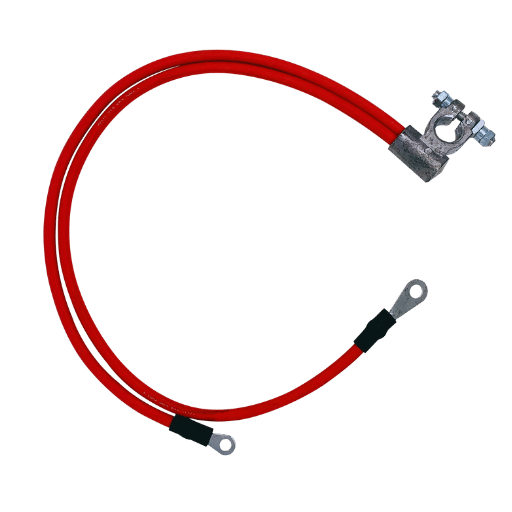
Q: What are the steps that are required in identifying the positive and negative terminals of my car battery?
A: Der rechte Anschluss der Batteriereihe, der ein Pluszeichen \ (+\) hat, ist der positive Anschluss, während der mit dem Minuszeichen ‘-’ der negative ist Als Faustregel kann man sagen, dass das positive Kabel des Akkus rot ist, und das negative Akkukabel ist schwarz.
Q: What actions should I perform before disconnecting the car battery cables?
A: Stellen Sie sicher, dass Ihr Auto aus ist und dass Ihre Schlüssel nicht im Auto sind, bevor Sie die Kabel der Autobatterie trennen. Um Kurzschlüsse zu vermeiden, sollte die Negativklemme als erste entfernt werden und dann sollte die Positivklemme entfernt werden.
Q: In which order do I put the clamps when replacing the battery in my car?
A: Legen Sie die Ersatzbatterie in ihr Fach und befestigen Sie dann zuerst das rote positive Batteriekabel am positiven Pfosten Verbinden Sie die andere Klemme erst, wenn das rote positive Kabel sicher befestigt wurde.
Q: What actions should I take for a car that won’t start after replacing the battery?
A: Überprüfen Sie, ob die positiven und negativen Anschlüsse gut passen Stellen Sie sicher, dass das Terminal keine Korrosion aufweist und dass die Batterie gut gesichert ist. Wenn diese Schritte das Problem nicht beheben, liegt das Problem möglicherweise am Batteriekabel des Autos, das in irgendeiner Weise fehlerhaft ist.
Q: Why is it essential to install the positive wire first when connecting a new battery?
A: Firstly connecting the positive wire decreases the risks of shorts that emerge at any point during set-up when the socket wrench comes in contact with positive or negative terminals or even parts of the vehicle.
Q: What is the safest way to dispose of an old battery?
A: Take the old battery to a local recycling center or auto shop that accepts battery disposal. It should never be disposed of in ordinary trash because it has hazardous components.
Q: What safety measures would you recommend while jumpstarting a car?
A: The red cable to the positive terminal of the dead battery is connected to the positive terminal of the good battery; then, the black cable is attached to the negative terminal of the good battery and to a metal surface on the car away from the battery with the dead battery.
Q: How can I stop corrosion from forming on my car battery terminals?
A: Combing routine upkeep with control, apply protective coatings and anti-corrosive sprays along the joints, crevasses, and every contact surface of the battery terminals. Properly tighten the cable terminal connections to halt corrosion from building up.
Q: What should be done if the car battery starts leaking fluid?
A: Replace the leaking battery immediately while ensuring not to touch the leaking battery fluid. Wipe the contaminated surface with baking soda and water. Lastly, safely dispose the old battery.
Referenzquellen
1. Incorporation of titanium alloy positive grids in lead acid batteries for weight reduction, enhanced lifetime, corrosion resistance and longevity.
- Autoren: Debo Liu et al.
- Veröffentlicht: 2023-12-01
- Wichtigste Ergebnisse: This paper focuses on the development of positive grids for lead-acid batteries with particular attention to their performance and durability, especially for role in automotive use. The research also discusses benefits of titanium grids over traditional lead grids including decreased weight and better corrosion resistance.
- Methodik: “Titanium Grids for Lead-Acid Batteries: Durability and Efficiency” outlines an experimental investigation of actual working conditions to measure titanium grids against conventional materials in terms of mechanical and electrochemical battery activity performance. (Liu et al., 2023).
2. Analyzing the Impact of Line Balancing in Increasing Efficiency of a Production Line in the Car Battery Industry
- By: Hayu Kartika et al.
- Erscheinungsdatum: 27 December 2023
- Main Conclusions: This research focuses on the orderly efficiency concerning the operations within the car battery manufacturing lines. One of the focal points is regarding process steps such as connecting cables (positive and negative) onto the battery systems, as these will influence interrelated processes on the assembly lines. This study enhances line efficiency and minimizes non-productive time.
- Forschungsansatz: The authors implemented line-balancing strategies to assess the production lines and workflows. Data gathering through the statistical approach is used to identify the bottleneck and propose solutions (Kartika et al., 2023).
3. Manufacturing of 18650 lithium batteries for electric bamboo scooters
- Autoren: A. N. F. Saputra et al.
- Veröffentlicht: 2024-04-01
- Key findings: In this case, the authors described the processes and sub-processes that comprise the manufacturing steps of lithium batteries, which provide energy for electric vehicles (EVs), including scooters. The research focuses on the design and configuration of the BMS as well as the assembly of the battery pack, which may include interconnections analogous to positive terminals found in traditional automotive lead-acid batteries.
- Methodik: The authors used descriptive qualitative research methods to interpret the processes, focusing on the assembly of lithium batteries with BMS integration, including all electrical interfaces that achieve the required performance for all operational scenarios (Saputra et al., 2024).