








Verkabelung eines Leistungsschalters Mag ein einschüchternder Job erscheinen, ist es aber wirklich nicht Ob für ein Heimwerkerprojekt oder um die Sicherheit und Integrität Ihrer elektrischen Anlage zu erhalten, es ist wirklich ein Talent, das es sich lohnt zu wissen: einen Leistungsschalter richtig zu verdrahten Dieser Leitfaden zielt darauf ab, Sie Schritt für Schritt durch den gesamten Prozess zu führen, so kann er auch einen Laien auf den Stellplatz eines Elektrikers erbauen Von den benötigten Werkzeugen bis hin zu wichtigen Sicherheitsvorkehrungen werden Sie mit jedem einzelnen Detail vertraut gemacht, das erforderlich ist, um diese Aufgabe sicher und sicher zur Hand zu nehmen Am Ende werden Sie in der Lage sein, präzise zu arbeiten und dieses spezielle elektrische Projekt auf Ihr eigenes Geheiß zu übernehmen. Sollen wir fortfahren?
Kritischer Sicherheitshinweis
WARNUNG: Die Arbeit mit elektrischen Systemen kann äußerst gefährlich und möglicherweise tödlich sein Dieser Leitfaden dient Bildungszwecken Konsultieren Sie bei jeder elektrischen Arbeit immer einen zugelassenen Elektriker, insbesondere wenn Sie Zweifel an Ihrer Fähigkeit haben, die Arbeit sicher auszuführen Lokale elektrische Vorschriften müssen befolgt werden, und Genehmigungen können erforderlich sein.
Leistungsschalter verstehen
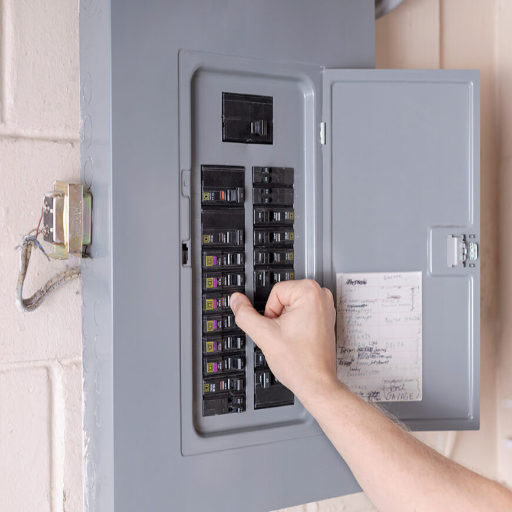
Leistungsschalter sind Schutzeinrichtungen, die verhindern, dass elektrische Stromkreise durch Überstrom beschädigt werden, meist infolge einer Überlastung oder eines Kurzschlusses Unterbrechungen werden automatisch durch den Leistungsschalter bei Vorliegen eines gefährlichen Fehlers vorgenommen, um den Stromfluss abzuschalten, die Leiter abkühlen zu lassen und so einen Brand zu verhindern Leistungsschalter sind wichtig für die Sicherheit sowie das Funktionieren elektrischer Installationen in Häusern, Unternehmen und anderen Orten Moderne Leistungsschalter sind sehr zuverlässig, leicht zurückzusetzen und in mehreren Größen und Typen erhältlich, um besonderen elektrischen Anforderungen gerecht zu werden.
Was ist ein Leistungsschalter?
Der Leistungsschalter ist eine der wesentlichsten Sicherheitseinrichtungen in einem elektrischen System, die den Stromfluss während einer Überlastung oder eines Kurzschlusses verhindert, oder wenn ein anderer Fehler auftritt Bei diesem Prozess kann ein Überstrom dazu führen, dass ein elektrischer Stromkreis überhitzt, was zu Schäden an der Ausrüstung oder einem Brand führen kann Im Gegensatz zu Sicherungen können Leistungsschalter nach dem Auslösen zurückgesetzt werden, was sie zu einer sehr praktischen und wiederverwendbaren Option macht Diese Geräte verfügen über Varianten nach Art und Größe, wie Standardunterbrecher, Erdschluss-Leistungsschalter (GFCI) und Lichtbogenstörkreisunterbrecher (AFCI). Diese wurden entwickelt, um verschiedene Sicherheitsprobleme in Wohn-, Gewerbe- und Industrieaufbauten zu beheben.
Arten von Leistungsschaltern
Die Klassifizierung von Leistungsschaltern hängt von ihren Funktionen, ihrer Konstruktion und ihren Anwendungen ab. Die Haupttypen sind:
| Brechertyp | Funktion | Gemeinsame Anwendungen | Hauptmerkmale |
|---|---|---|---|
| Standard-Leistungsschalter | Vor Überlastungen und Kurzschlüssen schützen | Allgemeine elektrische Schaltkreise | Gängigste Art, automatisches Auslösen |
| GFCI-Brecher | Erdschlussschutz | Badezimmer, Küchen, im Freien | Verhindert Stromschläge in Feuchtigkeitsbereichen |
| AFCI-Brecher | Lichtbogenfehlererkennung | Wohnzimmer, Schlafzimmer | Brandverhütung durch Lichtbogenerkennung |
| MCB (Miniatur) | Kompakter Überlastschutz | Wohn- und Leichtgewerbe | Platzsparendes Design |
| MCCB (Getriebener Fall) | Hochleistungsschutz | Industrielle Umgebungen | Einstellbare Fahreinstellungen, hohe Kapazität |
Standard-Leistungsschalter
Der gebräuchlichste Typ von Leistungsschaltern, die elektrische Stromkreise vor Überlastungen und Kurzschlüssen schützen sollen. Unter Bedingungen, bei denen der Strom einen festgelegten Grenzwert überschreitet, werden diese Leistungsschalter automatisch ausgelöst, um sie vor Überhitzung und anschließendem Ausfall zu schützen.
Unterbrecher für Erdschlusskreisläufe (GFCIs)
Hierbei handelt es sich um spezielle Leistungsschalter, die vor Erdschlüssen schützen, die auftreten, wenn elektrische Ströme außerhalb des vorgesehenen Weges verirren, und durch Elektroschocks eine Gefahr für das Leben darstellen können. Bruttoinvestitionsinvestitionen werden im Allgemeinen an Orten eingesetzt, die anfällig für Feuchtigkeit sind, beispielsweise in Badezimmern, Küchen und im Freien.
Lichtbogenfehler-Schaltkreisunterbrecher (AFCIs)
Der Hauptzweck von AFCIs besteht darin, schädliche Lichtbogenbedingungen in der Verkabelung zu erkennen, die zu einem Brand führen können. Sie bieten einen verbesserten Schutz, indem sie den Stromkreis unterbrechen, bevor größere Schäden auftreten, und werden hauptsächlich in Wohnzimmern, Schlafzimmern und anderen Wohnorten installiert.
Miniatur-Leistungsschalter (MCBs)
MCB ist ein sehr handliches kompaktes Gerät, das vor Überlastung und Kurzschluss schützt Diese werden normalerweise in Wohnzwecken und leichten kommerziellen Zwecken eingesetzt.
Leistungsschalter für geformte Gehäuse (MCCBs)
Diese Unterbrecher sind auf höhere Energieanforderungen zugeschnitten, bieten einstellbare Auslöseeinstellungen und bieten Platz für große Tragfähigkeiten, die sich ideal für industrielle Umgebungen eignen.
Jeder Leistungsschaltertyp wurde so konzipiert, dass er einem bestimmten elektrischen Sicherheitsbedarf entspricht, sodass in verschiedenen Szenarien und Umgebungen ein angemessener Schutz gewährleistet ist.
Bedeutung von Leistungsschaltern in elektrischen Schaltkreisen
Leistungsschalter spielen eine herausragende Rolle bei der Gewährleistung der Sicherheit und Funktionalität elektrischer Systeme. Diese dienen dazu, mögliche elektrische Brände und die Zerstörung von Geräten und Eigentum bei Fehlerbedingungen wie Überlastung, Kurzschlüssen oder Erdungsfehlern abzuwenden. Bei einer automatischen Schaltwirkung stellen sie sicher, dass Verkabelung, Geräte oder Eventualitäten nicht zu Überhitzung oder Stromstößen führen, wodurch die Wahrscheinlichkeit eines Missgeschicks verringert wird.
Darüber hinaus erweisen sich Leistungsschalter aus bequemer und wirtschaftlicher Sicht als Sicherungen überlegen, da sie nach dem Auslösen zurückgesetzt und wiederverwendet werden können. Moderne Leistungsschalter sind jetzt mit einstellbaren Auslöseeinstellungen und großen Unterbrechungskapazitäten ausgestattet, um den Anforderungen von Privathaushalten, Gewerbe und Industrie gleichermaßen gerecht zu werden. Vielseitig und zuverlässig zu sein ermöglicht es ihnen, eine elektrische Infrastruktur aufrechtzuerhalten und gleichzeitig die Sicherheitsstandards in verschiedenen Anwendungen aufrechtzuerhalten.
Vorbereitung für die Breaker-Installation
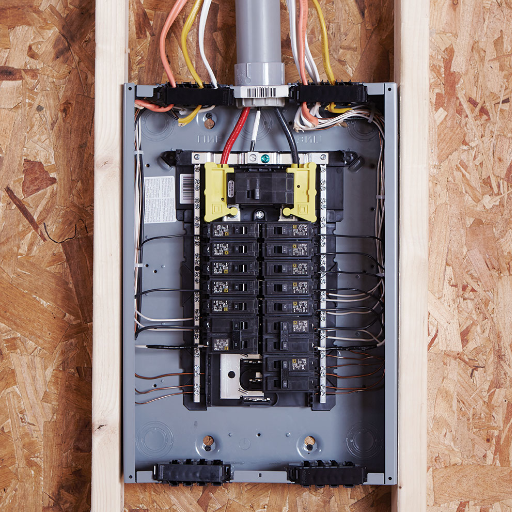
Checkliste zur Vorbereitung vor der Installation
- Verstehen Sie Ihr elektrisches System – Bestätigen Sie die Art und Kapazität Ihres Schalttafelns, um zu bestätigen, dass der Leistungsschalter, den Sie installieren möchten, kompatibel ist
- Wählen Sie den rechten Breaker – Wählen Sie einen Breaker, der den Stromkreis-Amperage- und Panel-Spezifikationen entspricht
- Schalten Sie den Strom aus – Schalten Sie den Strom für das elektrische Panel aus, um sichere Arbeitsbedingungen zu ermöglichen Verwenden Sie den Spannungsprüfer, um zu überprüfen, ob der Strom tatsächlich ausgeschaltet ist
- Beginn der Installation durch Montage von Werkzeugen – Verwenden Sie einen Schraubenzieher, einen Abisolierer und Handschuhe, um eine reibungslose Installation durchzuführen
- Überprüfen Sie die lokalen Codes. – Bestätigen Sie, dass die Installation die in den lokalen elektrischen Codes und Vorschriften festgelegten Anforderungen erfüllt, um Sicherheit und Zuverlässigkeit zu gewährleisten
Mit diesen Schritten können Sie einen sicheren und effizienten Installationsprozess durchführen.
Für die Verkabelung eines Leistungsschalters erforderliche Werkzeuge
Einige Werkzeuge, die bei der Verkabelung einer Leistungsschalterschaltung verwendet werden sollten, sind:
Wesentliche Werkzeuge
- Schraubendreher Set: Wird zum Öffnen von Plattenabdeckungen und zum Sichern von Verbindungen verwendet Sowohl Flachkopf als auch Phillips müssen im Set sein
- Abisolierer: Diese lösen die Isolierung von den Drähten, um eine saubere und präzise Verbindung herzustellen
- Spannungsprüfer oder Multimeter: Sehr notwendig, um zu überprüfen, ob der Strom ausgeschaltet ist und sicher funktioniert
- Nadelnasenzange: Nützlich, um Drähte von einer Seite zu biegen, zu formen oder zu halten
Sicherheit und Verarbeitung
- Isolierte Sicherheitshandschuhe: Zum Schutz der Hände vor Stromschlägen
- Kabelklemme oder Romex-Steckverbinder: Diese dienen zur Befestigung des elektrischen Kabels am Unterbrecherpaneel
- Elektrisches Band: Wird verwendet, um Drahtverbindungen zu isolieren und weitere Sicherheit zu gewährleisten
- Taschenlampe: Sehr praktisch, wenn man an unbeleuchteten Schalttafeln arbeiten muss
- Etikettierungsmaterialien: Beschriften Sie die Schaltkreise ausreichend, damit sie später leicht zu identifizieren sind
Indem Sie die Werkzeuge vorher bereithalten, können Sie die Verkabelung vereinfachen und gleichzeitig Sicherheit und Genauigkeit wahren.
Sicherheitsvorkehrungen vor Beginn
Kritische Sicherheitsanforderungen
Treffen Sie vor allen Arbeiten an der elektrischen Verkabelung diese Vorsichtsmaßnahmen, um Lebensrisiken zu vermeiden:
- Ausschalten Strom: Schalten Sie das Hauptnetzteil immer durch das Unterbrecherpanel aus Verwenden Sie einen Spannungsprüfer, um zu prüfen, ob Strom unter Spannung steht, bevor Sie fortfahren
- Verschleißschutzausrüstung: Tragen Sie Isolierhandschuhe und Schutzbrillen als Schutz vor Stromschlägen und Schmutz
- Arbeit in trockener Umgebung: Überprüfen Sie, ob die Arbeitsumgebung trocken bleibt, da das Vorhandensein von Wasser das Risiko eines Stromschlags drastisch erhöht
- Verwenden Sie die richtigen Tools: Verwenden Sie ausschließlich Werkzeuge mit isolierten Griffen, die für elektrische Arbeiten ausgelegt sind
- Kennen Sie Ihre Verkabelungsdiagramme: Machen Sie sich mit dem Layout und den Schaltplänen des Leistungsschalters vertraut, um Verwirrung und Fehler zu vermeiden
- Arbeiten Sie niemals alleine: Wenn möglich, versuchen Sie, jemanden für die Notfallreaktion in der Nähe zu haben
Wenn Sie diese Vorsichtsmaßnahmen treffen, werden Sie vor allen Arten von Gefahren geschützt und die Leistung während der Verkabelung verbessert. Bei der Stromversorgung muss immer die Sicherheit im Vordergrund stehen.
Identifizieren des richtigen Leistungsschalters für Ihre Bedürfnisse
Die Wahl des falschen Unterbrechers könnte die Sicherheit und Funktionalität eines installierten elektrischen Systems beeinträchtigen. Einige der Parameter für die Auswahl eines Unterbrechers sind:
Kennen Sie den Typ des Leistungsschalters
Arten von Leistungsschaltern können einpolige, zweipolige, GFCI (Ground Fault Circuit Interrupters) und AFCI (Arc Fault Circuit Interrupters) sein. Abhängig von den Sicherheits- und Anwendungsanforderungen Ihrer Schaltung wird bestimmt, welcher Typ dort installiert werden soll.
Kennen Sie die Amperage-Bewertung
Leistungsschalter werden danach bewertet, wie viele Verstärker sie voraussichtlich handhaben werden. Leistungsschalter für Privathaushalte haben normalerweise eine Reichweite von 15 bis 50 Ampere. Der ausgewählte Leistungsschalter sollte die richtige Stromstärke haben, um der Nennleistung der Last zu entsprechen, um Überhitzung und vorzeitige Auslösung zu vermeiden.
Überprüfen Sie die Kompatibilität mit Ihrem Panel
Es können nicht alle Unterbrecher ausgetauscht werden, da diese zur Marke und zum Modell Ihres Schalttafel passen müssen. Beachten Sie die Herstellerrichtlinien Ihres Schalttafel, um sicherzustellen, dass Sie einen kompatiblen Unterbrecher kaufen.
Betrag zu Spannungsanforderungen
Überprüfen Sie, ob Ihr Stromkreis einen einphasigen oder dreiphasigen Unterbrecher benötigt, und bestätigen Sie, dass seine Nennspannung den Anforderungen für diesen Stromkreis entspricht. Dadurch wird die Sicherheit gewährleistet und eine Beschädigung der Ausrüstung vermieden.
Sorgen Sie für eine ordnungsgemäße Zertifizierung
Wählen Sie Unterbrecher, die den Sicherheitsspezifikationen entsprechen, z.B. über eine UL-Zertifizierung (Underwriters Laboratories) verfügen, um sicherzustellen, dass sie zuverlässig sind und den elektrischen Vorschriften entsprechen.
Durch gründliche und sorgfältige Prüfung von Typ, Stromstärke, Kompatibilität, Spannung und Zertifizierung können Sie den richtigen Leistungsschalter für die elektrische Last und eine sichere Umgebung in Ihrem Haus oder Arbeitsplatz finden.
Schrittweiser Installationsprozess
1. Ausschalten
Schalten Sie die Ain-Leistung aus und überprüfen Sie dies mit einem Spannungsprüfer
2. Panel entfernen
Entfernen Sie vorsichtig die Plattenabdeckung, um an die Unterbrecher zu gelangen
3. Installieren Sie den Breaker
Positionieren und reißen Sie den Unterbrecher ein
4. Drahtverbindungen
Heiß-, Neutral- und Erdungskabel verbinden
5. Testen und finalisieren
Anschlüsse testen und die Abdeckung austauschen
Schritte zum Verkabeln eines Leistungsschalters
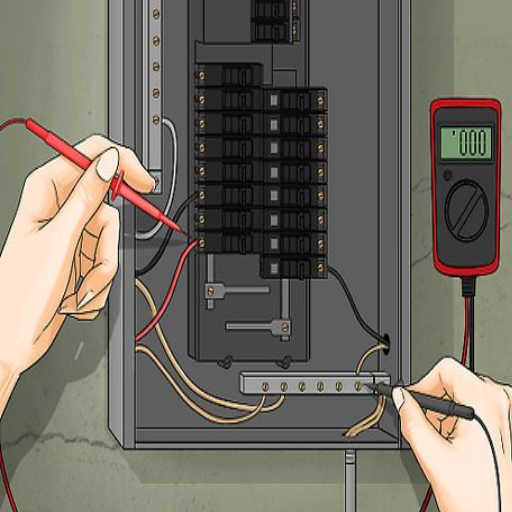
- Schalten Sie die Hauptstromversorgung aus: Bevor Sie mit der Arbeit beginnen, müssen Sie den Hauptstrom abschalten, um die Sicherheit zu gewährleisten und das Risiko eines Stromschlags zu vermeiden.
- Entfernen der Panelabdeckung: Schrauben Sie vorsichtig ab und entfernen Sie die Plattenabdeckung, um Zugang zu den Unterbrecherschlitzen innerhalb des Schalttafel zu erhalten.
- Wählen Sie den richtigen Steckplatz: Wählen Sie einen offenen Schlitz, damit er den neuen Leistungsschalter akzeptiert, den Sie einbauen müssen.
- Schließen Sie die Stromkreisdrähte an: Befestigen Sie den heißen Draht des Stromkreises (normalerweise schwarz) am Unterbrecheranschluss und ziehen Sie die Schraube fest. Verbinden Sie den neutralen Draht (weiß) mit der neutralen Sammelschiene und den Erddraht (grünes oder blankes Kupfer) mit der Erdsammelschiene.
- Schnippen Sie den Breaker an Ort und Stelle: Drücken Sie den Unterbrecher leicht in den ausgewählten Schlitz und setzen Sie ihn mit einem Schnappschuss richtig ein.
- Prüfen und sichern: Überprüfen Sie noch einmal, ob alle Verbindungen fest und sicher sind und ob der Unterbrecher selbst richtig im Panel sitzt.
- Installieren Sie die Panelabdeckung neu: Nach Abschluss der Verkabelung und der Anschlüsse kann die Plattenabdeckung wiederhergestellt und wieder in Position geschraubt werden.
- Testen Sie den Schaltkreis: Schalten Sie die Hauptstromversorgung wieder ein und schieben Sie den neuen Unterbrecherschalter in die Position “EIN” Testen Sie die Schaltung, um sicherzustellen, dass sie richtig funktioniert.
Wenn man alles sorgfältig durchführt, gewährleisten diese Schritte eine effiziente und sichere Verkabelung eines Leistungsschalters; Wenn Sie Zweifel haben, wenden Sie sich an einen Elektriker, der dafür sorgt, dass die Installation ordnungsgemäß durchgeführt wird.
Lokalisierung des Breaker Panels
Es ist wichtig, die Unterbrecherverkleidung Ihres Hauses zu lokalisieren, wenn Sie das Stromsystem verwalten Im Allgemeinen finden sich Unterbrecherverkleidungen in den Versorgungsbereichen im Keller, in der Garage oder im Lagerraum. Sie können auch an einer Außenwand angebracht werden, um einen bequemen Zugang im Freien zu ermöglichen Identifizieren Sie einen flachen oder leicht vertieften Metallkasten an der Wand. Der genaue Standort variiert je nach örtlichen Bauvorschriften: Es kann auch in der Nähe des Stromeingangs in das Haus sein, beispielsweise in der Nähe eines Stromzählers. Wenn Sie die Unterbrecherverkleidung nicht finden können, können Sie den Bauplan Ihres Hauses überprüfen oder einen Elektriker um Hilfe rufen.
Entfernen der Plattenabdeckung
Durch Befolgen dieser Anweisungen wird sichergestellt, dass die Plattenabdeckung sicher entfernt wird:
- Eine Frage der Sicherheit: Man muss sicherstellen, dass der Hauptbrecher ausgeschaltet ist, wodurch die Kraft auf die gesamte Platte abgetötet wird Tragen Sie immer isolierte Handschuhe und stehen Sie auf einer trockenen, nicht leitenden Oberfläche, um sich vor Stößen zu schützen.
- Schraubenstandort: Suchen Sie nach den Schrauben oder Befestigungselementen, die die Abdeckung an Ort und Stelle halten Normalerweise an den Ecken oder Kanten der Platte zu finden.
- Schrauben Sie ab: Entfernen Sie mit Ihrem Schraubenzieher die Schrauben und sorgen Sie gleichzeitig für einen festen Halt der Abdeckung, damit diese nicht herunterfällt.
- Entfernen Sie die Abdeckung: Positionieren Sie sich so, dass Sie die Abdeckung vorsichtig anheben und sie stabil halten können, um keine inneren Komponenten einzuschließen.
- Inspect the Inside-The-DE-Panel: Bei ausgeschalteter Abdeckung ist es möglich, die Leistungsschalter und Verkabelungsanschlüsse zu erkennen.
Warnung: Potenziell gefährliche elektrische Komponenten unter Spannung können Verletzungen im Inneren des Panels verursachen Wenn Sie nicht qualifiziert sind, treten Sie nicht in das Panel ein, berühren Sie es nicht, arbeiten Sie nicht darin oder interagieren Sie in irgendeiner Weise mit ihm Wenn Sie sich bei keinem dieser Schritte sicher sind, irren Sie sich immer auf Nummer sicher und konsultieren Sie einen zugelassenen Elektriker.
Verkabelung des neuen Leistungsschalters
- Ausschalten des gesamten Boards: Denken Sie daran, den Hauptschalter auszuschalten, der die Stromversorgung des gesamten Boards unterbricht. Überprüfen Sie ihn noch einmal mit einem Spannungsprüfer, um sicherzustellen, dass keine Spannung anliegt.
- Wählen Sie einen geeigneten Slot aus: Finden Sie alle freien Steckplätze im Leistungsschalterfeld, die einen neuen Leistungsschalter der Größe und des Typs aufnehmen können, den Sie installieren Stellen Sie sicher, dass der Leistungsschalter zum Bedienfeldmodell passt.
- Fügen Sie den Breaker ein: Stecken Sie den neuen Leistungsschalter in den gewählten Schlitz und richten Sie ihn an der Montagekonstruktion des Paneels aus. Drücken Sie ihn fest, bis er sicher einrastet.
- Draht der Brecher: Befestigen Sie die Leitungsdrähte an den Unterbrecherklemmen Normalerweise geht der heiße (schwarze) Draht zum Unterbrecher selbst; der neutrale (weiße) Draht geht an die neutrale Stange, wenn ein Erdungsdraht verfügbar ist, schließen Sie ihn an den Erdungsbus im Panel an.
- Überprüfen Sie Ihre Verbindungen: Überprüfen Sie noch einmal, ob alle Drahtverbindungen fest und sicher sind. Lose Verbindungen können zu Kurzschlüssen oder Überhitzung führen.
- Ersetzen Sie die Abdeckung: Sobald jede Verkabelung und Geräteinstallation im Inneren des Paneels sicher und noch einmal überprüft wurde, legen Sie die Paneelabdeckung vorsichtig zurück und befestigen Sie sie mit den Schrauben.
- Wiederherstellen von Leistung und Test: Schalten Sie den Hauptschalter wieder in die Netzposition, und dann schalten Sie den neuen Leistungsschalter ein Prüfen Sie, ob Ihre Schaltung ohne Überlastung einwandfrei funktioniert.
Sicherheitshinweis
Bei Arbeiten an elektrischen Anschlüssen besteht immer ein hohes Risiko, wenn Sie nicht mit voller 1001TP3 T-Konfidenz sagen können, dass Sie diese Arbeit erledigen können, dann bitten Sie einen Elektriker darum Denken Sie immer daran, dass Ihre Sicherheit an erster Stelle steht.
Verbinden Sie die Bremse mit Ihrem Schalttafel
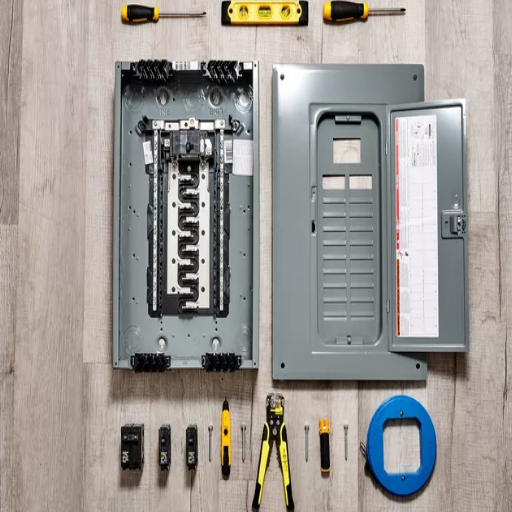
- Stellen Sie sicher, dass der Strom ausgeschaltet ist: Schalten Sie den Hauptschalter im Panel aus, um die Stromversorgung zu unterbrechen und sicherzustellen, dass die Arbeit auf dem Panel sicher ist Überprüfen Sie mit einem Spannungsprüfer, ob keine Stromversorgung vorhanden ist.
- Überprüfen Sie das Gremium: Überprüfen Sie den Unterbrecherschlitz auf Kompatibilität und stellen Sie sicher, dass nichts vorhanden ist, das ihn behindert Stellen Sie sicher, dass der Schlitz für den Unterbrechertyp korrekt ist.
- Problem beim Breaker: Positionieren Sie den Unterbrecher in seinem Schlitz innerhalb des Panels und geben Sie ihm dann einen ausreichenden Druck, bis Sie ein Klicken hören, das anzeigt, dass er gesperrt ist.
- Befestigen Sie die Drähte: Schließen Sie den heißen Draht des Stromkreises an den Schraubanschluss des Unterbrechers an und ziehen Sie ihn richtig fest. Garantieren Sie, dass kein Drahtstrang hinter dem Anschluss freiliegt.
- Alle Verbindungen erneut prüfen: Stellen Sie sicher, dass alle Verbindungen sicher sind und dass der Unterbrecher vollständig in seinen Schlitz eingelassen ist.
- Wiederherstellen von Leistung und Test: Schalten Sie den Hauptschalter ein Als nächstes schalten Sie den neu installierten Unterbrecher ein und testen Sie die von ihm gesteuerte Schaltung mit einem Spannungsprüfer auf ordnungsgemäßen Betrieb.
Sicherheit zuerst Wenn Sie sich bei einem Schritt nicht sicher sind, beauftragen Sie immer einen lizenzierten Elektriker.
Verständnis des Schalttafellayouts
Das elektrische Hauptpaneel ist die Grundsteuerung für alle Stromversorgungen eines Gebäudes, mit der Absicht, Strom an verschiedene Stromkreise im ganzen Haus oder auf dem Grundstück zu verteilen, um einen sicheren und effizienten Betrieb zu fördern. Im Inneren des Paneels sind Leistungsschalter installiert, die als Schutzvorrichtungen gegen Überlastung und elektrische Gefahren dienen. Diese Leistungsschalter entsprechen bestimmten Stromkreisen im Innen- oder Außenbereich eines Hauses, das für bestimmte Bereiche und/oder Geräte in Betrieb ist.
Suchen Sie bei der Identifizierung von Schaltkreisen nach Etiketten um oder in der Nähe der Unterbrecher, die Räume oder Geräte identifizieren, die sie steuern. Dann kommt der Hauptunterbrecher, der normalerweise ganz oben zu finden ist und dazu dient, in Notfällen schnell den Strom für das gesamte Panel abzuschalten. Eine Installation von Unterpanels kann auch für noch größere Gebäude oder bestimmte Bereiche nützlich sein, um weitere Kontrolle und Flexibilität zu bieten.
Das Verständnis des Layouts ist sehr wichtig, wenn Sie an der Fehlerbehebung bei elektrischen Problemen, der Installation neuer Schaltkreise oder sogar dem Zurücksetzen von Auslöseunterbrechern arbeiten Beauftragen Sie immer einen lizenzierten Elektriker, der alle komplexen Änderungen oder Reparaturen vornimmt, um die Sicherheit und Einhaltung lokaler elektrischer Vorschriften und Standards zu gewährleisten.
Richtiges Verbinden des Brechers
Je nach ein paar einfachen Dingen kann ein Unterbrecher angeschlossen werden.
Vorbereitung und Power-Switch-Off
Beginnen Sie mit dem Abschalten des Hauptschalters Achten Sie darauf, die Überprüfung mit einem Spannungsprüfer noch einmal durchzuführen, um sicherzustellen, dass dem Panel kein Strom zugeführt wird Elektrische Gefahren können entstehen, wenn diese Vorsichtsmaßnahme übersehen wird Achten Sie immer darauf, dass Sie isolierte Werkzeuge verwenden und sorgen Sie für Sicherheit für sich, wie zum Beispiel mit isolierten Handschuhen.
Wählen Sie den geeigneten Breaker
Stellen Sie sicher, dass der Unterbrecher, den Sie gerade installieren möchten, in Bezug auf Stromstärke, Kompatibilität und Typ zum Panel passt. Falsche Unterbrecher funktionieren entweder nicht ordnungsgemäß oder stellen eine potenzielle Gefahr dar.
Lokalisieren und positionieren Sie den Breaker
Suchen Sie den Schlitz, in den der Unterbrecher eingesetzt wird. Rippen Sie ihn ein, indem Sie ihn an der Montageschiene ausrichten. Geben Sie dem Unterbrecher einen guten Druck, um sicherzustellen, dass er gut sitzt.
Verkabelung anbringen
Abisolierung des Drahtes (falls erforderlich) und Befestigung am Anschluss am Unterbrecher Ziehen Sie die Schraube dann fest an, aber ziehen Sie den Draht nicht zu fest und brechen Sie ihn. Überprüfen Sie den Draht noch einmal, um sicherzustellen, dass er richtig sitzt.
Überprüfung und Wiederherstellung der Stromversorgung
Stellen Sie sicher, dass alle Arbeiten außerhalb des Panels sind, sobald der Unterbrecher fest installiert und angeschlossen ist Schalten Sie den Hauptunterbrecher ein und überprüfen Sie, ob der Stromkreis ordnungsgemäß funktioniert.
Wenn Ihnen die Erfahrung fehlt oder Sie zu irgendeinem Zeitpunkt unsicher werden, wird dringend empfohlen, einen zugelassenen Elektriker zu konsultieren oder zu beauftragen, um sicherzustellen, dass Ihr elektrisches System sicher und funktionsfähig ist.
Tests und letzte Schritte
Testen Sie Ihre Verbindungen
Sobald alle Verbindungen abgeschlossen sind, muss ihre Wirksamkeit zur Gewährleistung der Sicherheit und Arbeitsordnung sichergestellt werden.
- Testen Sie die Spannung der Schaltung mit einem Multimeter und prüfen Sie, ob sie der erwarteten Spannungsausgabe entspricht
- Schalten Sie alle angeschlossenen Geräte oder andere Geräte ein, um zu sehen, ob sie richtig funktionieren
- Jedes seltsame Verhalten, wie z. B. flackernde Lichter oder ein summendes Geräusch, kann ein Hinweis auf fehlerhafte Verbindungen oder ein anderes Problem sein
- Sollten dennoch Probleme auftreten, schauen Sie nochmals über die Verkabelung und die Anschlüsse oder rufen Sie einen zugelassenen Elektriker hinzu
Sicherheit zuerst: Halten Sie beim Testen alle Werkzeuge und Hände von spannungsführenden Leitungen fern.
Fertigstellung der Installation
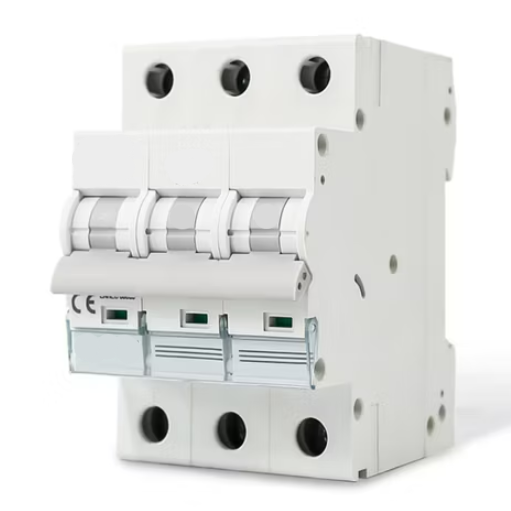
Nun, um die Installation zu beenden, stellen Sie sicher, dass alle Geräte und Geräte korrekt arbeiten und durch alle durchgeführten Tests Behandeln Sie sofort Anomalien wie flackernde Lichter oder seltsame Geräusche, indem Sie die Verbindungen überprüfen oder die Fachleute konsultieren Sichere Verkabelung und Komponenten, und stellen Sie sicher, dass alle Sicherheitsvorschriften erfüllt sind Nach der Bestätigung den Arbeitsplatz aufräumen, Trümmer gewissenhaft entsorgen und Installationsaufzeichnungen für zukünftige Referenz aufbewahren Stellen Sie sicher, dass die Sicherheit während der Installation absolut ist.
Ersetzen der Panelabdeckung
Der Austausch der Plattenabdeckung erfordert die Sicherung des Bereichs und die Entfernung aller Werkzeuge und Materialien, die Gefahren bergen oder einfach unbequem um die Platte herum sein könnten. Nachdem die Abdeckung richtig auf die Plattenbox ausgerichtet wurde, muss überprüft werden, dass keine Brecherschalter oder Komponenten locker darunter hervorstehen. Die Plattenabdeckung sollte dann mit Schrauben befestigt werden, um ein gleichmäßiges Anziehen zu gewährleisten, damit keine Lücken entstehen. Überprüfen Sie noch einmal, ob die Abdeckung bündig mit dem Plattenkasten liegt, behindert weder die Brecher noch die Zugangspunkte. Diese Bereiche sollten dann auf lose Ablagerungen oder aufgehängte Gegenstände überprüft werden, und die Platte sollte für zukünftige Benutzerfreundlichkeit fest gekennzeichnet sein. Bei der Handhabung der Abdeckung und der Schrauben sollte immer darauf geachtet werden, dass nicht alle Sicherheitsvorgänge beachtet werden.
Testen der Leistungsschalterfunktionalität
Zur Überprüfung der Bedienung von Unterbrechern sorge ich zunächst dafür, dass alle angeschlossenen Lasteinrichtungen vollständig ausgeschaltet sind, um Schäden im Falle einer Prüfung zu vermeiden, dann wird jeder Leistungsschalter ausgeschaltet und wieder eingeschaltet, um die Laufruhe zu testen, mittels eines Spannungsprüfers würde ich die Spannung an den Ausgangsklemmen der Unterbrecher überprüfen, etwaige Unstimmigkeiten werden ordnungsgemäß vermerkt, was einer weiteren Überprüfung oder einem Austausch bedarf Dieses Verfahren garantiert den korrekten Betrieb der Unterbrecher und die Sicherheit der elektrischen Anlage.
Letzte Sicherheitserinnerung
Denken Sie daran: Elektrische Arbeiten sind von Natur aus gefährlich und können bei unsachgemäßer Ausführung zu schweren Verletzungen, zum Tod oder zu Sachschäden führen Dieser Leitfaden dient nur zu Bildungszwecken Immer:
- Wenden Sie sich bei allen elektrischen Arbeiten an einen zugelassenen Elektriker
- Besorgen Sie sich ordnungsgemäße Genehmigungen gemäß den örtlichen Vorschriften
- Befolgen Sie alle örtlichen elektrischen Vorschriften und Vorschriften
- Versuchen Sie niemals, über Ihr Können hinaus zu arbeiten
- Im Zweifelsfall einen Profi beauftragen
Referenzquellen
Optimierung der adaptiven Steuerungstechnik für netzintegriertes PV-DSTATCOM
Häufig gestellte Fragen (FAQs)
Wie verkabelt man einen neuen Leistungsschalter?
Die Verkabelung eines neuen Leistungsschalters muss immer das Abschalten der Hauptstromversorgung, das Weglegen der Plattenabdeckung, das Verbinden des schwarzen Heißkabels mit dem Anschluss des Leistungsschalters, die Verkabelung des weißen Neutralleiters mit dem Neutralleiterbus und das Befestigen sowohl der schwarzen als auch der weißen Drähte umfassen. An dieser Stelle kann die Plattenabdeckung wieder aufgesetzt und der Strom eingeschaltet werden.
Wie stelle ich einen Leistungsschalter in die Leistungsschalterbox?
Beginnen Sie mit dem Ausschalten des Hauptschalters Entfernen Sie die Panelabdeckung, wählen Sie dann einen verfügbaren Schlitz im elektrischen Panel aus Verbinden Sie den schwarzen Heißdraht des Zweigstromkreises mit dem Unterbrecheranschluss, und verbinden Sie den weißen Neutralleiter mit dem Neutralleiterbus Sichern Sie den Unterbrecher am elektrischen Panel, tauschen Sie die Panelabdeckung aus, und stellen Sie die Stromversorgung wieder her.
Was soll ein Leistungsschalter?
Ein Unterbrecher ist eine Sicherheitsvorrichtung, die dazu beiträgt, Stromkreise vor Überlastschäden und Kurzschlüssen zu schützen. Die Unfähigkeit, Strom zu unterbrechen, sobald ein Fehler erkannt wird, kann Gefahren wie Brände oder Schäden an Geräten verursachen.
Wie gehe ich vor, wenn ich einem Schaltkreis mehr hinzufüge?
Sie wählen zunächst den geeigneten Leistungsschaltertyp aus, schalten die Hauptleistung aus und stecken den Leistungsschalter in einen verfügbaren Schlitz im Leistungsschalterfeld. Anschließend befestigen Sie die Leitungsdrähte am Leistungsschalter und prüfen Sie, ob eine ordnungsgemäße Sicherung stattgefunden hat, bevor Sie den Strom wieder einschalten.
Was sollte ich noch wirklich über die Verkabelung von Leistungsschaltern wissen?
Bei der Verkabelung von Leistungsschaltern sollte man darauf achten, dass die verwendeten Drähte der für die Stromstärke des Leistungsschalters erforderlichen Anzeige entsprechen. Verbinden Sie den schwarzen (heißen) Draht mit dem Leistungsschalteranschluss und den weißen (neutralen) Draht mit dem neutralen Bus. Beachten Sie immer Sicherheitsvorkehrungen und suchen Sie Hilfe bei einem Elektriker, wenn Sie sich nicht sicher sind.
Kann der Hauptleistungsschalter im Leistungsschalterfeld ausgetauscht werden?
Ja, der Hauptleistungsschalter kann in einem Leistungsschalterfeld ausgetauscht werden. Normalerweise wird der gesamte Strom ausgeschaltet, die Abdeckung entfernt, der alte Leistungsschalter herausgenommen und dann der neue Leistungsschalter installiert und im Karton gesichert. Die Verbindungen müssen überprüft werden, um eine Dichtheit und keine Bewegung zu gewährleisten, bevor die Plattenabdeckung wieder aufgesetzt wird.
Was ist ein Erdschluss-Schaltkreisunterbrecher?
Erdschluss-Schaltkreisunterbrecher schützen vor Stromschlägen, indem sie eine Überprüfung der Strombilanz durchführen, wenn ein Ungleichgewicht in Sekundenbruchteilen festgestellt wird, wird der Strom abgeschaltet Dieser Schutz ist in Bereichen, in denen Wasser vorhanden ist, unerlässlich.
Wie verkabele ich einen neuen Abzweigkreis?
Vor der Verkabelung neuer Abzweigkreise zunächst den Strom abstellen Führen Sie die richtigen Drähte von der Unterbrecherbox zur Auslassstelle durch Verbinden Sie den schwarzen Heißdraht mit dem Leistungsschalter, den weißen Neutralleiter mit dem Neutralleiterbus und erden Sie den blanken Draht mit der Erdungsstange im Panel.
Was ist der Unterschied zwischen Einzel - und Nebenstromkreisen?
In einem einzelnen Stromkreis kann es einen Auslass oder ein Gerät geben; Umgekehrt verfügt ein Abzweigstromkreis über Auslässe oder steuert Lasten. Ein Hauselektriker muss diese Unterscheidung berücksichtigen, sodass ein aufgebauter Stromkreis niemals ein Überlastungsproblem haben wird.