Especially for those who love the RV lifestyle, going solar is a significant move towards gaining energy independence and sustainability, too. Solar kits with RV inverters can be used to convert sunlight into electricity for powering vehicles, lower dependence on fossil fuels, and reduce the negative ecological impacts that come with this. The main focus of this article is to give readers wide-ranging knowledge about the benefits of solar power for RV users; it also provides in-depth details concerning how to choose the right type of solar kit(s) and expert tips for installing/maintaining an RV inverter. Armed with these basic facts plus some recommended procedures, individuals can make better choices when traveling while saving our environment. Call us now if you want more details about maximizing your use of solar energy!
What Do You Need to Start with Go Power Solar?
Step-by-Step Guide to Choosing a Solar Kit
- Determine Your Power Needs: Calculate the sum of all devices’ wattage that you plan to run with the help of the solar kit. Our terms have more details about this, which also takes into account daily energy consumption and peak power requirements.
- Evaluate Your Budget: Allocate a budget for your solar installation. Different kits come at different prices and therefore having a budget will help you narrow down on what suits yours best.
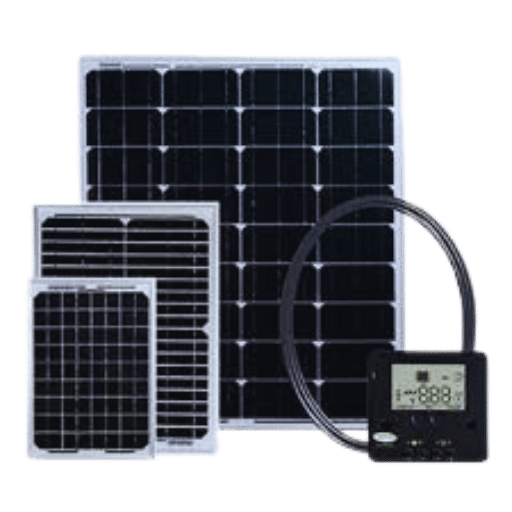
- Choose the Right Solar Panels: Efficiency, size, and type (monocrystalline, polycrystalline or thin-film) are some of the factors to consider when selecting solar panels. Usually higher efficient panels perform better but may be expensive.
- Examine Charge Controllers: Choose an appropriate charge controller (PWM or MPPT) to regulate voltage from solar panels ensuring no overcharge or damage is caused to batteries.
- Select Suitable Batteries: For energy storage go for either lead-acid or lithium-ion batteries considering aspects like capacity, lifespan and weight among others.
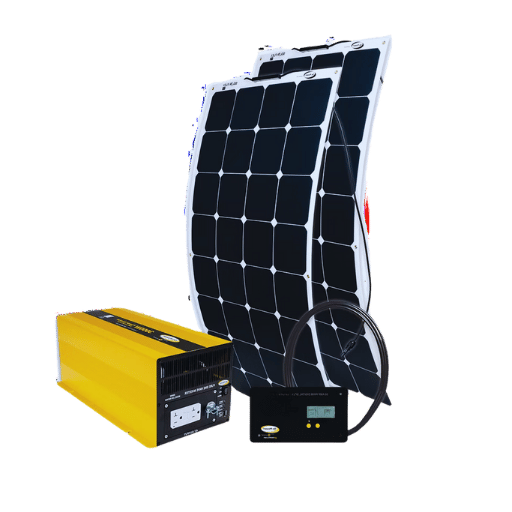
- Choose an Inverter: Select an inverter that matches your total watt needs which converts DC power from batteries to AC power used by household appliances.
- Portability And Installation Considerations: If you will frequently be moving them around then ensure components of the solar kit are easy to install as well as portable.
- Review Warranty And Support Options: Check manufacturer’s warranty period together with customer support options in place for long-term reliability whenever need arises.
Understanding Solar Panels and Their Efficiency
Solar panel efficiency measures how good a solar panel is at converting sunlight into usable electricity. More efficient panels produce more power per square foot, which makes them ideal for installations with limited space. There are three main types of solar panels to choose from:
- Monocrystalline Panels: These panels have the highest efficiency and longest lifespan among all types on the market. They are made out of single-crystal silicon and tend to be more expensive.
- Polycrystalline Panels: This type is made from multiple silicon crystals, offering a balance between cost and efficiency. Although slightly less efficient than monocrystalline ones, polycrystalline panels remain one of the most popular choices for residential installations thanks to their heavy photovoltaic configuration.
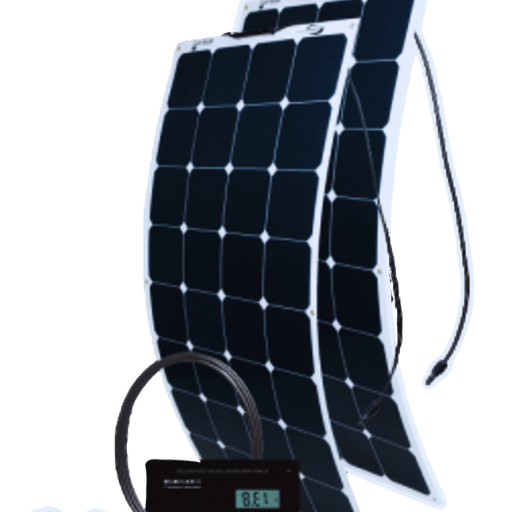
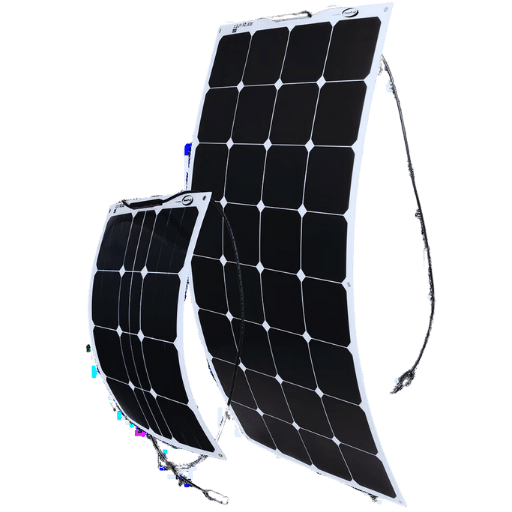
- Thin-Film Panels: Thin-film panels are less efficient but lightweight and flexible. Because they are made from various materials, they work well on unconventional surfaces or applications.
Efficiency ratings should be considered when comparing different solar modules; these usually appear as a percentage figure representing conversion rates achieved during laboratory testing under standard conditions. The higher this number is, that particular module can generate more power within a limited area – useful in places where roof space may be scarce or local electricity demand is very high. Another factor worth looking at would be the cost per watt ($/W) installed capacity; this value indicates how much money needs to be spent before generating a certain amount of electricity needed over a given period (e.g., a year). Durability should also factor into the decision-making process along with manufacturer warranty support services offered by each brand under consideration.
Decoding the Various Solar Controllers
Solar control systems, also called charge controllers, are necessary parts of a solar power system. They control the voltage and current coming from the solar panels to the battery pack, stopping overcharging and ensuring that it remains in good health throughout. There are two main types of solar controls:
- Pulse Width Modulation (PWM) Controllers: As the battery gets full, these regulators steadily decrease the power so that it stays fully charged. PWM controls are dependable, simple and cheap; they are best suited for smaller units where efficiency is not a major concern.
- Maximum Power Point Tracking (MPPT) Controllers: These ones do more advanced work, being efficient at continuously tracking an optimal voltage and current needed to ensure maximum power comes from a solar panel. MPPTs convert excess volts into amps, which makes them ideal for bigger installations demanding high performance while keeping efficiency at the top of the priority list.
When choosing a solar controller, one should consider factors such as system size, efficiency requirements, and budgetary constraints. However, considering larger systems, especially those that require higher performance levels, then, generally speaking, people go for MPPT controllers because they offer better results in terms of overall productivity than PWM counterparts would ever provide, even if all other things were constant, like simplicity or cost-effectiveness. Additionally, ensure that the capacity of your controller matches voltage/current needs within your setup; review the manufacturer’s warranty coverages/service provisions for added reliability in long-run assistance
How Do You Install a Complete Solar and Inverter System?
Installation Process Explained
- Site Assessment and Planning: Evaluate the area where solar panels will be placed. Ensure it gets enough sun and determine the most ideal spots for mounting them. Then, design the whole system layout, including where to put panels, batteries, charge controllers, and inverters.
- Mounting the Solar Panels: Install solar panels on roofs or ground mounts using proper mounting hardware. Ensure they are angled correctly throughout the year to gain maximum sun exposure.
- Wiring the Solar Panels: Link solar panels in series or parallel configurations according to the system’s design. Use suitable connectors and solar cables for efficient and safe power transmission.
- Installing The Charge Controller: Position charge controller next to battery bank for easy monitoring access. Connect solar panel output with charge controller input then connect charge controller output to battery bank.
- Setting Up The Battery Bank: The Battery bank stores energy produced by solar extreme systems to have a continuous power supply. Place batteries in a well-ventilated, cool place. Connect batteries in series or parallel depending on the required system voltage match. Ensure all connections are tight and secure against any power loss.
- Connecting The Inverter: Mount the inverter near the battery bank. Connect the battery’s output with the inverter’s DC input. Then, link the inverter’s AC output to either the household electrical or grid system, depending on your needs.
- System Testing And Configuration: After finishing making all connections, check each component to see whether it is properly installed or connected. Power up the system and configure charge controller settings together with the inverter according to manufacturer instructions. Test whether power is generated by this device and stored by another device work together as expected.
- Monitoring and Maintenance: Regularly monitor the system’s performance; clean solar panels from time to time; inspect all electrical connection points for signs of wear out or damage that may cause poor contact, which may lead to high resistance at such places, resulting in heat production, causing a fire outbreak.
By following these steps, one can install complete solar and inverter systems that will ensure sustainable and reliable energy production for one’s needs.
Required Tools and Materials
To properly install a solar and inverter system, you will need to have the following tools and materials:
- Photovoltaic Panels: These are solar panels that convert sunlight into electricity.
- Charge Controller: It regulates voltage and current from PVs to the battery bank.
- Battery Bank: A battery bank is where energy generated by photovoltaic panels is stored for later use.
- Inverter: Direct current (DC) power is converted into alternating current (AC) to be used in household appliances or fed back into the grid.
- Mounting Hardware: Brackets, rails, fasteners – all these things are needed to secure photovoltaic panels safely.
- Cabling and Wiring: You’ll also need electrical cables and wiring to connect different components.
- Disconnect Switches: They allow you to turn off parts of the system for servicing or emergency purposes without shutting down everything at once.
- Fuses & Breakers: Protective devices that prevent short circuits and overload currents from damaging your equipment.
- Multimeter: Measure voltage, current, and resistance during installation and maintenance – use a multimeter to track precise volt readings
- Drill and Drill Bits: Mount brackets, secure components
- Screwdrivers & Wrenches: Tighten connections, secure components
- Ladder For optimal off-grid performance the solar extreme ladder arrangement can aid in setup process on RVs. Ladders help with reaching roof-mounted solar panels safely.
- Personal Protective Equipment (PPE): Gloves goggles etc..
Connecting the Solar Panels to Your RV
To connect your RV with the solar panels, you should choose a proper place on its roof that gets maximum sunlight exposure during the day. Attach solar panels firmly with given brackets and make sure they are at the best angle for catching sun rays. Afterward, lead wires from these panels to a charge controller while avoiding any sharp objects that might cut through or damage them when routing cables anywhere along this path. At last, join the negative wire of one side terminal from each panel together alongside the positive wire of other opposite pole terminals respectively onto either end terminal (negative) & another end (positive) of the battery charger; then connect both sets’ positive leads onto corresponding charge control pins where it is labeled “connect array.”
Then connect the battery bank following the manufacturer’s instructions about correct wiring methods as well as settings configurations, for example, voltage limits, etcetera, so that everything works perfectly without causing any harm due to short circuits; etcetera thus, all connections must be physically tight fitting together correctly insulated, preventing insulation breakdown which might result into electrical faults occurring sooner than later also take note not over tighten nuts bolts screws which may lead breakage such fasteners thereby giving rise loose joints thereby leading weak points whose failure could cause fire outbreak.
Once you have done this properly, secure them by putting screws into appropriate holes provided brackets after aligning mounting holes on panel frames with those already drilled through the rooftop surface under lugs where possible if not, then use self-tapping metal roofing screws through pre-drilled pilot holes in order to avoid splitting timber battening beneath which would otherwise need replacing afterward because it becomes difficult even impossible remove damaged shingles one by one above mounted position finally secure tightly enough so that there’re no gaps between module frame rails across system area.
How Much Watt Solar Power Do You Need for Your RV?
Calculating Your RV’s Energy Needs
To calculate the energy demands for your RV, it is important that you are very detailed so as to install the right solar system. First, I put down all the electric appliances that I intend to use inside my motorhome, which include lights, a fridge, a water pump, a television, and a laptop. Then I wrote beside each appliance its wattage and estimated how many hours per day it would run. After that, I multiplied hours by watts, which gave me watt–hours per day of each gadget. Having added them up together gave me daily energy consumption of my RV in watt -hours.
The next thing to think about is the average number of peak sunshine hours available per day at places where one goes frequently camping, which usually varies from 4-6hrs; by dividing total daily energy usage by these peak sun hrs, we get solar panels’ total required wattage, e.g., if my recreational vehicle consumes 2400watts hour in a day and am expecting to get 5hrs of sunlight then I will require a 480 watts solar panel (2400/5=480). Also included were some losses due to efficiency or other factors, hence an increase in panel size by between twenty and twenty-five percent for continuous power supply without fail; this way enabled me to estimate accurately what amount of electricity can be generated by different types of arrays on various terrains under different conditions thus enabling one select appropriate rv solar setup
Choosing Between Different Watt Solar Kits
While selecting amidst many solar kits of different wattages, I looked mainly at power output, efficiency, and ease of use. What I found out is that 100-watt solar kits work well for RVs with minimum energy needs, and they only power basic appliances like lighting or small electronics. On the other hand, if you have moderate energy requirements, such as running a fridge and occasionally watching TV/laptop, then 200 watts would be better since it strikes a balance between capacity and space, whereas 400 watts or higher should be used when you intend to use them extensively, e.g., air conditioning/heavy appliance use because they can power almost everything.
I also needed to know my daily consumption in watt-hours so as to consider how long it takes for each kit size to recharge back to full capacity during peak sunlight hours. The number of peak sunlight hours was important, too, so I had to compute this based on where I live. On average, throughout the year, I receive about 5 hours per day, but there are months that receive up to eight hours per day.
Another thing that mattered most in my decision-making process was whether an expansion pack is available as part of the package deal, i.e., do these kits come with charge controllers, inverters, mounting hardware, etc? Therefore, always ensure all essential components are included in your purchase; otherwise, additional costs may be incurred later on. To learn more tips, click here now! Also, make sure to read through reviews and check ratings from reputable websites so that reliability and performance can be guaranteed after buying anything online. This systematic method helped me select the solar panel system that fits my specific power needs while traveling in recreational vehicles (RV) since it is sustainable and provides continuous supply.
Advantages of Higher Wattage Kits
Higher-wattage kits for an RV solar power system offer a few advantages. For one, they allow you to run more of the bigger appliances, such as air conditioners, microwaves, or larger refrigerators, at the same time. This is also convenient because it makes boondocking possible by reducing dependence on outside power sources.
Secondly, kits with higher wattages usually have better efficiencies and use more advanced technology. They come with more brilliant charge controllers and inverters that maximize energy conversion and storage, so little power is wasted. Additionally, the surplus in power can act as a safeguard during cloudy days or under shade because the energy supply will be steadier.
Lastly, these kits make future expansion easy. A high-wattage system can be scaled up effortlessly as energy needs grow or if more appliances are acquired. They often feature strong mounting hardware and flexible connection systems, which enable seamless integration of additional panels. With this kind of forward-thinking flexibility, your solar setup will stay useful for longer periods, too!
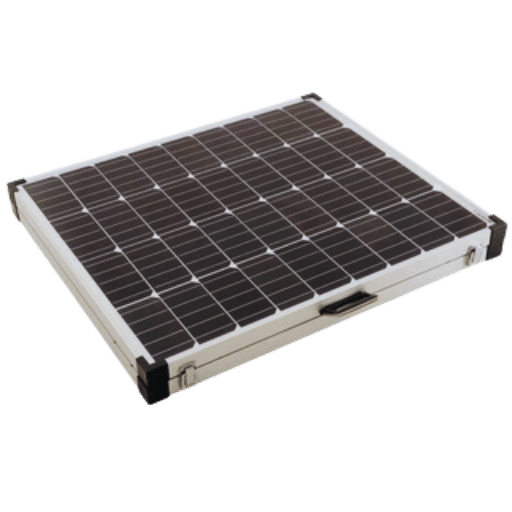
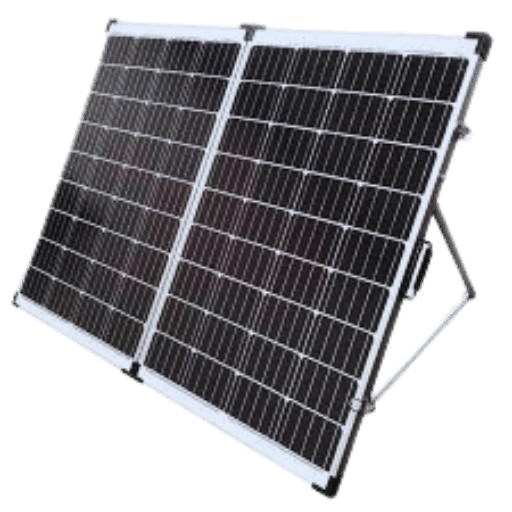
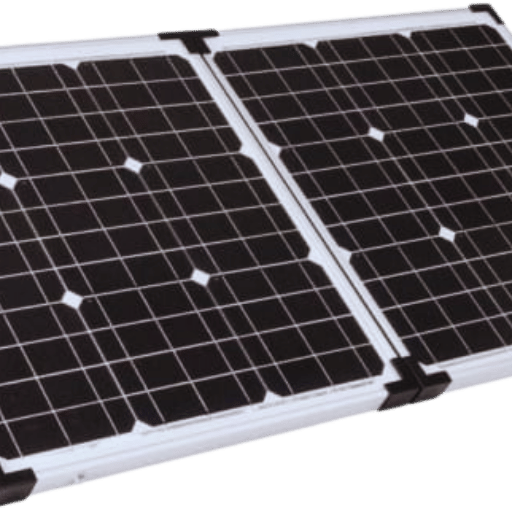
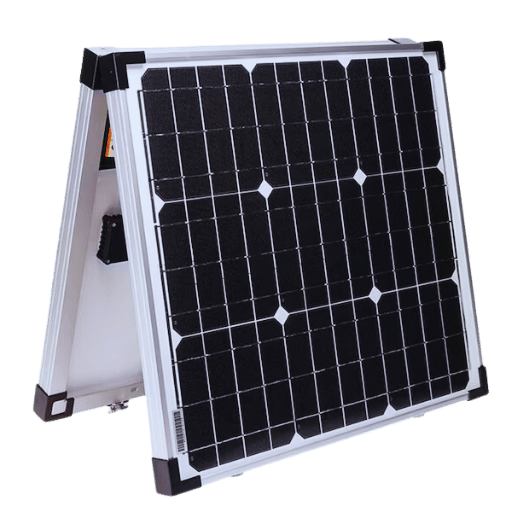
What Are the Benefits of Using a Portable Folding Solar Kit?
Ease of Use and Versatility
For RV owners, there is no better choice than portable folding solar kits for ease of use and versatility. They are designed to be easily set up and taken down with pre-wired parts and plug-and-play connections, so you do not need a lot of time or technical know-how for them to work. Instead of spending hours figuring out how everything connects, you can enjoy your trip more. With their lightweight and small size when folded up, these panels are easy to carry around wherever you go, so even if it’s not sunny every day where you’re, at least there won’t be any trouble getting them back home again either. Whether this may mean camping out somewhere off the grid or simply wanting an extra power source around the house, they have all bases covered because these things can function just about anywhere under the sun! In conclusion, portable folding solar kits offer convenient options for power on the move.
Comparing Portable Kits with Fixed Solar Systems
When we compare fixed solar systems to portable kits, there are several important differences.
Assembly: Professionals must install Fixed solar systems and require significant time for setup. On the other hand, portable kits can be quickly deployed and easily set up or taken down.
Mobility: Portable solar kits have unmatched mobility; they can be carried around and used in different places. Conversely, fixed systems stay put and only provide power at the point of installation.
Price: Fixed solar systems tend to cost more initially due to higher installation and component expenses. However, portable kits generally have a lower upfront cost but offer less power output than their fixed counterparts.
Power Output: Normally, fixed solar systems produce higher wattage with consistent power output which is suitable for full-time residential use. Conversely, portable kits are designed for intermittent use on a smaller scale such as during camping or RV trips.
Maintenance: Once installed, fixed systems demand little maintenance but repairs can be complicated when faults occur. Portable kits are easy to maintain where individual components can be replaced without much trouble.
In conclusion, one may choose between a portable kit or a fixed system based on factors such as mobility requirements, cost implications vis-à-vis power demands, and expected usage duration, among others. Each of them has its own benefits that cater to various energy needs as well as lifestyles.
Case Studies of Portable Solar Kit Use
Case Study One: Emergency Response
In the wake of natural disasters, power systems that never fail are necessary for teams involved in emergency responses. For instance, during the California wildfires of 2020, there was a case in point. They installed movable solar kits to generate electricity for communication devices, medical equipment, and lighting in remote areas where conventional power supplies had been damaged. These kits were easy to carry around because they were portable and could be set up quickly, which made it possible for them to be used right away, thus aiding critical rescue operations as well as coordination efforts among different agencies involved in disaster management.
Case Study Two: Mobile Medical Clinics
Portable solar kits are also essential in mobile medical clinics operating in underserved regions. In rural Kenya, in October 2019, a particular situation occurred when a mobile clinic used moveable solar panels to power refrigeration units for vaccines and other drugs and charging stations for diagnostic equipment. The clinic staff did not have to worry about where they were going because no matter how far away from civilization these places may seem, this ensured that there would always be electricity available at all times, hence improving upon their ability to provide consistent healthcare services within such communities that are isolated from each other due various reasons ranging from a geographical distance or social, economic factors among others.
Case Study Three: Recreational Use
Another example of practical application comes from the recreational sector, where people engage in various activities for fun. In the summer of 2021, a group of outdoor enthusiasts went on an extended camping trip across several national parks within US territory. They decided to use portable solar kits, which acted as their main source of power throughout this period so that they could charge their electronic gadgets such as phones, etc., light up campsites with LED lights powered by these devices while also running mini-refrigerators off them too but only when necessary since there were alternatives like ice boxes if needed be thus cutting down reliance on fuel generators thereby reducing carbon footprint as well which aligned with their being environmentally conscious at all times even during such moments.
These case studies demonstrate how versatile portable solar kits can be since they can cater to emergency, medical, and recreational needs in an efficient and sustainable manner. These units are so easy to work with, and anyone can use them, which makes it possible to meet different temporary power requirements without much struggle or too many complications involved on someone’s part depending upon his/her level of exposure to handling electrical gadgets, etc.
How to Maintain and Optimise Your Inverter?
Regular Maintenance Tips
You must establish a maintenance plan to keep your inverter alive for a long time and in the best possible shape. Here are some important suggestions:
- Clean up after your inverter regularly: Dust can accumulate on top of or inside an inverter, which might cause it to overheat or work less effectively. Ensure that ventilation slots are not obstructed, and use a dry cloth to wipe down outer surfaces.
- Check connections: Check all electric connections periodically for corrosion, looseness, or damage. Any loose connection should be tightened, and corroded parts replaced to maintain efficient power transfer.
- Observe performance: Make sure you have records showing how your inverter operates at different times, including input voltage and current levels and efficiency. With this data, one can easily detect abnormal behavior early enough to indicate an underlying problem.
- Firmware update: Always find out if there are any recent firmware updates provided by the manufacturer and install them. They may enhance performance or fix bugs that could be exploited later.
- Battery care: It is important to look after the batteries for inverters integrated into solar storage systems. Check battery voltage levels and lead-acid electrolyte levels frequently, and follow correct charging cycles.
- Control environment: The area surrounding an inverter should be cool, dry, and well ventilated because high temperatures and humidity adversely affect its performance and life span.
- Professional service: At least once every year, arrange for a thorough examination of various parts by someone who knows such devices inside out since some hidden problems might only surface during complex checks like these.
Therefore, when you follow these maintenance tips, your inverter will serve better and last longer.
Common Problems and Troubleshooting
- Inverter not starting: Ensure that the storage battery and solar panels are connected properly. Typically, this is because there is no power supply. Check if the input power source is well connected. If necessary, change the circuit breaker or fuse.
- Low or no voltage output: Ascertain that the inverter model’s allowable range of input voltage has not been exceeded. Moreover, confirm whether any wire connections are loose or damaged and make certain that they are secure and intact.
- Overheating: Poor ventilation or too heavy a load can cause overheating. Make sure the inverter is placed in a well-ventilated location and that its capacity is not surpassed by the load. Remove any dust or other foreign material from heat sinks and cooling fans.
- Noise or buzz: This could be a sign of internal malfunction, such as component failure, about to occur. Disconnect it and have an expert technician check it up for you as quickly as possible.
- Frequent tripping: If your inverter keeps tripping frequently, it may mean an overload, short circuit(s), or grounding problem(s). Reduce connected loads, inspect for short circuits and ensure proper grounding.
These common problems should be solved early enough so that your inverter system runs smoothly and efficiently, but if they persist, seek professional help.
Upgrading and Optimising Your Inverter
To make your inverter more powerful and efficient, determine the energy you need and appraise how well your current inverter works. The detailed instructions on our website may be helpful for you. Also, if you realize that your electricity consumption has gone up or there are better energy-saving capabilities with new versions of inverters, then upgrading might be necessary. Below are some steps that can help:
- Evaluate energy requirements: Calculate the present and anticipated power needs to establish the correct capacity for an upgraded inverter.
- Check Inverter Efficiency: Higher efficiency ratings should guide you during selection because they lower losses within a system, which leads to better overall performance. Visit our affiliate program page, where we offer high-efficiency inverters at affordable prices. Some of the latest models have maximum PowerPoint tracking technology (MPPT).
- Choose the type of waveform: Pure sine wave or modified sine wave? You should base your decision on what works best for your needs since these two differ in terms of efficiency, especially with the electronics involved, where pure sine wave inverters tend to perform better.
- Verify compatibility: Ensure that all new equipment is compatible with existing ones, such as solar panels, batteries, etc.. Otherwise, inefficiencies or even damage could be caused by mismatched components.
- Intelligent Features: To maximize this, look out for an RV Trip Planner RV Life app, which helps manage energy more effectively while traveling in recreational vehicles (RVs). There are many intelligent feature-enabled systems like programmable settings through remote monitoring enabled by modern inverters, so one can integrate them into home automation systems, thus significantly improving the management/optimization of energy systems.
- Professional Installation: It would be advisable to have a certified technician do installation work on any brand-new inverter to ensure proper setup/configuration and optimal output performance levels.
Through the right choice and following these optimization approaches when it comes to inverters, power system performance can be greatly improved in terms of reliability, efficiency as well as overall lifespan.
Can a Go Power Solar System Handle Off-Grid Living?
Essential Components for Off-Grid Systems
To find out if a Go Power Solar System would be suitable for off-grid living, there are certain key elements of an off-grid solar power system that must be considered:
- Solar Panels: These are responsible for generating most electricity. Determine the number and total wattage of panels needed based on your daily energy consumption.
- Battery Bank: It stores energy produced by solar panels for use when the sun is not shining such as at night time or during cloudy days. The capacity of the battery bank is critical to maintaining reliable power supply.
- Inverter: This device converts DC electric current generated by solar panels and stored in batteries into AC electric current used by most household appliances; hence ensure it is sized properly and works well with other parts of your system.
- Charge Controller: It regulates voltage and current coming from solar panels so that batteries do not get overcharged thereby lengthening their life span as well as efficiency.
- Backup Generator: For locations with unpredictable weather conditions or where very high reliability is needed then backup generators can provide additional security measures.
By using quality components together with correct design and installation practices, a Go Power Solar System could effectively support living off the grid thus giving dependable service while saving energy too.
Success Stories of Off-Grid RV Living
Many owners of recreational vehicles have successfully switched to off-grid living with Go Power Solar Systems, showing their reliability and efficiency in different environmental conditions. They usually use the RV GPS app RV with Confidence and other planning tools to manage their routes and power needs. For example, throughout a year-long trip across desolate parts of America, veteran RV travelers Jane and Mark used a Go Power Solar System for all their energy requirements—from powering essential appliances like fridges to charging electronic gadgets such as smartphones. In effectuating this feat even in places with little sunlight due to its strong solar panels coupled with an efficient battery bank together with a dependable inverter that ensures a continuous supply of electricity was maintained where there was hardly any sunshine, the system employed by them is unmatched. For detailed planning, consider using an app like RV Trip Planner or RV Life.
The Thompsons also have testimony after traveling through harsh terrains in Canada; they had equipped their Go Power systems with advanced charge controllers and backup generators so as not to be affected by severe weather conditions during such times. These examples show that a Go Power Solar System can meet all the requirements needed for living off the grid when installed correctly, including sustainable energy production while providing autonomy, which is suitable for people who are always on the move and seeking adventure.
Cost Analysis: Is It Worth It?
Many factors must be considered when determining whether or not a Go Power Solar System is cost-effective for living in an off-grid RV. The initial costs can be quite expensive; these include high-quality solar panels, batteries, inverters, and other necessary equipment. However, the money you spend upfront will pay off over time due to lower fuel usage and less need for external electricity sources. Another thing that makes solar panels worth it is their durability, as well as the minor maintenance they require. Not only this, but being able to produce your own energy and access places without any power lines brings about significant advantages that cannot be measured tangibly but are still valuable. When all things are taken into account, such as saving more dough during extended periods and going green while enjoying life’s conveniences, I see no reason why someone wouldn’t want one of these systems installed by GoPower because the benefits outweigh the costs every single time, in my opinion.
Reference Sources
Frequently Asked Questions (FAQs)
Q: What benefits do I get from using a 200w solar kit for RV trips?
A: A 200w solar kit gives enough power to meet daily requirements like charging small appliances and electronics. It guarantees a reliable source of energy throughout your RV trips and helps reduce reliance on conventional energy sources. The “Go Power Solar Controller” is helpful in efficiently managing the charging system.
Q: How does a pure sine wave inverter differ from other inverters?
A: Pure sine wave inverters produce smooth and constant waveforms similar to those supplied by grids as electricity. Such an invention is ideal for use with delicate electronics or appliances since it minimizes the chances of damage. Ensure that the installation aligns with our terms of service consistently. Conversely, modified sine wave inverters can generate an uneven voltage which may cause problems with some devices.
Q: Why should I consider a LiFePO4 battery for my solar setup?
A: LiFePO4 batteries are a better option than traditional lead-acid or AGM batteries because they offer higher performance levels. They have longer lifespans, discharge at higher rates, and are lighter in weight than others. Additionally, these types provide more dependable power for battery charging while being safer due to reduced risk of overheating or explosion.
Q: What is the difference between MPPT and PWM solar charge controllers?
A: MPPT (Maximum Power Point Tracking) controllers are more efficient than PWM (Pulse Width Modulation) controllers. They can optimize voltage coming from solar panels for better battery charging performance. In fact, MPPT allows for superior energy harvesting, especially during changing weather conditions.
Q: How can I monitor my solar system’s performance remotely?
A: You can keep track of different metrics about your solar system even when far away by using some apps found on smartphones through Bluetooth-enabled modern kits such as GoPower, among others. Some metrics that can be monitored include voltage, current, and overall system efficiency.
Q: What are the benefits of an innovative solar charger?
A: Smart solar chargers help maintain and increase battery life by automatically adjusting charging parameters for ideal health and efficiency. Often, they have features such as temperature compensation and multi-stage charging, which can significantly enhance overall performance.
Q: Should I use a 12V or higher voltage system in my RV?
A: 12V is sufficient and commonly used for most RV appliances and devices. However, larger-scale installations may employ higher-voltage systems that require more specialized equipment. A 12V system is easier to install and maintain, thus suitable for typical recreational applications.
Q: Can I combine different wattage solar panels in my setup?
A: Combining different wattage panels in one solar setup (e.g., 100w with 200w). Compatible arrangements can be found on our terms of service. Still, you must use a high-quality charge controller that will handle the different voltages and currents to ensure efficient charging.
Q: What does a 30A charge controller do in my solar charging system?
A: A 30A charge controller regulates power from the panels, preventing batteries from overcharging. It ensures batteries get the right amount of voltage and current, guarding against damage while increasing their longevity.
Q: Which brands would you recommend for RV solar kits and inverters?
A: GoPower, Renogy, and Solar Elite are some of the brands we suggest for RV solar kits and inverters since they offer high-quality products that perform well consistently. For more information about which brand might be best suited to your needs, consult sites like Forest River Forums or RV Life Campground Reviews, where there are often ratings alongside customer reviews.