With energy costs soaring and environmental concerns growing, more people use renewable power sources for their houses. Of all possible methods to exploit the sun’s energy, solar panels are considered the simplest and most affordable. This manual suggests universal stages of constructing solar panels at home, which can be understood even by nonprofessionals or amateurs who love doing it themselves, making homemade solar panels achievable. Through this guide, you will know what materials to buy, important technical terms used in this process, and step-by-step instructions on making a functional solar panel. Do not waste your time wondering whether you want to save the earth from pollution or cut down your bills because this extended instruction will prepare you with the necessary information needed for starting a solar energy system in your home.
What Materials Are Needed to Build a Solar Panel?

Essential Components for Your DIY Solar Panel
To construct a solar panel, the essential things you will require are as follows:
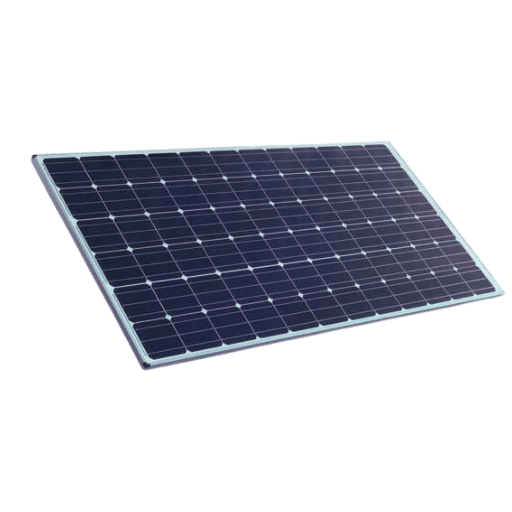
- Solar Cells: These are the basic components of making solar panels as they convert sunlight into electricity. Monocrystalline and polycrystalline are the most common types.
- Plexiglass or Glass Covering: It protects the solar cells from external damage.
- Frame: The frame holds together the different parts of a solar panel, mostly made from aluminum, which makes it strong and lightweight at the same time.
- Bus Wire and Tabbing Wire: They help connect electrically with each other between cells.
- Soldering Flux and Soldering Iron: Tabbing wire onto them is required for proper functioning when soldering.
- Junction Box: This box connects this device to your home’s electrical system so that you can use it easily whenever needed without any problems!
- Silicone Sealant: This is used to weatherproof the panel and secure its components tightly, thus preventing water from entering inside, which may cause short circuits or any other damage-related issues later on.
- Insulated Backsheet: This provides support and insulation on the back side of these devices, keeping everything safe within limits.
Having these materials ready ensures that your DIY project will work properly and also be long-lasting too!
Where to Source Quality Solar Cells
To find good solar cells, use the following:
- Specialized Solar Suppliers: These firms have a wide range of high-quality solar cells.
- Online Marketplaces: Websites such as eBay or Amazon contain many solar cell options, including monocrystalline and polycrystalline types.
- Manufacturer Direct: Buying straight from manufacturers guarantees product quality and often comes with detailed specifications.
- Local Distributors: Some local hardware stores or specialized electrical supply shops may stock reputable brands of solar cells, making building your solar panel more feasible.
- Renewable Energy Trade Shows or Exhibitions: Such events can provide networking opportunities with suppliers and hands-on inspection of solar cells.
Always verify reviews, technical specifications, warranty details, etc., to ensure that they meet your project requirements.
Tools and Accessories You Will Need
To construct your solar panel, you will need these tools and accessories:
- Multimeter: To gauge the electric output of the solar cells, keeping them in order.
- Wire Cutters and Strippers: Cut off and prepare wires for connections.
- Soldering Iron and Solder: Used to join solar cells with tabbing wire through electrical connection making.
- Soldering Flux: Used to clean surfaces before soldering.
- Bus Wire: Connects rows of solar cells.
- Tabbing Wire: This is used when connecting individual solar cells.
- Silicone Sealant: Sealing the edges of the panel to make it weatherproof.
- Screwdriver Set: Required during attachment of junction box, among other parts.
- Plexiglass or Tempered Glass: This is important as it protects against damage caused by environmental factors like rain, etcetera.
- Aluminum Frame: It provides support and gives shape to your solar panel, making it strong enough even for outdoor use where there are high winds, etcetera.
The availability of these tools and accessories will simplify the assembly process while increasing the product’s lifespan.
How Does a Solar Cell Work?

The Basics of Photovoltaics
Photovoltaics (PV) is a technology that directly converts light into electricity using materials that have the photovoltaic effect. The following are some of the key steps involved in making solar cells work:
- Photon absorption: When sunlight hits a solar cell, it absorbs photons from the light through a semiconductor material such as silicon, which is most commonly used for this purpose. This process excites electrons, freeing them from their atomic bonds to flow freely.
- Creation of electron-hole pairs: The absorbed photon energy creates electron-hole pairs within the semiconductor. An electric field established at the junction between two differently-doped silicon layers separates the negatively charged electrons and positively charged holes.
- Electricity generation: While free electrons move towards the front contact under the influence of the cell’s electric field, holes migrate towards its back contact. Such unidirectional movement constitutes an electric current. When connected to an external circuit, this current can be utilized to perform work like powering electrical devices, thereby effectively contributing to renewable energy production by solar systems.
- DC to AC conversion: Solar cells produce Direct Current (DC) electricity, which needs to be converted into Alternating Current (AC) either for grid or household appliance use. Thus, an inversion process where inverters are employed is required to convert DC into AC.
Understanding these basic principles about solar panels can help us see how useful electrical energy can be generated from sunlight. Improvements in PV technologies have continually achieved efficiency and cost-effectiveness in harnessing solar power systems.
Understanding Silicon and Its Role
Silicon is the cornerstone of current photovoltaic (PV) technology because it has the best electrical properties and is naturally abundant, hence suitable for both small solar projects and large installations. Being a semiconductor, silicon can absorb sunlight and convert it into electric power with high efficiency. The four valence electrons in its atomic structure enable the material to form strong covalent bonds necessary to create crystalline lattice structures in most solar cells. Silicon’s ability to produce stable, high-quality crystal lattices also increases charge carrier mobility, which is important in generating electricity effectively. Moreover, silicon is preferred due to its hardiness and resistance to different environmental conditions, thereby ensuring that solar panels last longer. PV systems keep improving through the utilization of silicon’s unique features, thus leading to higher efficiencies while lowering the costs of solar energy production.
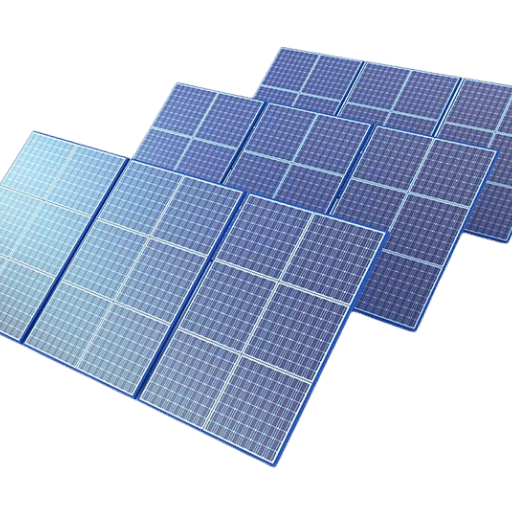
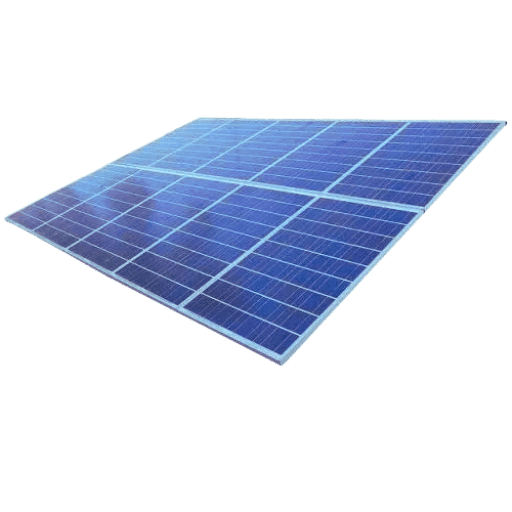
Types of Solar Cells: Monocrystalline vs. Polycrystalline
On one hand, solar cells made of silicon are classified into monocrystalline and polycrystalline. Each type has different traits and performance curves. Monocrystalline solar cells are created from a single crystal structure, which leads to higher efficiency rates, typically around 15-20%. Also, they look black since there is no variation within them. They can produce more energy compared to any other cell because of their better efficacy in space-limited areas.
In contrast, polycrystalline solar cells consist of many melted silicon crystals stuck together during manufacturing. This method is simple and cheap, thus reducing the cost of production. Nevertheless, their efficiencies range from 13% – 16%, lower than those found in monocrystalline counterparts, where efficiencies lie at 15% – 20%. These multi-crystal structured cells appear blue-speckled due to various reflections off each grain or crystal face. Moreover, they take up more room but save on costs, so they are often used for large-scale installations when space isn’t an issue.
Both kinds have pros depending on the specific needs for using solar energy. If it’s about getting maximum power out of small spaces, monocrystallines should be chosen, but if it’s more about saving money through larger systems, polycrystallines would fit best.
How to Assemble Your DIY Solar Panel?

Step 1: Preparing Your Solar Cells
When putting together a DIY solar panel, first, make sure that you handle your solar cells with care, as they are fragile and can easily break. You should have all the necessary materials, including a soldering iron, tabbing wire, flux pen, glass sheet or surface for mounting the cells, etc. Use a flux pen to coat the busbars of each solar cell with a thin layer of flux. After that cut pieces of tabbing wire that are twice longer than one cell’s height – those are very important parts when building homemade solar panels. Then, heat up the soldering iron and attach tabbing wires to the busbars. The connection must be strong and electrically conductive. Before proceeding, please test every cell for continuity and correct electrical output so that none of those defective units get into our panel!
Step 2: Soldering the Cells Together
For the first step in soldering the cells together, put them in your chosen configuration, which is usually a series for increased voltage. Ensure that you match one cell’s tabbing wires against the backside of an adjacent cell while connecting one cell’s negative terminal to another’s positive terminal. Apply flux on where they are linked so that it sticks better and becomes more conductive. Using a hot soldering iron, join carefully with heat each tabbing wire onto the following cell’s busbars, thus creating daisy chains. Keep doing this until all cells have been connected throughout a string employing soldering them in series. It is crucial not to mishandle these components during their joining through melting because if they get cracked or broken, then their functioning may be affected. Test every string after soldering for continuity and power output so that you are sure all connections are made are good. This stage guarantees high performance and dependable operation of your solar panel system.
Step 3: Setting up the Junction Box and Bus Wire
You should start by choosing a junction box appropriate for use with solar panels. Keep in mind that the junction box must be mounted on the back part of the panel and firmly fixed and sealed correctly to prevent moisture from getting into it. Then, positive and negative bus wires of cell strings are linked to their corresponding terminals inside the junction box. Connect them using a soldering iron so that solid electrical connections can be made and reliable ones are achieved. The junction box needs bypass diodes to protect solar cells against possible damage caused by shading or local obstructions. Ensure tightness of all seals when closing the lid of the junction box; this ensures the safe transfer of electric energy produced by these cells towards outside circuitry while at the same time maximizing its efficiency.
Step 4: Installing the Plexiglass Cover
To start putting Plexiglass coverings on, measure and cut a Plexiglass sheet that exactly fits the frame of a solar panel. This is very important as it should be fitted precisely to avoid openings that allow dirt or water into the cell. Place the plexi over the cells, but make sure that it aligns with the edges of the frame. To create an environmental shield, fasten down the plexi using UV-resistant sealants around its perimeter against exposure from outside. Additionally, mount brackets or clip them onto something specifically designed for plexiglass to strengthen attachment and prevent displacement by wind or thermal expansion forces. When you are done with this part, check whether everything has been covered well enough by examining if all corners have been secured tightly enough against entry points of stray materials like dust particles, etc., and also ensuring there is no visible gap around joints between different sections such as upper/lower halves; otherwise, redo until satisfied!
How to Connect and Install Your Solar Panel System?
How to Connect the Cells
Arrange solar cells on a nonconductive surface to form an array and connect them. For a series connection, wire the positive terminal of one cell to the negative terminal of another cell so that voltage is increased at the same current. A parallel connection involves connecting all positive terminals together and all negative terminals together, which increases current while maintaining voltage.
Knowing how to wire, apply tabbing wire for fastening cells. Cut tabbing wire into the required lengths, then solder tabs onto busbars using a soldering iron. Make sure that joints are well soldered to achieve maximum conductivity with minimum energy loss.
Thereafter, verify each panel’s correct output voltage and current by checking all connections with a multimeter. Finally, connect cells within the junction box are combined, ensuring a secure connection with bus wires and integrating bypass diodes where necessary (to protect against shading or blockages).
This ensures that everything is appropriately linked up in your solar power system, thus enhancing efficiency and reliability while converting sunlight into electricity.
Integrating a Charge Controller
Integrating a charge controller in your solar panel system is very necessary as it helps to regulate the voltage and current from the solar panels to the battery. The charge controller is mainly used to prevent battery overcharging and ensure power is well managed. Here’s a quick technical guide on how to do this.
- Choose an Appropriate Charge Controller: Ensure that you select a charge controller that matches the voltage and current specifications of your solar panel system. There are two types: PWM (Pulse Width Modulation) and MPPT (Maximum Power Point Tracking). MPPT controllers are more efficient for larger systems, while PWM controllers are simple and cost-effective for small setups.
- Connect Solar Panels to Charge Controller: Find input terminals on the charge controller labeled “Solar” or having a solar panel icon. Take the positive terminal of the solar panel array and connect it with the positive input terminal on the charge controller; similarly, take the negative terminal of the solar panel array and connect it with the negative input terminal on the charge controller. Ensure all connections are tight and secure using the correct gauge wires per the manufacturer’s recommendation.
- Connect Charge Controller to Battery: Look for output terminals on the charge controller, often marked as “Battery” or with a battery icon. While setting up your solar PV system, connect the charge controller’s positive terminal with the battery’s positive terminal and the charger’s negative terminal with the battery’s negative terminal. This connection will control charging based on the condition of the batteries.
- Monitor System: Most modern chargers come equipped with display panels/interfaces displaying real-time information such as voltage/current/State-of-Charge, etc., so keep an eye on these readings regularly to ensure that everything is running within safe limits.
- Include Disconnect Switches: Disconnect switches should be installed between panels and controllers and between controllers and batteries; this provides extra safety, allowing maintenance/inspections without the risk of electric shock.
By following these steps, you will be able to operate your solar panel system efficiently, saving battery life and protecting the whole setup from common issues associated with overcharging and power management.
Connecting the Inverter for Usable Power
- Set up the power inverter: Identify an appropriate location for the inverter, which should be near the battery bank, although not under direct sunlight and well-ventilated to prevent overheating. Ensure that the inverter is fixed firmly and away from any water sources.
- Connect your Inverter to the Battery: Make sure that you have selected cables with adequate ratings for connecting your inverter with a battery. Join the positive terminal of a battery with the positive terminal of an inverter and the negative terminal of the Battery with the negative terminal of the Inverter while tightening all these connections so that there are no power losses or safety hazards.
- Grounding your Inverters: Proper grounding of inverters should never be ignored because this measure enhances safety precautions. Therefore, you must follow the manufacturer’s instructions about how to ground your device by linking its earth ground point according to their recommendations.
- Linking loads together: After securely attaching the input side of an inverter to a battery, connect various AC appliances or other types of loads to output terminals found at the back section of this device. But among these devices, ensure those connected do not draw more power than what can be produced by our selected Power Inverter.
- Starting Up Your Power Inverter: Flip the switch on the front panel into the “ON” position, then check the status indicators and display panels to see whether they operate properly. Finally, check through different points to make sure stable electricity is being delivered from the DC-AC Converter box to appliances connected to it, like bulb sockets, etc.
Regularly inspecting and caring for solar energy systems will help them remain efficient for long periods. With such steps, one can easily convert renewable sun-ray radiations stored within batteries as direct current (DC) into alternating currents (AC) useful at home or business places, thus illustrating the practicality inherent in renewable PV-based electricity technologies.
Do You Need a Professional Installer for Your Solar Panel?
When to Consider Hiring a Solar Installer
In case you are thinking of hiring a professional solar installer, some factors should guide you:
- Complexity of Installation: If your solar panel installation involves complex roof structures, electrical systems, or extensive wiring, it is recommended that an expert do the work. They will ensure safety and efficiency in the process. Professionals ensure that all parts are fixed well without breaking any building codes or regulations.
- Maximizing Efficiency: These installers’ knowledge is important when it comes to placing solar panels where they can receive maximum sun exposure, thus increasing system performance. They also know how to size them according to your energy usage patterns.
- Permits and Inspections: Acquiring permits and organizing necessary checks may seem overwhelming, especially if one has no experience in this area; however, professionals deal with such paperwork often enough to make sure everything is done within legal frameworks stipulated by local authorities concerning construction activities like setting up solar systems.
- Safety Concerns: Installing photovoltaic modules requires working at heights and handling intricate electric parts that pose a danger if mishandled. Hiring an expert reduces personal injuries or damages resulting from self-installation methods.
- Warranty and Insurance: Some warranties require authorized persons who have undergone training in installing these gadgets so they do not become void, while others cover only jobs done by professionals who are insured against any form of damage during their duties so far carried out.
These points will enable you to decide wisely whether or not to engage someone knowledgeable about installing solar power equipment as part of your project, thereby ensuring a smooth-running process characterized by effectiveness and safety.
DIY vs. Professional Installation
When choosing between DIY and professional solar panel installation, there are many things to consider. According to popular industry sites, the main differences are cost, safety, and long-term benefits.
- Cost: You save a lot of money when you do it yourself because you don’t have to pay for labor upfront. But if an error occurs and it needs repair by a pro, then that will be costly in the long run.
- Safety: Installing solar panels can involve high-voltage electricity and heights, which can be very dangerous. This is why professionals are trained to manage such risks using appropriate equipment.
- System Performance: Systems fixed correctly by experts usually work better. These people understand where your energy needs come from, so they can place and size your panels accordingly, maximizing power production.
- Warranties & Compliance: Most warranties won’t hold water against manufacturers if not installed professionally. Professionals also ensure everything is done within legal frameworks by following through with permits while complying with local building codes, hence minimizing chances for litigation.
- Time & Effort: Doing it alone requires investing much time into learning about its technicalities before finally doing the job, which may take longer than expected, unlike having a crew finish up quickly due to their vast experience in installations.
In conclusion, though one may opt for DIY as a way of cutting down costs by focusing on safety aspects performance-wise, among other things, these outweigh the initial savings made by hiring professionals who guarantee to safeguard your life and maximize returns from such an investment.
Reference Sources
Frequently Asked Questions (FAQs)
Q: What materials are required to build your solar panel?
A: Solar cells, tabbing wire, soldering iron, silicon, glass sheet, backboard, connector block, multimeter, and a few other bits and bobs. Remember that high-quality components are important for an efficient homemade solar panel.
Q: How do I connect the solar cells?
A: Connect the solar cells using tabbing wire and a soldering iron. Carefully solder the tabbing wire onto each cell’s busbars in series so that they form strings. This is important because it ensures electricity flows through your solar panel correctly.
Q: What are the steps for soldering solar cells?
A: First, pre-solder tabbing wire onto every cell’s busbars. Then align them all and solder one cell’s tabbing wire to another until you have connected all the cells in series. Make strong, clean solders that conduct well, or you will mess up conductivity within your DIY solar module!
Q: How can I protect the PV cells in my panel?
A: Use silicone (or other suitable encapsulant) to encapsulate photovoltaic cells. Put this over them before laying down a glass sheet on top of everything else, such as weatherproofing against physical damage caused by external elements over time, thereby increasing its lifetime, etc.
Q: What does a backing board do in a solar panel?
A: A backing board supports the structure for any module where there may be weak points, i.e., between individual panels or around edges of a more extensive array, etc., besides protecting fragile parts like PVs from getting broken easily due to vibrations during transportation too much flexing when being mounted on uneven surfaces, etc.
Q: How can I determine the number of solar cells required for my solar panel?
A: The number of solar cells needed depends on your panel’s desired output voltage and wattage. Calculating your solar system’s voltage and current requirements will help you determine the right number of cells. Connecting more cells in series increases the voltage, whereas parallel connections increase the current.
Q: How long does building a homemade solar panel from scratch take?
A: The time it takes to make a solar panel from scratch varies depending on your experience and the project’s complexity. In general terms, though, it could take a few hours to a couple of days to complete everything, such as soldering, encapsulating, or assembling the module as one unit.
Q: How do weather conditions affect homemade solar panels?
A: Homemade solar panels can be affected by weather conditions such as snow, hail, and extreme temperatures, which may impact their performance or even shorten their lifespan over time if not taken care of properly during the installation process. It also helps prevent some damages caused by external forces but still needs periodic checks so that they keep generating power at all times when needed most for sustainability purposes.
Q: Can homemade solar panels give electricity to my home?
A: Yes, homemade solar panels can supply electricity to residential buildings; however, their efficiency and durability might not match those of professionally manufactured ones in some cases. If reliability is critical for a sustainable clean energy supply at home, homeowners should evaluate their energy requirements and consider complementing them with commercial-grade systems.
Q: What is the difference between monocrystalline and polycrystalline panels?
A: Monocrystalline comprises single-crystal wafers, thus making this type more efficient and expensive, while polycrystalline involves multiple crystal fragments, meaning slightly lower efficiency but cheaper in terms of cost. However, both have their place based on budget and space availability considerations.