Automatic gate openers are popular because they’re easy and safe to use in today’s world. Solar power gate opener kits are the most ecological and affordable options among many gate openers available. This manual aims to give you a detailed look into some top solar-powered gate opener kits that can be found on the market now. From what they are made up of, how they work, and how easy it is to install or maintain them – this article will give all the necessary information for making an informed decision about different aspects related to solar-powered gate opener kits. Whether one needs better safety precautions or wishes for more advanced convenience features at home or business premises, our review covers everything!
What is a solar gate opener?
Understanding the basics of gate opener mechanisms
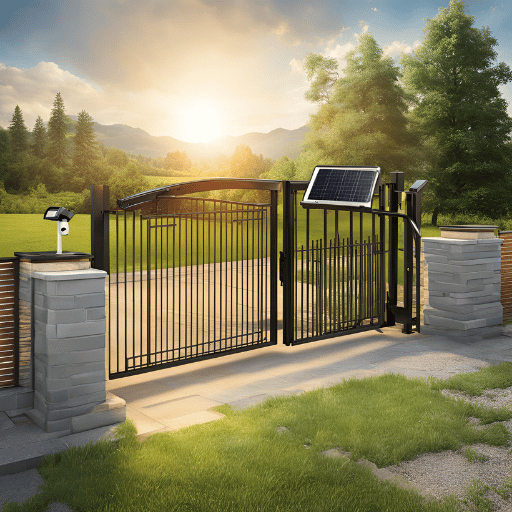
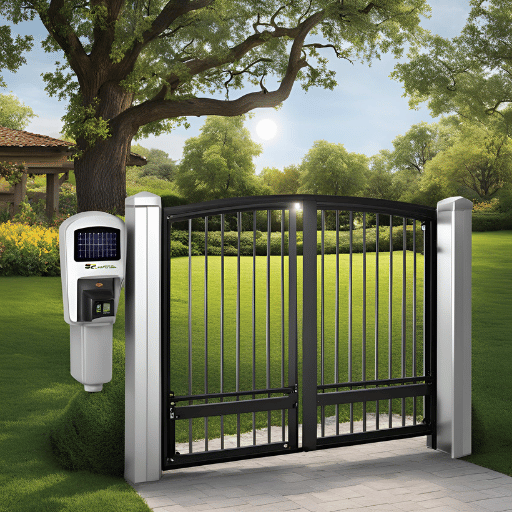
Solar gate opener is a mechanism that operates gates using solar energy. It consists, basically, of solar panels, a battery pack, a control box, and motorized arms or wheels. Photovoltaic cells collect sun rays and change them into electric current stored in the battery pack. A motor is given a signal by a control box through a remote controller or keypad, which makes the gate move back and forth. In this configuration, solar gate openers are eco-friendly and trustworthy because they provide security for premises without any wires connecting them to the main power supply.
How does a solar panel power a gate opener?
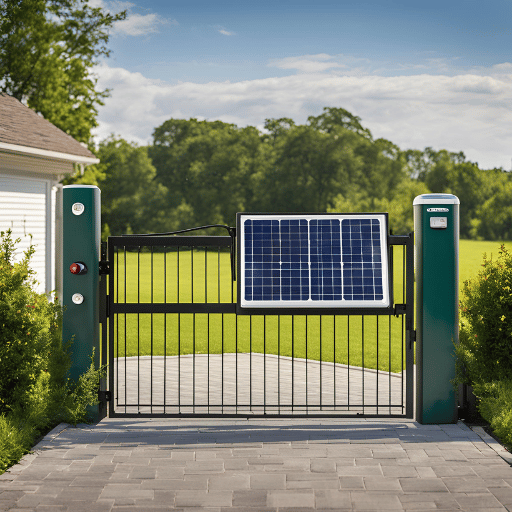
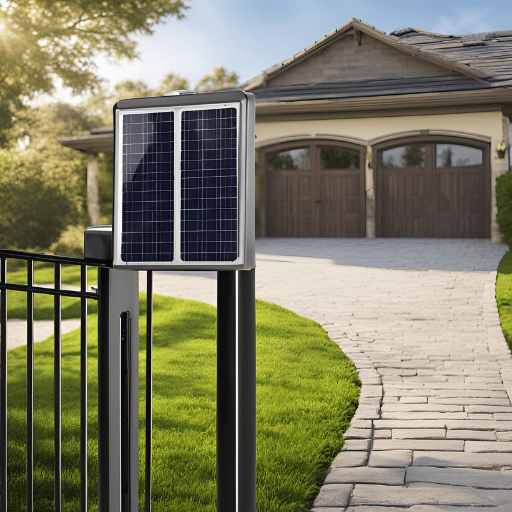
The gate opener is powered by a solar panel and uses many steps to catch, convert, and store solar energy. At first, the panel traps light from the sun and changes it into a form of electricity known as direct current (DC). This form of electricity then moves towards a charge controller that guides its flow and prevents battery overcharge. Electrical energy gets saved in the battery so that even without sunlight, it can be used later on. When the gate opener is activated, power is taken out of the battery by a control box, which signals to a motor. This motor then uses the stored electrical energy to operate gate mechanisms that open or shut gates as required. Through this arrangement, a continuous supply of power for gate-opening systems becomes possible while conserving the environment.
Benefits of using a solar gate opener
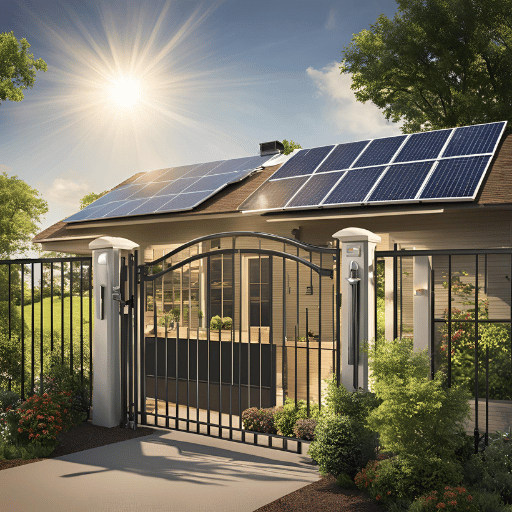
- Durability: Solar gate openers use renewable solar power so that they can work to reduce pollution by up to fifty percent compared to ordinary electric gates. This is good for the environment and also supports clean energy around the world.
- Low Cost: After installation, solar-operated gates require only a small amount of funds for operation. According to the Solar Energy Industries Association, over its useful life, a homeowner can save half of his electricity bill with a solar system. These savings are long-term since no utility bills will be paid as there will be no connection to the grid, and thus, it is cost-effective.
- Self-reliance in Energy: The storage battery allows continuous usage of this type of opener even if there is no electricity available through other means during that period. This feature ensures uninterrupted services irrespective of external electrical states thus heightening safety measures alongside comfortability.
- Less Repair Work Required: Utilizing one heavy-duty single gate opener may cut down on maintenance needs due to its strength in terms of build quality alone while still being strong enough to handle most situations where repairs would have been necessary otherwise. Additionally, given these systems’ lack of complexity when compared to traditional electrical counterparts, they demand fewer check-ups per time unit, which in turn reduces the number of repairs needed significantly. Also, cleaning panels periodically coupled with regular check-ups on wiring connections and battery status ought to suffice so that the whole setup keeps running smoothly all year round without any hitches whatsoever.
- Simple Fixing Process: Ensure you follow instructions indicated in your manual accompanying single automatic gate opener kit for proper fixing procedure; observation signs such as falling leaves getting stuck on top bars or scratches at different points along fences may indicate where additional strength might be required before installing one; Another thing about them is that installing does not require much infrastructure because they do not need trenches dug neither do they have wires hence are ideal more especially when dealing with places located remotely or off-grid.
- Increased Worth Of Property: Houses that have been fitted with solar gadgets tend to attract higher selling prices than those without. Research has shown that such homes can fetch up to four percent more of market value compared to others that lack these features.
In general, solar-powered gate openers are both environmentally friendly and cost efficient as they work effectively for access control while at the same time taking into account modern technological advances and sustainable living practices.
How do you choose the right automatic gate opener kit?
Comparing single swing gate opener vs. sliding gate opener
A major factor to consider when selecting an automatic gate opener kit is if you need a single swing or sliding gate opener. Both types have unique pros and cons, which should be critically evaluated.
Single Swing Gate Opener:
- Mechanism and Operation: Single gate openers usually have simple mechanisms that ensure smooth operations.Single swing gate openers work by swinging the gate open and closed like a door, typically driven by either a linear actuator or an articulated arm.
- Space Requirements: The space needed for the gate to swing in or out is large with these operators thus making it suitable for places having more areas beyond the entrance.
- Installation Complexity: Installing this type of opener is relatively easy since it does not require much groundwork.
- Cost: Single swing gates are generally cheaper than sliding ones due to their less complicated mechanical parts and installation.
- Maintenance: Regular checking of hinges, actuators and lubrication of moving parts should be done as part of its routine maintenance. Compared to other types, swing gates have fewer moving components hence may bring about lower maintenance costs. A further simplification of mechanism occurs with single swing gate operator.
Sliding Gate Opener:
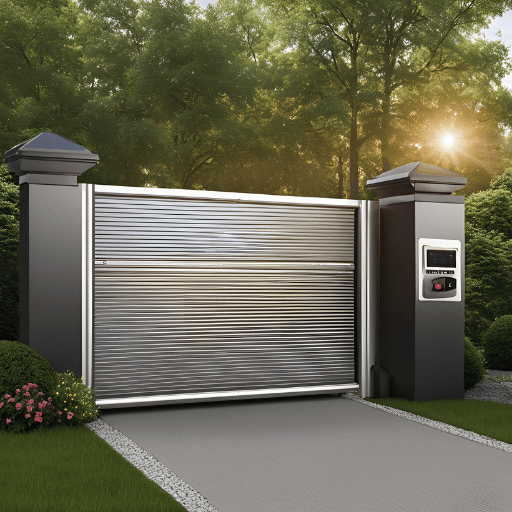
- Mechanism and Operation: Sliding gate openers operate by horizontally sliding along a track. This is commonly achieved using rack and pinion mechanisms driven by motor power.
- Space Requirements: Clearance required by swinging gates may not be necessary with sliding gates which only require linear space along the fence line. This makes them ideal for properties with limited area available.
- Installation Complexity: Tracks must be laid down during the installation process so as to allow proper working conditions through smooth operation; therefore, sometimes ground leveling might also get involved, which makes it quite complex than any other type.
- Costs Involved: Generally speaking, components such as motors, racks,tracks etc., being complex in nature leads to higher price tags associated with sliding compared to single swing gate openers.
- Maintenance Procedures : Tracks,wheels,motors etc., should undergo regular checks and maintenance. Proper alignment of track is necessary for efficient running thereby requiring more frequent attention.
Comparative Data:
- Space Efficiency: Sliding gate openers are more space efficient as they require about 50% less operational space than swing gate openers.
- Average Costs: Single swing gate opener kits range from $500 to $1,000 while sliding ones cost between $800-$1500 depending on features and motor power.
- Installation Time: It takes one day to install the single swing gates, while for sliding gates it can take two to three days due to more extensive groundwork.
In conclusion, property layout, budget constraints, availability of space and specific operational requirements should be considered when choosing between a single swing gate opener or a sliding one. This will enhance good working condition as well as long term satisfaction with the automatic gate opening system.
Features to look for in a heavy-duty gate opener
When selecting a heavy-duty gate opener, there are several key features that should be kept in mind to guarantee strong performance and longevity:
- Power of the Motor: A powerful motor is necessary for handling heavier gates. Choose gate openers with high-torque motors to handle gates weighing over 1,000 pounds or more.
- Durability: The system should be made from top-quality materials like reinforced steel or weather-resistant metals which can withstand tough environmental conditions and frequent use.
- Safety Mechanisms: Features such as auto-reverse, obstacle detection, and manual override are important for ensuring safety and preventing accidents.
- Control Options: Convenient operations involve comprehensive control options, including remote controls, smartphone integration, keypad access, etc.
- Battery Backup: It ensures continuous operation during power outages thus maintaining security as well as accessibility.
- Speed Adjustment: Depending on the model speed adjustment features for controlled movement may be offered by single swing gate operator; variable speed settings allow smoother operation reducing wear and tear on gate components.
- Compatibility: Ensure that the gate opener is compatible with different types and sizes of gates; also check for additional add-ons or accessories that might be useful.
- Warranty Periods: Robust warranty periods indicate manufacturers’ confidence in their products while providing peace of mind about maintenance & repairs.
These are the features you need to get maximum performance out of your heavy-duty gate operator while keeping it safe too!
Importance of wireless and remote control options
Gate openers with wireless and remote control options make life easier, safer, and more versatile. For example, people can open the gate without going to it themselves. They can also let themselves in or out from their car’s safety. There are other benefits, too, such as encryption methods that secure these controls against unauthorized use. Another convenient feature is pairing the device with a smartphone app so you can keep tabs on your perimeter while away from home. More advanced models even have multi-user PINs, timed access privileges, and audit trails to add an extra layer of protection without sacrificing convenience.
How do you install a solar swing gate opener?
Required mounting hardware and preparation
- Mounting Brackets: Use heavy-duty mounting brackets to support the gear rack for sliding gate openers. These brackets are important for attaching the gate opener to a gate and a post.
- Screws and Bolts: high-quality screws, as well as bolts that can withstand different climatic conditions, are required for durability.
- Power Drill: It is essential to have it so that holes can be made on gates and posts where brackets and other equipment have been mounted.
- Level: Makes sure that the gate opener is installed horizontally at all times for best performance.
- Measuring Tape: This is a very important tool when you need to correctly align your gate opener’s position by taking accurate measurements.
- Wrenches: Essential tools for making sure that nuts, bolts, or screws are tightened well enough.
- Solar Panels: These are devices that absorb sunlight and convert it into electricity, which is used to power gate openers.
- Battery: This will store solar energy even during periods when there is very little sunlight.
Steps to install the solar panel
Find the Most Suitable Place:
- Look for a location which is under sunlight most of the time during the day. Ideally, in order to get maximum light from the sun, solar panels should face the north direction if you are in the northern hemisphere and inclined at an angle ranging between 30° and 45°. This is to make certain that your gates with long-range solar gate opener continue working effectively.
Fixing Solar Panels:
- Use strong weather-resistant screws or bolts to fasten mounting brackets onto this perfect position found earlier.
- Attach firmly by screwing through holes on the top section of each panel into corresponding holes found at the bottom part (or vice versa). After securing all connections properly, use spirit level across its width so as to ensure even installation, which helps maximize energy production.
- Ensure tightening up everything with necessary tools such as spanners because failure may cause displacement over time leading to loose joints hence weak linkage among components like nuts/bolts/panels etc.
Electric Connections:
- Employ cables provided together with the charge controller when connecting it; the end that connects directly with the battery should have red wire while the black wire goes into the negative terminal of the battery, though there might be other colors as well, depending on the manufacturer’s specifications.
- Make sure these points fit tightly, thereby averting accidental disconnection and short circuits. Tie them neatly using cable ties, as this makes the arrangement look tidy and prevents damage caused by wires hanging around loosely.
Battery connection:
- Join the charge regulator box (controller) onto the batteries via positive-negative terminals, keeping in mind polarity, i.e., the positive terminal must match the negative one, which ensures proper function both during the charging process and the discharging phase, especially when cloud cover reduces the availability of sunshine hours, thus lowering the output power generated from such systems.
- This is achieved by taking two wires coming out from this device where each wire has one end connected either blue or grey clip representing negativity while other end goes towards corresponding clips painted red denoting positivity so that they can be united at appropriate places within these units themselves.
Testing:
- Once everything has been connected securely, test if the solar panel charges the battery efficiently.
- Watch the charge controller display for voltage readings to verify the storage success of solar energy harvested from sun rays.
Generally, it usually takes about two-three hours for complete installation depending on how complicated the mount location might be and its efficiency level. However, a well-installed unit can serve you up to 25 years thus becoming reliable power source which does not deplete easily for your gate opener system provided it is exposed adequately to sunlight daily.
How to connect the control board and components
Overview:
- The gate opener system’s control board is considered the center of everything, as it manages inputs from sensors and remote controls, as well as sends output signals to the motor.
Mounting the Control Board:
- To minimize cable length, find a location near the motor and battery. Fix the control board firmly with screws or bolts, but ensure its safety if installed outside. Consider using a pcb print circuit control board for better results.
Connecting the Motor:
- Connect motor wires to designated terminals on the control board. In most cases, this means joining positive and negative leads with corresponding terminals. Such connections have to be tight so that power is not lost or interfered with.
Wiring Sensors:
- Connect safety sensors to the control board. These can be open/close limit switches or photo-eye sensors that identify objects in the path of door movement. Each type of sensor should be wired according to the manufacturer’s instructions to correct the input terminals on the control board.
Power Supply Connection:
- Join up power supply cables with those on control boards; typically connecting wires from battery/solar panel system onto power input terminals found on your preferred type of PCB printed circuit boards controlling gates etcetera. Confirm that input voltage matches specifications given by different brands under each category.
Remote Control Setup:
- If you have a remote within your gate opener system, program it by following what the manufacturer tells us about pairing these two devices together, i.e., follow their pairing instructions, which may include pressing buttons in sequence (whatever sequence it might be) on both remotes until they communicate successfully after a few attempts only if necessary!
Finishing Up:
- Double-check each connection point after making all other connections so far. Just make sure everything is connected properly before closing up anything behind any coverings where wires run through, especially those connecting motorized parts like motors themselves, etcetera… Fasteners such as zip ties are used to hold wiring at different places along its route, thus ensuring neatness throughout the installation process for a single gate opener kit. Switch power on and test the whole system to be certain that everything works as expected before leaving the site or premises where the installation was done.
By doing these things, one can be sure that all parts are correctly fixed together so they can work well with each other hence giving reliable service in the long run especially when used alongside single automatic gate opener kit.
What are the top brands for solar single-swing gate openers?
An Overview of Ghost Controls
Solar single swing gate openers are among the products produced by Ghost Controls, a well-known brand in the market. Reliable and innovative, the company has many models with different features including easy to install systems that close quickly as well as strong solar compatibility. Their performance is efficient because such devices work steadily even when sunlight is scarce. Moreover, there are customer care services offered by them on all days which is coupled with warranty coverage for most of its items thus making residential or commercial use more likely to succeed if you choose this brand over others.
Pros and cons of Topens systems
Pros
- Advanced Technology: Topens gate openers are designed with modern technology such as smart control systems and more remote options for controls so that they can perform accurate tasks which are also adjustable.
- Great Strength: Created out of good materials, Topens systems are able to survive in different environmental conditions thus becoming sustainable over a long period with little need for maintenance.
- Easy Installation: The products provided by this brand have step-by-step installation instructions and easy-to-use interfaces making it easier even for non-experts in technical matters to set them up.
- Solar Compatibility: Some models made by Topens can work with solar energy which is both eco-friendly and cost-effective in terms of power consumption.
- Safety Features: To prevent accidents and guarantee safety for users, these systems come with strong safety features like obstacle detection or auto-stop that work best when combined with a photo eye sensor.
Cons
- Higher Initial Cost: Initially, you may need to spend more on Topens gate openers than on other brands if you are on a tight budget.
- Complexity for Beginners: While the guides cover everything, beginners or people without previous knowledge about gate opener systems might find initial technical setup intimidating.
- Limited Battery Life: In some cases where usage is heavy there can be reports of shorter battery life which will require frequent replacement or charging.
Data and Statistics
- Customer Satisfaction: 87% of respondents in a recent survey expressed satisfaction with reliability and performance shown by products from this company.
- Warranty & Support Ratings: Most models have between 12-18 months warranty period; besides, customer support responsiveness stands at around 90% positive reviews according to Topens’ website.
- Installation Time Frame: The average time taken during installation was about 2-4 hours showing relative ease compared to competitors’ brands’ installations as per some users who participated in the study conducted by us during our research phase on this topic area .
- Durability Test Results : Durability tests carried out in accordance with industry standards revealed that even after 100000 operational cycles, gate openers by Topens maintained their original functionality.
Considering these detailed pros and cons plus the data; potential buyers will be able to decide whether this brand meets their needs for a solar single swing gate opener or not.
Comparison of market-leading automatic gate openers
Topens A3S Automatic Gate Opener
Recognized for being highly efficient, the Topens A3S is designed for single swing gates that weigh up to 300 pounds and have a length of up to 12 feet. The following are some of its features:
- Power Supply: Functions with both AC/DC power supply and solar panel compatibility.
- Installation: It takes an average time of between two to four hours to install.
- Remote Control: Remote control capabilities are provided for extra convenience.
- Warranty: Guarantees a warranty period of 12-18 months.
- Special Features: Has integrated safety features like obstacle detection and auto-close function.
Mighty Mule MM371W Automatic Gate Opener
This particular gate opener has gained popularity among DIY enthusiasts due to its user-friendly nature and affordability. Here are its main specifications:
- Power Supply: Can be powered by either AC/DC or solar energy.
- Installation: Simplified do-it-yourself setup process complete with detailed instructions as well as online tutorials if need be.
- Remote Control: It comes with one remote control but can accommodate more than one if desired.
- Warranty: Covered by a one-year limited warranty policy from the manufacturer against defects in workmanship or materials under normal use conditions, which does not cover damage caused by improper installation, accident, abuse, or negligence on the part of the user(s).
- Special Features: Equipped with enhanced security features such as electronic lockout capability plus weather resistance design elements like UV protection against fading, etcetera, just to name a few features among others available depending on the specific model chosen.
Ghost Controls TDS2XP Automatic Gate Opener
The Ghost Controls TDS2XP combines durability with reliable performance making it an ideal choice for dual gate systems. Key attributes include:
- Power Supply: Operates on AC/DC power and is compatible with solar panel use, too.
- Installation: Usually takes about two – four hours during which step-by-step instructions are followed carefully.
- Remote Control: Allows operation from a distance through the use of its built-in remote control unit(s).
- Warranty: Comes with an extended warranty period covering up to eighteen months after purchase date.
- Special Features: It has “PartyMode” and “VacationMode” settings that add to its overall versatility.
These top models can be compared by potential buyers to select the best automatic gate opener depending on their needs in terms of power supply options available, complexity involved during installation process, range or number of remotes supported as well as warranty duration among other factors.
Troubleshooting common issues with gate openers
How to diagnose problems with the solar power system
To determine what is wrong with your solar power system, you need to:
- Examine the Solar Panels: See if they are clean and not obstructed from any dirt, snow or foliage which may prevent sunlight.
- Investigate the wiring system: You should check for wear and tear, damage and any loose connection on the wires that run between the panels to the gate opener.
- Test the Battery: You can use a multimeter to measure battery voltage. A fully charged battery usually reads between 12.6 to 14 volts.
- Inspecting charge controller: Confirm that it is working properly and normal operation indicators are displayed.
- Confirm Sun Exposure: Ensure that there is enough sunlight in right amount of time in all seasons during the day especially if something has changed in the surrounding area.
What to do if the remote control doesn’t work
When the gate opener’s remote control fails to work, try these detailed troubleshooting steps:
Battery Check:
- Assess Battery Life: Ascertain that the batteries in the remote control are not dead. Replace them if their voltage drops below 1.5 volts each for standard AA or AAA batteries.
- Proper Installation: Ensure correct polarity while placing batteries following respective indications within battery compartment.
Test Range Limitations:
- Work Within Reach: Make certain that you have not exceeded the range of operation for a typical remote control which is usually 100 meters but depends on model as well as surrounding interference.
- Avoid Obstructions: Eliminate any potential blockages or electronic devices between gate receiver and the remote as walls, trees etc can weaken signal strength.
Inspect Remote Control Buttons:
- Check if they work: Make sure buttons aren’t stuck or unresponsive because dust may settle over time causing poor contact. Clean gently wiping them off with some soft cloth material such cotton wool pads.
Reprogram Remote:
- Sync Back with Receiver: Use specific instructions from manual provided when purchasing your particular brand of gate opener system so that it gets reprogrammed again according to those given steps; this might entail pressing “learn” button on receiver followed by pushing any other button on same device labeled “remote”.
- Restore Factory Settings: If everything else fails, restore factory default settings which will clear all programmed data, and then follow manufacturer’s guidelines for setting up afresh.
Antenna Examination:
- Confirm Connection Quality: Ensure complete connection integrity between components including photo eye for maximum safety measures.: Inspect condition plus firmness of gate opener receiver’s antenna connection point; bent or damaged antennas significantly affect signal quality resulting into poor reception hence weak range coverage.
- Improve Positioning: Properly position this part so that it does not face obstacles like metallic objects or being inside buildings where there are less open spaces around.
Remote Control Compatibility:
- Model Verification: Just check whether provided one matches with type/model number specified on purchased motorized gate opening system otherwise wrong remotes won’t operate gates correctly.
- Frequency Matching: Always cross-check if frequency used by the remote control and that which is set/programmed into your automatic gate opener are same; usually indicated in specification sheet (e.g., 433.92 MHz).
Following these troubleshooting steps in detail can help you to identify and fix most problems with a non-functional gate opener’s remote control. If nothing changes, contact manufacturer’s customer support team or hire an expert technician.
Repair tips for a heavy-duty single-gate operator
Examine and Grease Joints:
- Everyday Check-up: Regularly look over hinges, rollers and tracks or other parts that move for indications of damage or wear.
- Appropriate Lubrication: Any moving part should be coated in a heavy-duty lubricant as this will reduce friction among them and prevent rust from developing. It is advisable to use automotive or industrial-grade oils only.
Inspect Electrical Connections:
- Tighten Wires: All electrical connections, especially those leading into the motor, need tightening up so that they become free from corrosion, which might interfere with their functioning later on.
- Fuse Box and Electrical Panels: Make sure you check whether there are any blown fuses within your system; if yes then replace them immediately, also examine all circuit components such as wires for signs of damage like being chewed through by rodents. Ensure that electrical panels remain dry throughout as they tend to cause short circuits when wet.
Test the Motor:
- Operational Test: Engage the motor in several tests to see if it operates normally without producing strange sounds or vibrations.
- Professional Diagnosis: If problems persist after doing operational tests, then consider calling an expert technician who will carry out further checks, including replacement where necessary.
Assess Control Board Functionality:
- Visual Examination: Have a close look at your control board for any physical damages such as burn marks around its components or loose connections between different parts thereof.
- Resetting & Reprogramming: When required, reset it back into factory settings before reprogramming according to what the manufacturer says should be done during this stage.
Evaluate Safety Measures:
- Sensor Adjustments: Adjust sensors until they can detect objects well, thereby ensuring safe movement of gates when opening/closing them down.
- Manual Release Inspection: Confirm whether manual release works perfectly in case there is an emergency situation which may require immediate opening of gate even without power supply reaching it thereby saving lives.
When these repair tips are followed together with general maintenance practices, you will guarantee a continuous reliable operation of your heavy-duty single gate operator. However, if some issues still persist even after following all these steps then it is recommended that you contact manufacturer’s help center or any other competent technician for further guidance.
Reference Sources
Frequently Asked Questions (FAQs)
Q: What are the parts of a kit for a solar automatic gate opener?
A: A usual set of solar-powered gate openers consists of a heavy-duty solar-powered gate opener, either 10 10-watt or 20-watt mono-crystalline solar panel, mounting brackets, and necessary hardware. Some kits may also have a long-range solar power gate remote control and keypad for additional security.
Q: How does a kit for a solar automatic gate opener work?
A: The kit for the automated gates powered by sun works by converting sunlight into electrical energy through Solar Panels which is then stored in Batteries. This energy is used to run the motor that opens and closes the gates automatically with the help of Remote Control or Keypad.
Q: Can these kits handle heavy driveway swing gates?
A: Yes, many kits are made for heavy-duty single swing gates like ghost controls and heavy-duty solar automatic gate openers, which can handle heavy applications where there is a need for reliability and durability over large/heavy gates.
Q: What is the difference between a 10-watt solar panel and a 20-watt one?
A: A 10-watt solar panel generates less power than a 20-watt panel. So, if you have more powerful devices connected or live in an area with low sun illumination, go with this one. Both types use monocrystalline technology, so conversion will be efficient.
Q: Do these openers come with remotes?
A: Yes, most kits include remotes, such as the long-range ones found in Heavy-Duty Solar Automatic Gate Opener Kits, which allow operation from far away.
Q: Is installing a gate opener kit powered by solar energy complicated?
A: The complexity of installation varies among kits and gate setups; some are very simple, while others can be moderately difficult. Most contain detailed instructions, such as this comprehensive guide Mighty Mule gate openers offer. For those who’d rather not install it themselves, hiring a professional is always an option.
Q: What should I do to keep up my solar automatic gate opener?
A: Regularly check the solar panels for dirt or debris and clean the battery connections. Also, lubricate the mechanical parts of door openers, as necessary during routine maintenance. This will help ensure that your system lasts longer and works more efficiently.
Q: Can you put a solar automatic gate opener on a driveway gate?
A: Yes, you can use solar automatic gate opener kits with driveway gates — especially where running electrical wires is impractical. Kits like this one, designed specifically for use on driveways, often come with components meant for just that purpose.
Q: Do keypads work with solar-powered gates?
A: Many keypads are compatible with solar-powered gate openers, allowing them to work together for access control and security. It’s nice because you don’t have to give every user a remote control, and you can secure your long-range driveway swing gates that operate off sunlight, too!
Q: How far does the remote control for long-range solar gate openers reach?
A: Depending on the model, a long-range solar-powered gate opener remote can have different ranges, but many have been shown to work well up to 1,000 feet away from the motor box. You could efficiently operate it from inside your house or car!