The proper use of lighting devices is only possible when it is easy to exercise control. The two-wire switch, which is very common in most buildings, provides a smart way of controlling the lights with reduced amounts of wiring in terms of installation. But let’s talk about this kind of switch, and try to understand why it is still widely used in today’s electrical circuits. In this blog post, you are going to learn about the two-wire switch and its working principle, understand when this type of switch must and must not be used, and hopefully explain enough if that’s what you need in your case. Even if you are not going to upgrade something or you just never had any electrical experience, this guide will explain everything there is to know regarding the two-wire switch for lighting.
What is a Two-Wire Switch?

A two-wire switch is also called a pole single-pole throw (SPST) switch because it has only two connections. One wire is usually for the power supply, and the other for connection to the light bulb or any other appliance that is being operated. This particular setup allows the switch to either close or break the path of current, thus allowing or prohibiting the load (fan, light) to be powered. Two-wire switches are very simple, durable, and are usually found in low-end lighting systems; hence, they are ideal in simple setups.
Definition of a Two-Wire Switch
A two-wire switch is an electrical switch that is simple because of its use of only two wires to perform its function. The two-wire switch normally plays a crucial role in residential and commercial areas with simple lighting requirements. One wire is connected to the source of power, while the other wire is connected to the load, for example, the light or any other appliance.
The correct one, however, is the two-way switch, in which there are two switch points that deal with only one light. Unlike the more intricate three-wire or four-wire installations, the two-wire arrangements do not need the neutral wire, which is an advantage in older buildings without neutral wires. As an example, one specification commonly given for use in the two-wire switch system is provided with the 120V to 240V AC as per the region’s power supply.
However, it is important to point out that even though two-wire switches are working and effectively used, they are found to be unsuitable in more complex electrical system designs because of the lack of a neutral wire. Such switches can still be regarded as an effective and efficient solution for simple electrical systems, combining features, cost, and installation convenience, especially in existing structures where upgrading the wiring structure is a limited factor.
Components of a Two-Wire Switch
A two-wire switch is made up of different essential components that perform their own distinct roles to manage electric current in a circuit. These roles include:
This is the wire that brings the electrical energy from the source to the switch. It is very necessary for the circuit, as without this connection, the line wire would prevent the other components from obtaining power.
This is the one that connects the appliance or lighting fixture to the switch. It is the one that transmits power to the other side when the switch is activated.
This is the component that makes the switch – it performs the function of opening or closing the electrical path. It can be a toggle switch, a button, or a rocker switch, depending on the specific type of switch.
The structure and protective case of the switch are designed to ensure that the components of the device are turned on and, in certain cases, also protect them from damp and dry risks as well as impacts. It is almost always covered by plastic or metal and properly insulated for the safety of the user.
When the switch is flipped, the contactors complete the internal and external connections of the circuit. These contacts are made to be efficient and long-lasting and use metallurgy such as brass, copper, and even silver alloy for high conductivity.
Two-Wire Switch toggle cutouts come with either a screw or a snap fastening, which arranges the switch within the box tightly and securely. Such parts hold the switch while not allowing it to move from the correct position when used.
How a Two-Wire Switch Works in a Circuit
A two-wire switch in a basic single circuit system functions by controlling the electric current flow. There are two terminals, in general, with one of each being labeled “line” and the other labeled “load.” The “line” terminal can be connected to a live power wire, with current-bearing power lines, rather than being supplied for transport and used to connect to power devices. The fixture or light bulb, which is controlled, has no connection to the “load” terminal; it is connected to the switch, which is turned on and closed. An internal mechanism in the switch, which is described as a circuit in an engineering sense, closes when the female switch is closed, enabling in a manner current, that is, the current powering the connector present in the switch. However, when we turn off the switch, we also disable the entire electricity circuit; thus, the device is turned off as well.
Most houses have the two-wire switch for lighting; for instance, a neutral wire is not needed in the simple circuit. It is to the best principles of electrical installation that the switch isolates the live wire to eliminate the risk of unintended current flow in the load (device) when the switch is turned “off”. Their simple construction explains why they still have a place in every home, even as advanced smart switches are appearing on the scene.
These are present and observed in the context of such requirements for most lower-power applications. Such as in the case of two-wire switches, they typically conform to 120V or 230V impedance ratings due to the geographic applications and are used with incandescent and resistive loads. Some LED lights or smart devices are not very stable with their operation, and these switches will always require a neutral line connection for proper functionality.
The reliability and simplicity of these devices are the reasons why they are the building blocks of rustic circuits. More so for applications with limited processes void of networking or complex elements. Many electricians below are used to putting up devices as these. Because they are able to fit onto the existing wiring configurations of many older buildings, they are two-wire switch types.
Types of Two-Wire Switches
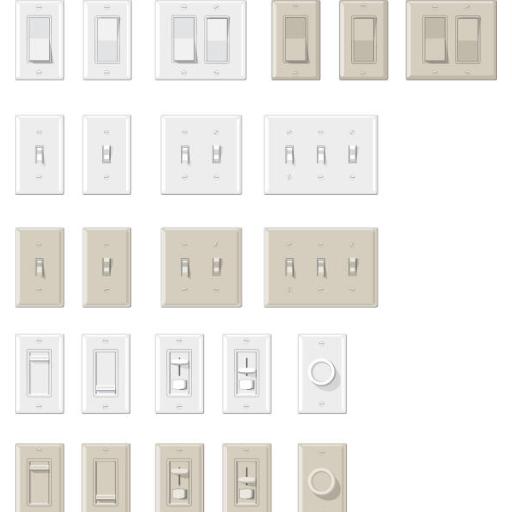
Single-Pole Switches
These are an everyday form of two-wire switch used pretty much everywhere, bog standard, single-pole switch. There is a simple controlling wiring where only one fixture/device can be controlled, and it is on or off. Very simple to use and economical, these switches are designed for general-purpose lighting and other services due to their ‘on’ and ‘off’ features.
Toggle Switches
Toggle switches are a few specific types of single-pole switches with an added toggle lever mechanism. Excellent and installed without any hassle, since they belong to the design list of any household or business use.
Push-Button Switches
With push-button switches, one pushes a button to either turn the device on or off. The common use is mainly in small units or units with a different design that still possess a basic two-wire working.
SPST vs. DPST: Understanding the Difference
| Feature | SPST (Single Pole Single Throw) | DPST (Double Pole Single Throw) |
|---|---|---|
| Construction | One input and one output | Two pairs of inputs and outputs |
| Application | Simple ON/OFF mechanism for single devices | Control two distinct circuits simultaneously |
| Cost | More economical | Higher cost due to complexity |
| Use Cases | Basic lighting, small appliances | High current applications, safety isolation |
| Installation | Simple, minimal circuitry | More complex, multiple connections |
With respect to the type of electric switch used, the SPST and DPST switches have certain differences, with regard to construction and operations as well. On one hand, the SPST switches have an uncomplicated construction, consisting of only one input and one output. Such switches can be efficiently applied in cases requiring only an ‘ON/OFF’ mechanism, for example, turning on a bulb or a small appliance. The lack of any complexities allows for the production of cheaper options, which can be used in the simplest form of electric circuits.
Conversely, the DPST switches have two pairs of inputs and outputs. These offer the possibility to open or close even two distinct circuits using only one lever or knob. This is why DPST switches come in handy in cases where more than one circuit is to be switched on or off at any given time, for instance, power to devices being cut off, as well as earthing, or the isolation of equipment from each other. Such cases are likely to be seen in advanced systems present in factories and some household items, where systems of multiple loads or power supplies need to be managed in terms of loads.
The choice between SPST and DPST will depend on the circuit/function it serves. Whereas the first one is easy to find and very simple, the latter provides more features that ensure better and safer performance in the circuits. These distinctions help you choose the right devices for your electrical works, bearing in mind monetary allocation, operating requirements, and the purpose of use.
Toggle Switch vs. Rocker Switch
Toggle Switch
- Operated by clicking a lever up or down
- Clear visual indication of switch state
- Strong and durable construction
- Simple plug-and-play logic
- Best for industrial applications
Rocker Switch
- Triggered by pressing edges (on/off)
- Clear and simple for modern use
- Visually appealing design
- Easy to work with
- Suitable for home and consumer electronics
Both a two-wire switch and a mechanical switch are useful in certain devices, such as the aforementioned, but they entail different advantages and disadvantages. In order to operate a toggle switch, one must click a lever that shifts it into an upward or downward position; in the process, any of its states can be viewed. This type of switch is designed to allow the user ample options. It is strong and is Robco’s best-selling switch for a reason: for its simple plug-and-play logic.
However, a rocker switch is triggered by simply pressing one of the edges either on or off, looking quite clear and simple for modern and everyday use. Most home-use devices, including lighting and other electronic devices containing a rocker switch, use it because it is very appealing and incredibly easy to work with.
When deciding whether to take up a toggle or a rocker switch, it all comes down to the needs of the task at hand, more so those that lean towards the design aspect, environment, and functionality. If a sturdy switch is called for, for example, in nonstandard production, a toggle switch may be best; however, when the appearance is to be in modern designs, a rocker switch may be appropriate, for example, in home or consumer electronics.
Double Switch Configurations
In most cases, double-pole wiring installations where switches and outlets are positioned in different locations are called double switch configurations. They are suitable for the performance of circuits where they have to work independently, yet it is easier to control several circuits in one go. For instance, the fan lights and the fan may be linked up to a two-wire switch within a room, in which separate or even the same task may be accomplished.
If you want to use double switch configurations, you have to keep in view several factors like the electrical capacity of the switch, the type of circuit to be controlled, and the installation location. One must be careful in installing the wires and always observe safety precautions, follow the electrical codes in force, or seek the assistance of an expert in electricity if things get out of hand. The incorporation of the latter modern options can be an essential improvement and thus offer more convenience to the user and control options.
Installation of a Two-Wire Switch
To replace a two-wire switch, you will need to adhere to these steps for a complete and secure installation:
- 1Cut Off the Power: first, interrupt the electrical current from the specific box.
- 2Check the Circuit: This is for the case when the circuit has a two-wire switch, making it unnecessary for a neutral wire, as is the case with most lighting.
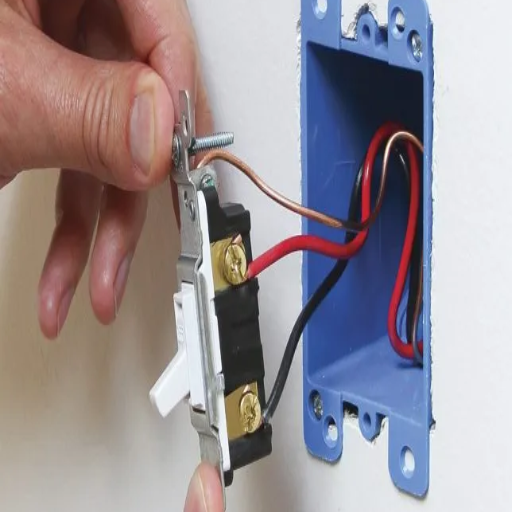
- 3Offsource Wiring: Find the connector or connector to serve as a line as well as a connector to serve as a load, using a voltage tester. The two-wire switch in the process will be installed to such connectors.
- 4Wire Up: Connect the phase wires with the “line” terminals while connecting the load wires to the “load” terminals of the switch. Get a screwdriver and fasten the screws nicely so that there is a connection.
- 5Fix the Switch: Attach the switch in the box of the unit, making sure that none of the wires get pinched, and fasten nickel screws.
- 6Power Thyself and Check Off: Check the power supply, remount the breakers, and go through the test of how the switch works to make sure it is fine.
Necessary Tools and Materials
Tools Required:
- Screwdrivers: flathead and Phillips
- Voltage testing tool
- Stripper and cutter for wires
- Needle-nose pliers
- Cordless drill (optional)
- Level tool (for precise installation, if desired)
Materials Needed:
- Replacement switch
- Insulating Tape
- Wire Connectors (wire nuts)
- Plate for covering the switch(s)
- Screw and plugs for use when necessary
They are tools that help in installing the light switch, but the materials that will be installed make it possible and safe for the device to operate. It is always good to check whether a two-wire switch will work with the particular electrical wiring.
Step-by-Step Installation Process
Turning Off Power
First of all, you must locate the circuit breaker for the particular area and turn it off. Also, use a voltage tester to ensure that the area you are about to work on is de-energized.
Dismantling the Old Switch
Take out both the faceplate and the screws holding the old switch. Expose the internal structure by carefully displacing the installed switch and figure out its connecting wires. Note down the cumbersome positioning of other wires or consider taking a photograph for reminders.
Examine the Wires
Assure yourself that the existing wires are not damaged. Ensure that there is a neutral wire because most of the smart switches need a neutral supply. In case of any doubts, call in the help of an electrician.
Install the New Advanced Switch
Refer to the specific smart switch wiring diagram that came with the package, as this may vary by device. Usually, the order is quite the same: connect the live, neutral, and protective earth wires; if required, also connect the load wire. Apply connectors to the ends of each wire and twist them onto the wires.
Put the Switch Back and cover it with the Plate
Insert the two-wire switch back into the electrical box neatly. Fasten it with screws to the box and put and turn the faceplate on the switch with screws.
Return Power
Re-activate the circuit breaker. Move the switch manually to confirm its operation without introducing smart solution components yet.
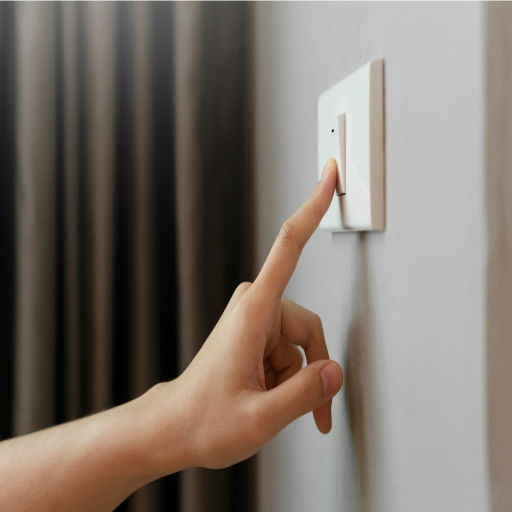
Adding the Smart Switch to Your Network
Consult the instructions that came with the switch in order to set it to connect to your Wi-Fi connection. More often than not, it usually requires you to download an application and register, as well as follow a few instructions.
Confirm the Functional Operation
Make sure the smart switch is operational. Check the building instructions and see if app controls or voice assistants can also be used for the intended purpose.
When you carefully follow these instructions, backed up by the iface manual, you will not only implement the facile mounting but also evolve the smart home to the next level.
Common Mistakes to Avoid
Skipping the Power Shutoff
Leaving the power on at the circuit breaker during installation is probably one of the most dangerous mishaps. An electric shock can occur, and it can damage the switch.
Wrong Connection
Connecting wires in the wrong order, such as swapping the load and line wires, is a common mistake. Refer to the wiring diagram in your smart switch’s manual for proper connections, and always use a voltage tester to verify your work.
Not Testing Compatibility
Install a smart switch that does not fit your home’s electrical system, and especially lacks a neutral wire, and it would very well result in performance issues or outright inability to finish installation.
Ignoring Wi-Fi Requirements
In many cases, a smart switch requires the 2.4 GHz band to work. Trying to connect it through a 5 GHz network would thus lead to a failure to pair it to your home setup.
Skipping App Setup Steps
Rushing through the app installation means an incomplete integration with the other smart devices or possibly the voice assistant. So make sure to follow the app instructions to the letter for full functionality.
With this little checklist of common beginner pitfalls, your installation should go super-smooth and make your smart switch highly reliable in your connected-home environment.
Applications of Two-Wire Switches
Two-wire switches traditionally boast greater utilization in older homes where neutral wires were not provided in the electrical wiring. They fare well with simple lighting arrangements such as single light fixtures or plain circuits. Such switches prove especially helpful when it comes to retrofitting an existing system or upgrading it without undertaking an extensive rewiring job. Their simplicity is quite helpful in those situations denied modern three-wire arrangements.
Using Two-Wire Switches for Lighting Control
Advantages of the Two-Wire Switches
- Dependable for controlling lighting in old houses
- Do not require a neutral wire in installation
- Help in cutting down installation and material costs
- Easily incorporated into existing wiring systems
- Minimal disruption to current arrangement
- Cheaper to buy and require less energy to operate
- Reasonable alternative for regular lighting control
Limitations of Two-Wire Switches
- Not compatible with certain advanced smart lighting systems
- Require neutral wire functionality for advanced features
- Limited integration of functions like dimming and automation
- Can cause problems with some types of bulbs, like LEDs
- May experience flickering or improper operation without neutral
Considerations for Optimal Use
In the case of two-wire types of switch installation, factors must be considered to ascertain their suitability for the particular lighting fixture and the nature of the electrical layout. Using good-quality switches and lights made to function without the need for a neutral wire can lessen any difficulties. Put safety first, as well as your local electrical codes, by having an installation or upgrade carried out by means of a licensed electrician.
Compatibility with LED Lights and Appliances
Two-wire switches are generally suitable for LED lights and modern appliances. However, certain factors may be worth considering. Unlike traditional incandescent bulbs, most LED fixtures consume less power and hence may demand that the switches be specifically built for low-wattage loads to avert flickering or other malfunctions. The selection of LED-compatible two-wire dimmer switches, when dimming is intended, will guarantee flawless performance.
Further, some LED lights may allow insufficient amperage to keep the circuit on when the switch is turned off, thus causing ghosting or pulsing. In such cases, bypass devices are available from many manufacturers, which can be installed alongside the switch to stabilize the current flow.
Thus, when wiring appliances or smart devices with two-wire systems, always check if such wiring is rated for the device. If the appliance requires a neutral wire, alternative wiring options or additional supplementary items such as smart switches with a neutral wire option would need to be considered. Always review product requirements and consult a professional regarding compatibility issues.
Understanding Circuit to the Light
Light fixture circuits must be understood with regard to how they are wired. In a basic lighting circuit, the live wire supplies power to the switch, from which another wire is taken to the light fixture; then a neutral wire returns the current. Two-wire circuits will see the switch controlling the break in the line wire, “line wire” being the term used in English when referring to a live wire, and no neutral at the switch. If the light terminals require a neutral, then either a three-wire system should be used, or an alternative may be considered, such as a bypass device.
It goes without saying that the fixture manual should be read and that the correct wattage and type of fixture should be chosen, along with any smart switches or devices. A few considerations to keep in mind include: Does your home have neutral wires? Or do you require a neutral smart switch or an additional relay? Always choosing a professional for installation will ensure safety and proper operation. It would be good to combine tips from big, trustworthy sources, as this will really clarify and put you away from common mistakes in retrofitting or new installations.
Safety and Compliance with NEC Guidelines
As an advice, it is imperative to Muslim the regulations and provisions of NEC so that electrical safety is assured in a house or business environment. Important aspects are:
- Proper Grounding: Keep all electrical systems and devices properly grounded to avoid hazardous situations.
- Overloading Circuits: Electrical loads should be adequately distributed, and no device should be used for carrying more than its rated wattage to prevent circuit overload.
- Use Approved Equipment: Equipment, switches, and fixtures used in any work should be compliant with the NEC and should carry certification from UL, ETL, or any other organization.
- Hiring a Professional: Throughout any wiring alteration or new installation, keep the services of a licensed electrician so that the work meets NEC standards.
Following these guidelines will reduce hazards and thus encourage safety in the electrical environment. Always stay abreast of local amendments to the NEC for your area.
Understanding Ground Wire Requirements
Benefits of Ground Wires
Ground wires are an important part of any electrical system as they ensure the safe passage of excess or stray electrical current. This process of grounding lessens the chances of an electrical shock, fire, or damage to an appliance. The ground wire connects an electrical system to the earth so that any fault current may be dissipated safely.
NEC Guidelines for Proper Grounding
On the safety of grounding, the NEC commands that proper grounding practices be followed. Every metal part of an electrical system — outlets, panels, fixtures — needs to be bonded securely to the grounding system. In places with high humidity and wherever sensitive equipment is used, grounded protection is doubly important for persons as well as the equipment.
Ground Wire Materials and Sizes
The ground wires are normally made of copper or aluminum, as both of these materials provide good conduction to electricity. The size of the ground wire extends with system-wide capacity and must comply with NEC specifications. For example, the greater the amperage of a system, the thicker the ground wire for proper dissipation of fault current.
Verifying Grounding Systems
Regular inspection of your grounding system is recommended to make sure it is effective and compliant. Ground connection continuity and integrity can be tested through standard equipment, or you may opt to have an electrician verify that the system is meeting NEC standards. Proper care and maintenance lessen hazards from electricity and keep systems up and running.
Importance of Following NEC Standards
Following the NEC is important, as it must guarantee the safety and reliability of electrical instalments. Following these guidelines reduces the risk of electrical hazards to upset property and follows the laws. It gives me a sense of assurance that systems, barring one, could not pass through without being up to code and working efficiently to prevent potential problems.
How to Ensure Safe Circuit Configuration
For safe circuit installation, first take the necessary time to program the circuit-keeping in view in this phase load requirements, wire sizes, and breaker ratings to avoid the load on these breakers. Always use best quality materials certified as per NEC standards-Wires, breakers, and outlets shall all be as per NEC specifications. Ground and bond all electrical components to provide safety, should there be a fault or electrical shock. Carry out inspections of the installations during placement and after construction to identify any problems that could jeopardize safety codes. Finally, circuits must be very well-labeled, tested, and verified for appropriate operation. Following these practices reduces hazards and guarantees a secure electrical system.
Reference Sources
“A Rural Next Generation Network (R-NGN) and Its Testbed”
“Power Switching Protocol for Two-Way Relaying Network under Hardware Impairments”
Frequently Asked Questions (FAQs)
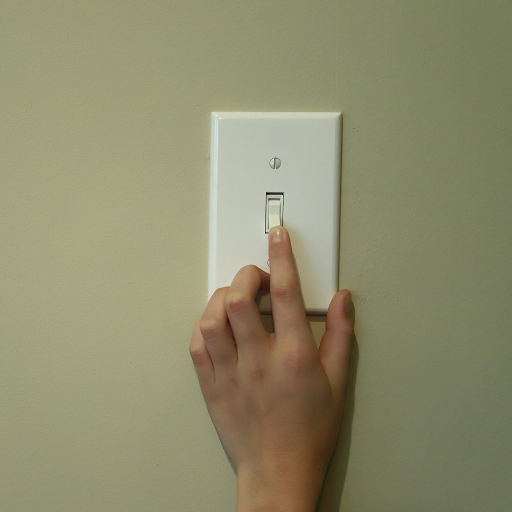
And what exactly is a 2-wire switch? How does it work?
Commonly, a 2-wire switch consists of a hot wire and a switch wire that controls the electrical flow toward some lamp or other electrical appliance. Flipping the switch would either connect or disconnect the hot wire, basically breaking the circuit, and turning the light on or off.
How do I determine if a wire is hot in a 2-wire switch cable?
The black wire is generally hot, and the red wire may also be hot. The neutral wire is normally white. In a switch box where there is a 2-wire configuration, the black wire would feed through the switch and control the flow of electricity, whereas the white wire usually would be the return path.
Is it possible to insert a toggle switch in a switch box with two wires only?
Yes, the toggle switch can be installed within a switch box that has only two wires running to it. Then attach the black wire to the terminal of the switch and wire the white to the lamp or appliance. This is, after all, the common method for controlling basic lighting.
What is the difference between a rocker switch and a toggle switch in 2-wire circuits?
The rocker switch rocks back and forth to allow or disallow the flow of current, while the toggle switch has to be flipped one way or another for the current to be on or off. Both types of switches can be used in a 2-wire switch configuration, giving a choice of style and function to light applications.
How to wire a ceiling fan to a 2-wire switch?
To wire a ceiling fan to a 2-wire switch, one must connect the black wire coming from the fan to the switch and the white wire to the neutral line. This arrangement makes it possible for the fan to be controlled from a single switch, subsequently keeping its installation simple and efficient.
What if the 2-wire switch box is grounded?
If the 2-wire switch box is grounded, and a bare copper ground wire is available, then connect it to the switch’s grounding terminal. This acts as a safety feature as it grounds any electrical faults, thereby reducing the risk of an electric shock while using the switch.
Will LED bulbs work with a 2-wire switch?
Of course, LED bulbs can be used with a 2-wire switch. Since LED bulbs are power savers, they work fine with standard switches. Just take care not to allow the total wattage to exceed the rating of the switch, for this could cause it to overheat.
What does breaking the circuit mean in the context of a light switch?
Breaking the circuit means opening the circuit path that occurs when the switch is turned off. The circuit is interrupted, so no electricity flows down the hot wire to the lamp. The light is, thus, turned off.
How can one carry out the function of controlling multiple lights using a single 2-wire switch?
To control multiple lights with one 2-wire switch, you would wire the lights in parallel so that each lamp has its own return path back to the neutral. In this way, one switch can be used to turn several lights on and off.