Understanding Jumper Cables
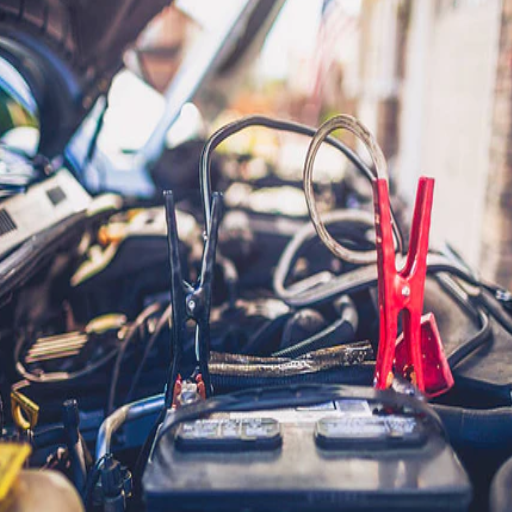
Jumper cables work by moving current from the battery of a car that is fully charged to the one that is discharged. The dead battery thereby has enough power to start the engine. The cables consist of wires that are insulated and have clamps at either end, which are red for the positive terminal and black for the negative terminal according to the standard color code. It is very important to connect the clamps properly in order to have a safe and efficient energy transfer. Wrong connections or use of badly frayed wires may lead to electrical troubles or even cause harm to the auto’s electrical system. Indeed, proper cable handling is the main factor that will rule out the occurrence of hurdles during the jump-starting process.
What Are Jumper Cables?
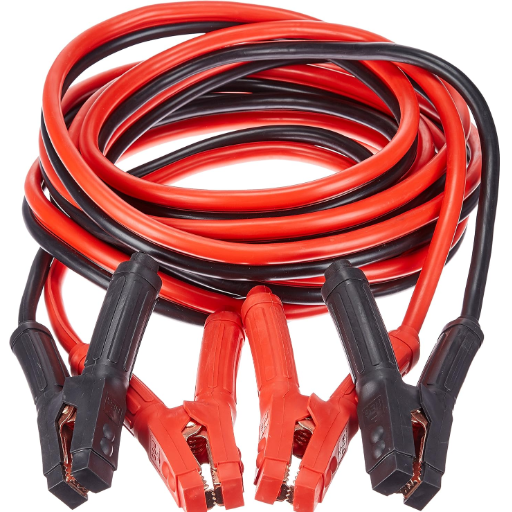
Jumper cables are referred to as a pair of insulated wires that have alligator clamps on both ends, which are used to transfer electrical energy from one vehicle to another. Generally, one cable with red color indicates the positive terminal while the other with black color indicates the negative terminal. The main purpose of these cables is to revive a car with a flat battery by temporarily linking it up with the battery of the running car. The procedure consists of attaching the clamps to the corresponding terminals in a specified sequence to guarantee a safe and efficient energy transfer. A first-rate cable is usually produced from copper or aluminum so as to provide the best electrical conductivity and is available in many sizes and diameters for different vehicle types and requirements. Proper use of jumper cables is essential to prevent electrical damage or safety issues.
Components of Jumper Cables
Jumper cables consist of three main parts that are designed to provide effective power transfer and safety to the user:
- Clamps: These are robust, spring-loaded holders usually covered with insulated rubber to eliminate the chance of unintentional contact with electricity. There are two clamps for each set – one red for the positive pole and one black for the negative pole – so that at all times during use, the right polarity is aligned.
- Cables: The cables are heavy, insulated wires made of materials with the highest conductivity, for example, copper or aluminum. The cable gauge ranges from 1 to 10, generally, with 1 being the thickest and having the greatest electrical capacity. Insulation adds strength and protection to the wire against mechanical, thermal, and environmental factors.
- Insulation and Coating: The cables are first covered with a durable outer insulation, usually made of PVC or rubber, which gives them heat resistance, flexibility, and protection from wear and tear, thus ensuring consistent performance even in extreme temperatures and difficult conditions.
These parts are able to work together so a jumper cable system can be created, which is not only capable of providing a reliable electrical connection but also can handle different vehicle battery configurations and be less prone to user mistakes or equipment failures.
Common Uses of Jumper Cables
The primary function of jumper cables is to revive a car with a dead battery or a low battery by transferring electrical power from a good battery of another vehicle or a power source. They are indispensable in jump-starting cars in emergencies caused by battery drain owing to lights left on, very cold or hot weather, or long disuse. Jumper cables are not limited only to cars, as they can also be used on other battery-powered equipment, e.g., motorcycles and boats, to bring back power. These cables are deemed as an important element in roadside assistance kits and are often employed both professionally and personally with the aim of keeping vehicles running through sudden battery failure.
Causes of Excessive Heat in Jumper Cables

Usually, the overheating of jumper cables results from either bad connections, small cable sizes, or long-term use. Loose or dirty clamps may add to the resistance, thus producing heat in the course of power transfer. Likewise, using low-gauge cables (thin wires) could make them incapable of handling the high electrical currents, and consequently, the wires would get hot. In addition, prolonged use would make the heat problem even worse since the constant flow of the electric current would increase thermal energy. Therefore, to avoid the problem of excessive heat, make sure that connections are clean and secure, and the right-sized cables are used for the job.
Electrical Resistance and Heat Generation
Understanding Thermal Management
Thermal management is significant in electrical systems to lessen the risks brought about by rising resistance and heat production. Resistance, which is caused by the unevenness of the conducting materials or bad connections, opposes the flow of electric current and, at the same time, dissipates a portion of the electrical energy as heat. The causes of the increase in resistance include bad insulation, connections that have rusted away, or cables that are of insufficient size. All these cause the risk of the wire getting overheated or causing a fire to be more possible; therefore, the periodical inspection of the area would be the most efficient solution to the problem. This inspection would entail checking, cleaning, replacing, and doing maintenance on the areas mentioned above. In addition, letting the wires have adequate ampacity by using the proper American Wire Gauge (AWG) standards and taking the environment’s temperature into account will make sure that the system works safely within its design limits. Also, heat sinks or ventilation are the type of proper cooling mechanisms that take an active part in heat dissipation, thus enhancing the whole system’s reliability and lifespan.
Improper Connections and Their Impact
The improper connections made in electrical systems have consequences that are great in number but of the most hazardous nature as well. The most common types of these connections are the loose, poorly fastened, and incompatible ones, which, if not addressed at the very beginning, might cause an increase in electrical resistance, which in turn would lead to overheating and maybe even fire hazards. On top of that, such connections can also cause voltage drops that would result in less efficiency of the system and the devices connected to it functioning poorly. Besides, over time, improper connections can cause faster deterioration of the components, leading to an increased number of failures and consequently increased maintenance costs. Also, there is a possibility of safety risks, such as electrical shock or damage to the equipment by a sudden power surge, if the system is not grounded properly. Therefore, the performance and safety of an electrical installation are dependent on the proper connection, i.e., every connection being secure, properly rated, and compliant with electrical regulations.
Overloading the Cables
When the current that runs through electrical cables is more than what they are rated for, the situation is known as overloading. As a result, the cables generate a lot of heat, and the system may fail. This may happen due to many devices being plugged into one circuit, using small wires, or not considering the total load on the system. The insulation of the overloaded cables may get damaged, arcing may occur, or fires may be ignited, which will result in the loss of both safety and functionality.
To avoid this problem, accurate load calculations should be done in the design stage. This will involve looking at the highest possible current draw, making sure that the cables are correctly rated for the use they are going to be put to, and using circuit breakers or fuses as safeguards. It is of utmost importance that the local electrical codes and standards, such as the NEC in the United States, be followed to guarantee the safety and durability of the system. Regular checks and maintenance also play a part in spotting potential overloading signs, like discoloration, heat that is out of the ordinary, or breakers that are tripped, which makes it possible to take corrective action on time.
Consequences of Melting Insulation

In electrical systems, melting insulation can be a source of major safety risks and interruptions in the operation. One of the first outcomes is the unintentional bare wires, which, after that, elevate the danger of electric shock and electrical fire to a very high level. Furthermore, one of the scenarios resulting from the melted insulation is wire overheating and fire risk. It also weakens the performance of the system since the insulation that has been damaged might cause the equipment to fail more often or the supply of electricity to be cut off. To avoid these hazards, it is critical to take care of the insulation problem as soon as possible.
Risks of Damaged Jumper Cables
Harmed jumper cables can cause a number of major safety and operational risks. To begin with, the exposure of wires or their becoming frayed would surely result in electrical arcing occurring more frequently, and this could mean sparks, electric shocks, or even fire being a threat. Also, poor insulation or broken clamps could create connections that are not stable, leading to overheating or inconsistent power being transferred. This instability not only prevents the jump-starting of a vehicle from being done effectively but also can cause damage to the car’s electrical system, which includes the battery, alternator, or onboard electronics. In addition, cables that have been damaged may give way under load, thus leaving the users stranded and increasing the risk in emergencies. Regular check-ups and timely replacement have been the main factors in preventing the occurrence of these risks and in making sure that the operation is safe and reliable.
Safety Hazards Associated with Melted Cables
Primarily, the unsafe melted cables are a result of insulation and conductivity that have been compromised. When the insulation is suffering and melting, it gets to the point where the internal wiring is completely visible, thus increasing the chances of short circuits, which can consequently lead to fires or even damage to the equipment that is connected to the wires. Furthermore, the melted cables may go through overheating in the course of operation, thus intensifying the possibility of thermal events or sparks of fire. This, in turn, could make way for electrical arcing, which is a considerably high risk of causing injuries and property damage. In the case of vehicles, the problems that arise could lead to the failure of systems that are critical to the vehicle, such as alternators, ignition systems, and lights, especially when under heavy electrical loads. Regular inspections, eliminating sources of heat, and replacing faulty wiring promptly are necessary precautionary measures for safety.
Signs of Cable Damage to Watch For
Early Detection is Critical
Recognizing cable damage signs at the earliest possible stage is very important for the safety and normal operation of electrical systems. The most common signs are the insulation getting visibly worn or cracked, whereby the conductive core is left exposed, and the insulation discoloration, which is usually a sign of overheating or ultraviolet light exposure. Furthermore, the insulation material becoming hard or brittle can also be a sign of degradation. The presence of burn marks or scorch patterns on cables is are unambiguous signal of past overheating or electrical faults. Noise from cables, like buzzing or crackling, is usually a sign that there is an arcing or a short circuit. Other indicators are devices not working properly or working every now and then, as well as circuit breakers or fuses that have been tripped, which may indicate overload or fault. Regular inspections, especially in places where there are high-stress conditions like near engines or areas where moving parts are located, are essential to spotting these problems before they get worse.
Preventing Jumper Cable Melting

In case the jumper cables need to be prevented from melting, be sure to use cables of the gauge and capacity required by your vehicle. The clamps should be fastened firmly to the terminals so that no corrosion or debris hampers their contact. Follow the correct order while connecting the cables: connect the positive terminals first and leave connecting the negative terminal to the vehicle with the dead battery as the last step. Do not keep cranking the engine unnecessarily, as the overheating may be caused by excessive current. Check your cables occasionally for wear or damage and replace them if necessary for safety.
Choosing the Right Jumper Cables
Selecting the right jumper cables is crucial for safety and efficiency during usage. Consider the following factors when deciding on jumper cables:
Gauge Rating
The gauge indicates the thickness of the cables and thus their ability to carry current. The lower the gauge number, the thicker the cable, and the better the performance. For most vehicles, a 4- or 6-gauge cable will do. Heavy-duty vehicles or those with larger engines might require 1- or 2-gauge cables to perform well.
Cable Length
Longer cables enable more flexibility for positioning vehicles, especially in tight spaces. A length of 10 to 20 feet is quite standard, with 16 to 20 feet being the most recommended for versatility without excessive resistance.
The Clamps
Clamp quality matters. These should be well-made, with a firm grip and teeth that are not loose. Preferably, the clamps should have a copper or brass finish for maximum conductivity and safety. Avoid those cheap plastic clamps as they will probably break or give in to resistance.
During the forages, it is inseparable from having thought that the original method of insulation is not only for durability but also for safety. So get cables with thick and rugged rubber or PVC insulation that will stand wear and tear, corrosive agents, and extreme weather conditions. Copper cables are the best, given their conductivity, while aluminum cables with copper plating can do well.
One should focus on these selection criteria and be confident that the jumper cables they have bought fit their vehicle and are safe to handle during a jump start. Check for the manufacturer’s instructions for compatibility and maintenance.
Proper Jump-Starting Techniques
The car being jump-started in this tutorial must have certain safety precautions in place and follow the exact procedure, lest damage be caused to the vehicle or someone get injured. Both cars ought to be off, and one has to examine if the jumper cables are in good condition so they would not cause an electrical fault or sparks. It is recommended that the vehicles be placed so that the car batteries are unwittingly held near by cables or without tension lint.
Connector Placement:
- Attach one red clamp to the positive terminal (+) of the dead battery and the other red clamp to the positive terminal of the charged battery.
- Attach one black clamp to the negative terminal (-) of the charged battery.
- For safety reasons, connect the other black clamp to an unpainted metal surface on the engine block or chassis of the dead car. This grounding point reduces the risk of sparks near the battery, especially if hydrogen gas is present.
- Starting Procedure: It starts the engine and idles for some minutes with the good battery so as to provide a steady charge. Now, attempt to start the dead vehicle. If the engine does not immediately turn over, wait for about a minute or two before trying again. Try not to crank a starter for more than 15 seconds at a time; marring it could lower your chances in any case.
- After Starting: With the dead vehicle started, leave it to run for another 20 minutes to allow the alternator to charge the battery suitably; an alternator will typically charge between 13.7 volts and 14.7 volts when running, ensuring that sufficient power is restored in the battery for the next start.
- Disconnecting Cables: Keep this order in reverse to disconnect the clamps — begin by removing the black clamp from the grounded surface. When removing, verify that the clamps do not touch each other or any metal part of the vehicles to avoid a short circuit.
Monitoring warning lights and all abnormal engine behavior is of utmost importance in this case. A battery dealing with an endless battery problem would indicate an alternator too weak to charge or the battery being discharged and needing replacement. Another maintenance procedure to minimize sudden battery failure is to perform periodic battery checks and keep electrolyte levels properly maintained, where applicable. Hence, applying these techniques helps in securing a jump-start in all situations efficiently and safely.
Regular Maintenance Tips for Jumper Cables
To keep the jumper cables in working order and reliable, proper maintenance must be ensured. Start by keeping an eye on the cables for signs of wear and tear, such as fraying of insulation, exposed wires, or corrosion on the clamps. These damaged cables can give substandard conduction, or worse, they might pose some safety problems. Periodically clean the clamps using a wire brush and a solution of baking soda and water to abate corrosion buildup, which in turn degrades performance that would lead to erratic charging or ignition problems.
The jumper cables must be kept dry and cool and away from moisture and direct sunlight, which have the potential to deteriorate the insulation over time. Spending cash on a fine storage bag especially made for automobile tools should keep your cables free from any tangles or damage. Check to ensure that these cables are rated with the proper gauge for your type of vehicle. Thicker gauge cables, or those with lower gauge numbers, will mostly provide better transfer of current for any type of larger vehicles like trucks or SUVs.
Inspect your jumper cables for length; anything less than 12 feet will tend to be rather limiting while in use. For heavy-duty applications, consider rating the cables at 4-gauge, which would be capable of carrying more potential/current and sustaining a greater demand of a larger vehicle battery. Periodic testing with a multimeter to check for proper electrical continuity will ensure that the cables are working properly when needed. If you apply these simple maintenance steps regularly, they will help prolong the life of your jumper cables and improve the reliability of any emergency use.
Choosing the Right Jumper Cables to Avoid Melting and Improve Vehicle Safety
To keep cables from melting and to emphasize safety, jumper cables must have the following characteristics:
- Right Gauge: Choose cables with a lower gauge number (possibly 4-gauge or thicker). Thicker cables carry more current, preventing heating.
- Great Insulation: High-quality insulation is necessary for the jumper cables to resist extreme temperature changes.
- Good Clamps: The clamps should be solid metal, preferably copper-plated, to offer good conductivity and hold on securely.
- Correct Length: Cables at least 12–20 ft provide a wide variation in vehicles that they can respond to without being overstretched.
By choosing cables with these criteria, the risks to your safety can be prevented while assuring reliable operation in times of an emergency.
Key features to look for when purchasing high-quality jumper cables
In the process of choosing jumper cables, put under consideration the features that guarantee safety and efficiency. Based on research from myriad sources, the following factors are felt to be essential:
| Feature | Description | Recommended Specifications |
|---|---|---|
| Cable Gauge | Lower gauge numbers, such as 4-6 AWG, should be used in favor of the jumper cables. The lower the number, the thicker the cable, allowing a higher current to flow and hence a faster jump-starting procedure. | 4-6 AWG for standard vehicles; 1-2 AWG for heavy-duty |
| Insulation Quality | Good insulation should be used and must be from a good, durable material like rubber or TPR (thermoplastic rubber). These materials will protect from extreme temperatures, abrasion, and exposure to chemicals. | Rubber or TPR material, weather-resistant |
| Clamp Design and Durability | Heavy-duty clamps are best, having jaws that firmly grip, preferably copper-plated or solid copper, so as to maximize conductivity and durability while preventing slippage during use. | Copper-plated or solid copper with a strong spring mechanism |
| Length and Flexibility | A jumper cable should run at least 12-20 ft in length to ensure that one has a choice to reach out to the battery terminals of vehicles in varying configurations. The cables should maintain flexibility even in extreme cold so as to facilitate easier use. | 12-20 feet, flexible in cold weather |
| Amperage Rating | Look for high amperage rating cables in the range of about 400-800 amps so as to be able to work on a large spectrum of vehicles, from small cars to larger trucks and SUVs. | 400-800 amps minimum |
| Easy Storage and Portability | Look for those that offer a carrying case or bag for neat organization and ease of transport. | Includes storage bag or case |
If you invest in premium-grade jumper cables that have these key traits, you are assured that you will have a dependable product that will not break down easily, plus the safety of the people involved in emergency use will be guaranteed.
Differences between standard and heavy-duty cables
The main difference between the standard and heavy-duty cables lies in their construction and purpose. Standard cables are lighter, shorter in length, and are meant for smaller vehicles or some low-power requirements. This means they would suffice for use with a compact car or for occasional use. Heavy-duty cables are thicker gauges of wire knit with higher amp ratings and would probably be longer, allowing larger vehicles like trucks or SUVs to be jump-started in more demanding scenarios. Personally, I would prefer heavy-duty cables for the versatility and reliability they offer, particularly when dealing with various vehicle sizes or conditions.
How to match the cable gauge to your vehicle’s battery requirements
Jumper cable gauge selection really depends on the size of your vehicle’s battery and its electrical requirements. The gauge of a cable corresponds to its conductor thickness: the lower the number, the thicker the conductor and the better the cable works. Gauge 8 or 6 would generally work for smaller or midsize cars, since less cranking power needs to be delivered; bigger cars like SUVs and trucks with bigger engines usually go for heavier gauges like 4 or even 2 so that they can bear the large current flow during a jump-start.
Gauge 8
Perfect for small cars and lighter use.
Gauge 6
Great for midsize sedans with regular use.
Gauge 4 or less
For bigger vehicles, heavy-duty applications, or extreme weather scenarios.
Professional Recommendation
Since low-gauge cables happen to be very flexible and efficient in the transmission of power, do not be afraid to opt for a lower-gauge cable if one has the tendency to assist in jump-starting several vehicle types or in harsh conditions.
Final Thoughts
Understanding why jumper cables melt and how to prevent it is essential for every vehicle owner. By choosing the right cables, following proper jump-starting techniques, and maintaining your equipment regularly, you can ensure safe and effective emergency battery assistance. Always prioritize quality over cost when selecting jumper cables, as this investment directly impacts your safety and the longevity of your vehicle’s electrical system.
Reference Sources
Welding Station Monitoring System Using Internet of Things (IoT)
Shear-Thinning in Oligomer Melts—Molecular Origins and Applications
Frequently Asked Questions (FAQs)
Why do jumper cables melt during the attempt to start a car?
If jumper cables are not thick enough to carry the full current needed to start the car engine, they may simply melt. Cheap jumper cables made of thin copper conductors overheat and melt the plastic insulation when they are subjected to careless use or when the car refuses to start because of a dead battery or an internal short.
What happens to a car if one connects the jumper cables in the wrong way?
Connecting the jumper cables in the wrong way, red cable on the negative terminal of a battery, or black cable to the positive one can create a dead short, melting the insulation of the jumper cables and probably leaving damage on the vehicle’s electrical circuits. It is always wise to connect red with red and black with black, avoiding all dangers.
To really cause problems in jumping a car, are cheap cables capable of doing it?
Cheap cables tend to have lower resistance and may not be able to carry the high current required when jump-starting a car, leading to overheating and melting of cables, especially if they are 10-gauge or thinner. Choosing a larger gauge, such as 4 or 0, might keep these things from happening.
What should one do if their jumper cables begin to melt?
If you observe your jumper cables melting, stop the operation immediately to avoid further damage to everything. Check to make sure the cables are not connected to battery posts incorrectly; inspect for a corroded connection or a shorted battery.
How do you keep your jumper cable from melting?
Prevent the cables from melting by using only top-quality jumper cables whose specifications fit your vehicle’s electrical requirements. You want to use a set of cables with a large enough cross-section, e.g., 4 gauge or better, and then take care in connecting those cables to avoid overload.
What would melting imply for the insulation on my jumper cables?
The melted insulation of jumper cables generally indicates that a very high current was allowed to pass through them, heating them up. This can occur if the cables are either too thin or wrongly hooked up. This situation can become dangerous if it results in the exposure of live wires.
Can jumper cables melt when connected to a leaking battery?
Yes, if the jumper cables are connected to a battery with residue leaking or venting out gas into the atmosphere, the gas may create an unsafe environment. Any spurting sparks can ignite this gas dispersed around and may cause the cables to melt or spread their flames. Hence, always work in areas with good ventilation and away from battery vents.
What kind of behavior can be exhibited by your jumper cables to show their failure?
Any visible signs of wear and tear, melting insulation, a burning odor, or difficulty in starting the car must indicate that the jumper cables are in the process of failing. If the cables are cheap or thin, they tend to fail more often. Always ensure your cables are in fine shape by checking them before every use.