Understanding Speaker Wire and Its Importance

Speaker wire is a kind of electrical cable specifically designed for transmitting audio signals from your amplifier or receiver to the speakers. Its main role is to keep the signal intact, allowing truly accurate sound reproduction. The wire’s quality, which consists of its type of material, thickness (or gauge), and length, has a direct effect on audio quality. A good example is that wires with a lower gauge are more appropriate for signal loss reduction over larger distances. Speaker wire that is correctly selected and maintained is necessary to reach clear and distortion-free sound, and also to keep the audio system’s overall efficiency.
What is Speaker Wire?
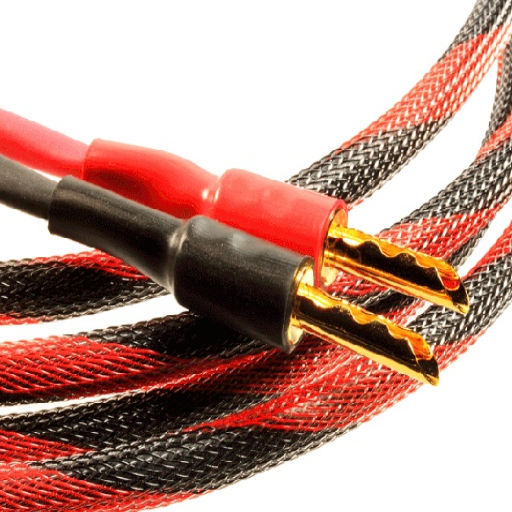
Speaker wire is a type of electrical cable specifically designed to carry audio signals from an amplifier or audio receiver to the loudspeakers. Its structure comprises two or more metal wires that are covered with an insulating layer, which is usually plastic. Speaker wire’s main aim is to transmit audio signals with the highest quality possible while resisting, for instance, resistance, capacitance, and electromagnetic interference to the least possible extent. The wire’s gauge (its thickness), the type of conductor (for example, copper or aluminum), and the wire length are essential factors influencing its performance. Usually, the use of high-grade materials and thick (low-gauge) wires is recommended to prevent signal deterioration, especially when carrying sound over long distances. Thus, the right speaker wire selection and its proper installation can greatly affect an audio system’s fidelity and power efficiency.
Types of Speaker Cable
The various types of speaker cables can be classified according to their construction, materials, and particular applications:
Standard Speaker Wire
The type of speaker wire that is commonly used is made up of two insulated conductors of copper or aluminum. Copper is the best conductor and is the one that has the least resistance, while aluminum is the one that is less efficient but is more economical and lightweight.
Oxygen-Free Copper (OFC) Wire
OFC wires are made by a process that removes oxygen to lower the resistance and increase the durability of the wire. These wires are frequently used in high-fidelity audio systems where it is very important to have the least signal loss and distortion.
Silver-Plated Copper Wire
Silver-plated copper wire is a type of wire that has a copper core and a very thin layer of silver, which contributes to its high conductivity, thanks to the superior electrical performance of silver. This type is preferred for high-end audio setups, though the price is a significant disadvantage.
Flat Speaker Cable
The cable that is designed for hidden installation is a flat one, which can be placed under carpets or along walls without being seen. This type is very helpful in places where the appearance and space are the main considerations.
Bi-Wire Speaker Cable
Bi-wire cables divide the signal into two distinct paths, which leads to better sound quality because the distortion and interference are reduced. These are mostly applied in sophisticated sound systems that are meant for audiophiles.
Different types of speaker cables, each of them for separate usages, and the decision of their choice has to be made according to the system’s power output, distance, and environmental conditions. Moreover, using connectors of high quality will guarantee the best signal transmission.
Role of Speaker Wire in Sound Quality
The principal speaker wire function in sound quality is to ensure that the audio signal from the amplifier shall be unchanged and pure. The characteristics of the cable, such as its resistance, capacitance, and inductance, will determine its performance. Power loss in the case of low-resistance cables will be at a minimum, and thus the signal will arrive at the speakers without any major quality loss. Typically, well-designed cables have low capacitance and inductance, but still, they can affect sound in the situation of longer cable runs or mismatched system components, particularly at higher frequencies.
The thickness of the wire, indicated by its American Wire Gauge (AWG), is a very important factor—smaller gauge numbers mean thicker wires, which can better endure longer distances or higher power levels. Moreover, ensuring good insulation and using materials like oxygen-free copper (OFC) or silver can further increase the flow of electricity and lower the loss of the signal. But, usually, the difference that can be heard between high-end and standard cables in most setups is quite small, a matter of matching the specific system correctly rather than the costly option of just choosing the most expensive one.
Another aspect that can affect sound quality is the environment where the circuits are placed, interference from the nearby electronic devices, or physical wear. Nevertheless, high-quality speaker wires with robust sheathing and shielding can lower noise and at the same time provide a long period of reliability, especially in difficult installations.
Splicing Speaker Wire: An Overview
The splicing of speaker wire is a practical way to either make the wire longer or to repair a broken section. To start, strip about 1-2 inches of insulation from each end of the wire with the intention of getting pure copper that is clean and not oxidized. Keep the bare strands together tightly so that they are tidy and secured. Place the wires side by side and twist them together, making sure that the connection is firm. For an added advantage, use solder for the splice to give it strength and to eliminate the possibility of signal loss, although it is not necessary for basic setups. After that, cover the splice with heat shrink tubing or electrical tape to insulate it from short circuits and damage due to the environment. Signal degradation is minimized, and sound quality is retained through proper splicing.
What Does Splicing Speaker Wire Involve?
The Splicing Process
The term splicing speaker wire refers to the joining of two independent pieces of wire to either extend a connection or repair a section that has become defective. However, the whole process is done in such a way that optimal signal transmission is maintained. The process starts off with the stripping of the wire’s insulation at the ends of each wire in such a way that a sufficient length of the conductor is exposed. The wires are then twisted together, forming a strong physical and electrical connection. To ensure even better reliability, soldering is a very common practice as it not only strengthens the splice but also provides a low-resistance pathway for the audio signal. The next thing to do is to insulate the splice since it is very critical in avoiding short circuits, corrosion, or interference by outside factors. Heat-shrink tubing or very good quality electrical tape is suggested for proper insulation. Using the proper splicing technique is very important to reduce signal loss, keep the sound quality, and make the connection last longer.
Tools Needed for Splicing Speaker Cable
For a successful speaker cable splice, several tools and materials are required, besides good technique, to guarantee a connection that is both reliable and of high quality:
- Wire Strippers
They are for the removal of the insulation from the cable ends in such a way that not even a single strand of the wire gets damaged. - Soldering Iron and Solder
The use of a soldering iron is needed for a secure and firm joining of wires, while solder forms an unbreakable and non-stop connection that is also conductive. - Heat Shrink Tubing
The output is a splice that is completely insulated and protected against moisture, corrosion, and electrical shorts, which are the threats that heat shrink tubing offers once the splice is complete. - Electrical Tape
As a substitute for heat shrink tubing, it is used for insulating the splice and holding the connection firmly in place. - Utility Knife or Cable Cutter
They are for cutting cables to the desired length and getting clean and accurate cuts. - Multimeter
It measures the electrical continuity and detects any irregularities in the connection.
The use of these tools and materials is what the professionals advise for a splice that is well insulated, durable, and with minimal signal loss and interference.
Safety Precautions When Splicing
Critical Safety Measures
Splicing cables involves a strict adherence to safety measures that are crucial to prevent injuries or damage to equipment, as well as to avoid the connections becoming compromised. Key precautions are listed below:
- De-energize All Electrical Systems – Completely turn off all cabling and connected systems before starting to prevent electric shock or short circuits.
- Wear Appropriate Personal Protective Equipment (PPE) – Use insulated gloves, safety glasses, and protective footwear to prevent electrical hazards and sharp tools from coming into contact with the body.
- Ensure a Clean and Organized Workspace – Contaminants such as water, dust, and debris should not be present in the work area, as they can hinder the splicing process; therefore, keep your area clean.
- Verify Compatibility of Materials – It is a good practice to check that the cable types, connectors, and insulation materials are all compatible at all times to avoid connection failures or electrical interference.
- Follow Manufacturer Guidelines and Standards – Practice the specific guidelines issued by the industry, for instance, those given by ANSI or IEEE, and also the manufacturer’s recommendations regarding the tools and materials to ensure maximum safety and performance.
- Perform a Final Check – Test the connection using a multimeter or a similar device to check for continuity and make sure no abnormalities exist before re-energizing the system.
Splicing can be done in a safe manner, in an efficient way, and with the result lasting for a long time and being reliable, if the above detailed precautions are observed.
How to Properly Splice Speaker Wire
To splice the speaker wire correctly, you need to follow the procedure outlined below one by one:
- Gather Tools and Materials – Properly splicing the speaker wire will require a wire stripper, electrical tape, heat shrink tubing or wire connectors, and the speaker wire to be spliced.
- Prepare the Wires – Carefully remove by using a wire stripper, the insulation covering about 1 inch of the ends of the wires that are to be connected. Check that the exposed copper strands are not dirty or damaged.
- Twist the Wires Together – Put the exposed copper strands side by side and then twist them tightly to form a secure connection. This will help to a good conductivity.
- Secure the Connection – Either cover the twisted part with electrical tape or put a heat-shrink tube on the connection and heat it to shrink it in place. You may also use a wire connector for extra security.
- Inspect and Test – Re-confirm with your eyes the connection’s strength and that it is well insulated and that no copper is exposed. Play audio from the speaker as a test to make sure it is working properly.
A reliable splice will come from having clean, tight connections and using the right insulating materials.
Step-by-Step Guide to Splicing Speaker Cable
1. Is it possible to splice speaker wires without using solder?
Certainly, there are various non-soldering methods, such as twist-on wire connectors, crimp connectors, or securely twisting the wires together and insulating them with either electrical tape or heat shrink tubing. The first two techniques can also provide a solid connection if done right.
2. Is splicing speaker wire bad for sound?
If done correctly, the splicing of speaker wires shouldn’t bring down sound quality in most applications. The wire connection will be clean and resistant-free if securely twisted with no loose strands left. Also, the use of top-notch connectors and insulation material cuts down any potential interference or loss.
3. Is there a limitation for the length of the speaker wire after it’s been spliced?
Wire length is not a concern, but splicing itself. In fact, the longer the wire run, the more resistance and signal loss in the thick wires. If the distance is more than 50 feet, then one can go for lower gauge wires (thicker) for better audio performance.
4. What steps should I take to make sure the splice is strong?
Get yourself a strong splice by following the best-practice route: strip the wires to the right length, exposing the correct amount of copper, then either twist together or connect the wires with the appropriate connectors, and finally insulate the whole splice with electrical tape or heat shrink. This will be a barrier against corrosion, a short circuit, and wear-and-tear through the years.
Using the right splicing techniques and top-quality materials to connect your audio system will give you a reliable and efficient connection with no integrity loss.
Common Mistakes to Avoid When Splicing
If done correctly, the splicing of speaker wires shouldn’t bring down sound quality in most applications. The wire connection will be clean and resistant-free if securely twisted with no loose strands left. Also, the use of top-notch connectors and insulation material cuts down any potential interference or loss.
Using Incorrect Tools
If you are using the wrong tools, such as using dull wire strippers or connectors that are inappropriate for the job, you run the risk of either damaging the wires or making a poor connection. It is advisable to always use those tools that have been specially made for electrical work so that there are clean cuts and exact insulation removal.
Failing to Properly Strip and Clean Wires
Not stripping enough insulation or not cleaning the ends of the exposed wires properly can prevent contact from being made correctly and cause resistance or intermittent connections. Make sure the wires are stripped to the right length and are clear of dirt, oxidation, or debris.
Skipping Proper Insulation of Connections
By leaving spliced connections unprotected or poorly insulated, you are risking the occurrence of short circuits, electric shocks, and corrosion. To prevent this from happening, make sure that you always employ top-notch insulating materials like electrical tape, heat shrink tubing, or self-sealing connectors.
Over-Tightening or Under-Tightening Connectors
The application of too much strength can lead to the destruction of not only the connectors but also the wire strands; on the contrary, the lack of sufficient tightening can give rise to loose and unreliable connections. Adhere to the manufacturer’s guidelines with respect to torque or pressure so that you can get an optimal fit.
Neglecting Wire Compatibility
If you splice together incompatible types of wire, like for example those with different gauges or materials (aluminum to copper), it can lead to poor conductivity, overheating, or degradation in the long term. The best practice is to match wire types to get rid of problems and to increase the lifespan.
Common errors are the main reasons for poor wire splicing, but if you know how to avoid them, you can produce safe, secure, and, finally, long-lasting wire splices that will not affect the flow of power through your electrical systems.
Testing Spliced Speaker Wire for Quality
Testing is necessary if you want your spliced speaker wires to work at their peak and be reliable. Check the quality of your splice by following the steps below:
Visual Inspection: Look at the splice closely to see that the connections are secure, the insulation is appropriate, and there is no wire that is not covered. Make sure that the heat-shrink tubing or electrical tape covers the splice completely so there will be no short circuits or oxidation.
Continuity Test: To test the connection, use a multimeter that is set to continuity mode. Put the probes of the multimeter on either end of the wire that has been spliced. A beep or a reading that is very close to zero resistance means that the splice is good; it has conductivity that is not interrupted or faulty.
Resistance Measurement: Using the resistance setting on your multimeter, measure the spliced wire’s resistance. An extremely high resistance can be a sign of a bad splice, which may result in audio quality degradation or power loss. The resistance should be very similar to that of a wire that has not been spliced, which is intact, the same material and length.
Audio Performance Check: Your audio system should be connected to the spliced wire. Choose a range of audio tracks, and then carefully listen for any distortions, loss of clarity, or inconsistently loud sounds. These might be signs of the splice being bad or the wire not conducting properly.
Through these tests, you can be sure that your spliced speaker wires meet the required standards for safety and efficiency. Therefore, you will have the best sound quality and the longevity of your system.
Impact of Splicing on Sound Quality
The way speaker wires are spliced can affect sound quality in a negative way if not done properly. A splice that is properly made and neat provides the best conductivity, thus maintaining the sound clarity and the performance being in the same level all the time. On the other hand, the poorly made splices may cause resistance, which could lead to a lower sound, loss of some sound details, or even distortion in the sound coming out. By using the best connectors and a very tight, insulated connection, these risks are minimized, and the audio signal is allowed to keep its quality. If sound splicing is done properly, it will hardly or not at all change the sound quality.
How Splicing Affects Audio Performance
The right way of connecting audio cables has a direct influence on audio performance since it allows a clean and efficient signal transfer. Properly done joint reduces resistance and loss of signal, which are both very important for the preservation of audio quality and the avoidance of distortion. Bad splicing methods, like loose connectors or not enough insulation, can lead to noise, increased resistance, and possibly signal degradation, which will all result in poor sound quality. To be able to use the best materials like oxygen-free copper conductors, and apply certain techniques such as soldering for a strong and long-lasting connection, is all part of getting the best performance. Moreover, shielding and insulation that are up to the required standard are important so that the splice does not suffer from external electromagnetic interference, thus maintaining the audio signal’s integrity.
Maintaining Optimal Sound After Splicing
For the best sound quality preservation after splicing, these major practices must be followed:
Ensure High-Quality Materials: Choose top-notch materials like oxygen-free copper (OFC) wires, which offer the best conductivity and hence less signal loss. High-grade solder and connectors meant for audio applications should also be used.
Implement Proper Splicing Techniques: Remove the insulation from the wires carefully so that not much material is taken away. Twist the bare wires tightly together before soldering to reduce resistance and, at the same time, create a strong mechanical bond. Heat should be applied uniformly during soldering to get a clean and stable joint.
Shielding Against Interference: The splice can be protected from electromagnetic interference (EMI) by using cables that possess good shielding, like those with layers of braided copper or aluminum foil. Moreover, the splice can be wrapped up with insulating materials such as heat-shrink tubing to block oxidation and thus keep the connection strong.
Check and Test Connections: Connection testing after splicing can be done through continuity and signal strength measurement with a multimeter or a dedicated cable tester. This step gets rid of the possibility of the presence of weak points or interruptions in the signal flow.
Adhering to these well-defined and somewhat intricate steps, the optimal sound fidelity as well as the durability of your spliced audio connections can be assured.
When to Replace Instead of Splicing
Even though the process of splicing can restore the functionality of some damaged cables in most cases, there are still situations where the cable has to be replaced for the better. Replacement is the recommended solution in the following cases:
Extensive Damage: When the cable is completely worn out, rusty, or there are several broken points, then splicing might turn out to be a safety and performance risk. On the other hand, replacing the cable guarantees a safe and reliable functionality for a long period.
Critical Applications: In case of high-quality or professional installations like studio recording or live sound systems, the cable should be changed to avoid a decrease in signal quality or even an interruption in use due to failure.
Aging or Wear: Very old cables that are noticeably worn, such as those with cracking insulation or those that do not comply with current standards, should be replaced to bring safety and performance up to date.
Cost and Time Efficiency: When the cost of splicing and the effort involved are higher than the cost of a new cable, then replacement is usually the best option, especially with replacements that are readily available.
Manufacturer-Specific Cables: In the case of proprietary or specialized cables that need strict specifications, replacement is the only way to ensure that the cable is compatible and works at its best.
Hence, using the method of replacement instead of splicing will result in no risks associated with unreliable connections and will also guarantee that the system will be functioning efficiently and safely.
Maintenance and Troubleshooting
If you are working on or fixing cables, then you need to do the following:
First, look for physical damage: Identify and check the damaged area and such like—fraying, cuts, and so on. The damaged cables must be replaced right away because they may cause system malfunctions.
Next, test the connections: Take a continuity tester or a multimeter and see if there is proper electrical flow. Issues that come and go may mean either internal damage or loose connectors.
Then, secure the connections: Tighten all of the connectors to avoid losing the signal or interrupting the power. The very loose cables are the most common reason for the failure of operations.
After that, clean if needed: Connectors may get dusty and dirty and, as a result, lose contact. To avoid that, use cleaning solutions that are non-conductive for the maintenance of good performance.
Finally, make a habit of doing regular inspections and also timely interventions that will help a lot in not only prolonging the cables but also reducing the system’s downtime. It is a must to always adhere to the manufacturer’s guidelines whenever carrying out maintenance and troubleshooting on cables.
Caring for Spliced Speaker Cable
The quality and reliability of sound signals produced by spliced speaker cables depend greatly on their proper care and maintenance. The following are some succinct and practical instructions for keeping together spliced connections:
Secure the Splice: Apply good-quality electrical tape, heat shrink tubing, or solder to fix the spliced region. This makes it very difficult for oxidation, humidity, and mechanical wear to reach the connection area, thus degrading it eventually.
Inspect Regularly: Look for signs of fraying, corrosion, or loose connections at the splice from time to time. The wear might be so slight as to only interfere with the audio signal; therefore, you need to be quick in your detection.
Protect Against Environmental Factors: Keep spliced cables well away from moisture and places where the temperature is extreme. Physical stress should not be applied to the cables either. In fact, you might want to install protective conduits or cable covers for such environments.
Ensure Proper Polarity: At the splice point, misaligned polarities may produce a phase problem and consequently, poor sound quality. So, when you are repairing or checking the splice, you should be using a multimeter to confirm the polarity.
Minimize Movement: The constant flexing or movement of the area around the splice will just increase strain and lead to either signal degradation or complete failure. Try to secure the cables in such a way that there will be no movement at all.
By adhering to these procedures, the quality of spliced speaker cables will be preserved, and their audio performance will be clear and consistent. However, please only work with tools and materials that the industry has recommended for the best outcome.
Identifying Issues with Spliced Speaker Wire
In my usual process of troubleshooting spliced speaker wire issues, I begin with a close-up inspection of the splice to spot poor connections or any damage that can be seen, such as frayed ends, exposed wire, or holes in the insulation. I am also taking a look for any signs of corrosion since this is one of the things that can affect the flow of current. With the help of a multimeter, I am able to test continuity and assert that the splice is not introducing resistance or breaks into the circuit. Furthermore, I do listen for audio distortions like crackling or intermittent sound, which might signify a weak splice or misalignment of the wires.
When to Replace Spliced Speaker Cable
When the splice on the speaker cable becomes so worn or damaged that it affects performance, it is time to replace it. In this case, the splice may show the following signs: burning, becoming visible wiring, melting of the insulation, or rust, and this is because such problems can affect sound quality or even cause electrical hazards. An important sign is also a constant decline in sound quality, such as distortion, or a broken sound now and then, or less clarity in the sound. If the splice adds noticeable resistance to the circuit while being tested with a multimeter, it would be better to replace it so as to have the best conductivity and most reliable performance. Furthermore, cables in high-humidity or extreme conditions may need replacement sooner than expected because of quick deterioration. Regular inspection of the splice is necessary to decide when it is a weak point of the system that requires replacement to keep the whole system working properly.
Reference Sources
SPLICING, TERMINATING, AND ACCESSORIES
Causative Sentence Characteristics Based on Its Semantic Structure
Frequently Asked Questions (FAQs)
What is the finest method to splice speaker wire?
The finest method to splice speaker wire depends on your specific needs and equipment. The ways generally used are butt connectors, wire nuts, or solder joints. Each method has different levels of durability and sound quality, so pick according to your audio experience and the size wire you are working with.
Is it possible to use electrical tape for insulation after speaker wire splicing?
Certainly, using electrical tape for insulation after speaker wire splicing is an accepted practice. It aids in establishing a bond and keeping any naked wire from leading to short circuits. Make sure that the wires are well twisted together or linked with butt connectors before applying the tape for the best effect.
Is there a signal loss when splicing speaker wire with solder joints?
Spicing speaker wire with solder joints is an elaborate act that is considered very effective when the signal loss is to be as minimal as possible. A pair of properly soldered connections can yield a strong and reliable bond, which will, in turn, enhance the overall sound quality of your home theater or stereo system.
What gauge speaker wire is suitable for splicing?
The gauge of speaker wire you should use when splicing usually depends on your audio equipment and the distance of the run. For the most part, 16-gauge or 12-gauge wire is good for home theater systems. Larger wire sizes can handle more current, thus making them suitable for high-performance setups.
Are butt splices or wire nuts better for splicing speaker wire?
Butt splices are generally preferred over wire nuts for splicing speaker wire as they provide a more secure and stable connection. Butt connectors, when properly crimped, ensure that there is a solid mechanical connection between two wires, reducing the risk of signal loss compared to wire nuts.
Can I splice unspliced wire without a heat gun?
Yes, you can splice unspliced wire without a heat gun by using butt connectors or wire nuts. If you choose to use solder joints, a lighter can be used to heat the solder instead of a heat gun. Just be careful not to damage the insulation around the area.
What tools do I need for splicing speaker wire?
To splice speaker wire, you will usually require a wire stripper, a set of crimping pliers, and either butt connectors or soldering gear. Depending on the method you select, electrical tape may also be handy for insulation, and a heat gun or lighter might be needed for soldering.
How can I make sure that the connection of my speaker wire splice is strong?
To make sure that the connection of your speaker wire splice is strong, ensure that the wires are correctly stripped and twisted together if a wire nut is used, or securely crimped if butt connectors are being used. If soldering, make sure the solder joints are cooled properly before insulating and apply insulation. It is also encouraged to test the connection for any audible effect.