In essence, the installation of an electric wall oven is no plug-and-play job; it requires considerations and wiring to ensure safety, good performance, and electrical code adherence. Understanding the basics of wall oven wiring is essential whether one is refurbishing a kitchen or installing one in a contemporary cooking space. Here, you will get a full view of the entire procedure-from principal electrical considerations and safety standards to step-by-step instructions for an easy installation. By the end, you will be able to handle the entire job perfectly or know what to ask when hiring an electrician for the job. This already includes you if you are a pretty well-informed do-it-yourselfer or just want to stay informed.
Understanding Wall Oven Wiring
Wiring a wall oven demands that one understand a few basic components and their functions so that the appliance may be operated safely and efficiently. The major components include the dedicated circuit, usually measuring 240 volts; the correct-gauge wiring, 10 for most residential ovens; and a suitable circuit breaker to safely handle the load of the appliance. Ground and neutral wires also play a crucial role in preventing electrical hazards. Connections to these wires should be made in compliance with the NEC so that installations are up to code and safe. Familiarity with these basic components makes it quite smooth to install and troubleshoot.
What is Wall Oven Wiring?
The wiring of a wall oven is the arrangement of electric wires employed in supplying power and ensuring safe operation of a wall-mounted oven in a household or commercial environment. Wall ovens are commonly connected to the home’s electric system through hard wiring and require a dedicated circuit of 240 volts. This wiring setup consists of hot wires, a neutral wire, and a ground wire, all rated to safely handle the amperage load of an oven. The most common wire gauge for wiring an oven is 10-gauge; however, larger ovens might require higher gauge wire depending on their power requirements. It is imperative to abide by the National Electrical Code (NEC) during installation to install grounds properly, avoid overloading, and prevent electrical hazards. Moreover, this wiring must incorporate a suitable circuit breaker rated between 30 and 50 amps, as specified by the manufacturer’s instructions. This way, the appliance can operate safely and efficiently.
Components of Wall Oven Wiring
Depending on wire types and gauge quantities required can be a little tricky during wall oven wiring; these wires must be present with the actual design for configuring the appliance and proper integration for function and safety.
| Component | Description |
|---|---|
| Electrical Wires | Normally, a wall oven requires 10-gauge or 8-gauge wires, based on the appliance’s amperage rating. Their rating must be for 240V circuits to stand against the load of the circuit efficiently. |
| Dedicated Circuit | Make sure wall ovens are connected to a dedicated 240-volt circuit; thus, electrical load excess on the actual system is counteracted. A little interference with some other appliances is reduced through this circuit. |
| Circuit Breaker | Generally, the 30-50 amp rating will be given to that particular breaker serving the dedicated circuit. Referring to the manufacturer’s instructions is best when opting for the precise technical requirements for the model of the oven being installed. |
| Grounding System | The correct grounding is vital to prevent electrical shocks and to comply with the NEC. The ground wire connects the metal frame of the appliance to the electrical panel for extra protection. |
| Junction Box | The wiring should be connected safely within a safe junction box, installed in an accessible location, usually behind or beneath the oven, to allow for connections and future maintenance. |
| Neutral Wire (if applicable) | Certain wall oven models may require the neutral wire in addition to two hot wires and a ground. Providing this additional degree of freedom allows power to be supplied to some internal functions, such as timers or digital interfaces. |
All these must be installed strictly in accordance with the NEC and the instructions provided by the oven manufacturers for the system to work safely and efficiently. Always consult a licensed electrician to ensure compliance and professional installation.
Importance of Proper Wiring for Your Oven
Being wired properly, an oven will be safe, efficient, and reliable in its operations. Faulty or improper wiring increases the risk of electrical hazards like short circuits, overheating, or fire. During installation, any electrical work should comply with the National Electrical Code (NEC) and the manufacturer’s specifications. Most wall ovens found in modern homes demand a three-wire system comprising two hot wires, one neutral wire, and one ground wire. The purpose of the neutral is to give a separate electrical feed to the oven for features such as timers, clocks, and digital displays, distinct from the actual heating elements.
Any fault in wiring will result in defective components, irregular temperatures, or outright damage to the oven’s electrical circuits. The choice of wire gauge and type is pretty much dictated by the current demands the oven puts on any wiring. Wires that are sized too small are prone to overheating, whereas certain materials used in wiring are hazardous. Electrical troubleshooting is a big challenge; hence, installation and repair by a licensed electrician is best. Professional installation is a guarantee that local electrical codes will be respected, which in turn extends the working life of your appliance and keeps its warranty intact.
Preparing for Your New Wall Oven
It is essential to measure your kitchen space accurately. You start by measuring the height, width, and depth of the existing cutout where the oven will be installed. Provide for sufficient toast clearance so air can properly flow through it, sharing the manufacturer’s guidelines. Then one more time, measure the wall oven itself to make sure it will fit right into the space available. Proper measurements prevent installation delays so that everything goes smoothly in operation.
Assessing Your Current Wiring Setup
Evaluating your existing wiring setup is yet another important factor to consider before installing the new wall oven. Determining voltage and amperage requirements for your new appliance is performed first by consulting the product manual. Most modern wall ovens require 240 volts and a dedicated circuit. Check to be sure your electrical panel in your home can feed this. Inspect your wiring system to ensure it is up-to-code, which means it must not be damaged, be properly insulated, and carry the required load. It is vital to look out for a grounding connection, as this is a safety requirement and hence must be in line with electrical standards. Should your present setup fail to satisfy these requirements, talk to a licensed electrician about any upgrades or modifications necessary to make it comply. Such an evaluation prevents not only the hazards but also ensures the correct functioning of your appliance post-installation.
Choosing the Right Power Cord for Your Oven
The most important aspect of choosing a cord for an oven is that it fits the oven’s electrical requirements. Determine the voltage and amperage specifications of your appliance from the manual, product label, or packaging. Most ovens require either a 3- or 4-prong cord, depending on the connection in your household outlet, according to the National Electrical Code.
With the 4-prong outlet, a wire separate from the ground is supplied; this is the standard under newer installations. The 3-prong outlet, on the other hand, belongs to the older generation; this setup is not equipped with a separate ground wire and is still frequently found in older systems. Choose a cord that meets this prong configuration for your outlet. Power cords also come rated for amp requirements, most being 40- and 50-amp cords, so check to see that the rating of your cord matches the requirements and capacity of your oven and electrical circuit.
What’s important to keep in mind is to always choose a power cord that is UL-listed or similarly certified for safety and quality; never use one with dubious origins. Do not use old or damaged cords with potentially worn insulation, because that would be the recipe for electrical failure and a fire hazard. Should you ever find yourself questioning compatibility or installation procedures, consult with the oven manufacturer or employ the services of a licensed electrician to discount any risk.
Gathering Necessary Tools and Materials
Installation of an oven requires a properly arranged workspace where safety and efficiency prevail. The most essential items and tools for installation include:
- A screwdriver set, with both Phillips and flathead types
- A voltage tester to ensure the circuit is disconnected
- A wire stripper to adeptly cut the cable to the needed length
- Adjustable pliers to guarantee all connections are well tightened
- The power cord suitable for your oven model (preferably UL-listed)
- Adequate strain relief clamps to firmly hold the cord in place
- Electrical tape is necessary to insulate the terminations
- A measuring tape will help ensure proper alignment during installation
Always double-check with your manufacturer or instruction manual as to whether any different materials are recommended for your particular model to prevent issues.
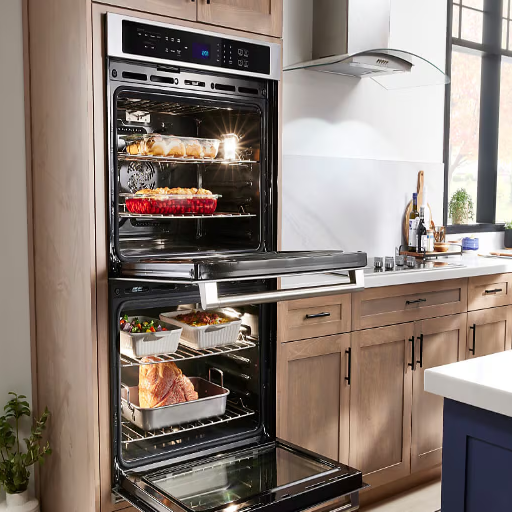
Installing a New Wall Oven
Before installing the new wall oven, ensure that the wiring satisfies the electrical specifications of your oven with regard to voltage and amperage, as stipulated in the manufacturer’s manual. It is also an opportunity to verify whether the cutout dimensions of your cabinet fit to hold the oven securely. The electrical junction box must be situated properly, almost always within the cabinet or wall, so that a neat connection is assured and easily accessible. Apart from this, provide for heat-resistant insulation in the vicinity to safeguard other materials that can be exposed to heat during the operation of the oven.
Step-by-Step Installation Guide
Step 1: Setting up the WorkspaceBegin by ensuring that the installation site’s electricity is turned off at the circuit breaker. Confirm with the multimeter if the connections are not live. Clean the workspace and keep it ventilated. Wall ovens have different cutout widths, either 24, 27, or 30 inches, according to the model, so first, measure your respective cutout area and make sure it is understood by the dimensions of your oven. Allow the recommended clearance around for ventilation, which is usually an inch or two.
Step 2: Confirm Electrical RequirementsThe measurement of amperage varies according to the kind of oven, but wall ovens usually operate at 240 volts and a dedicated circuit is thus required to manage this electrical load, which generally weighs at 20 to 50 amps. Match the circuit rating size and voltage to that of the label stuck on your oven. It is typically found either on the inside of the door frame or at the back of the unit. Perform rewiring with 10-gauge or 8-gauge wiring for 30- or 40-amp circuits if required to be in line with the current electrical codes. Mount the junction box according to the prescribed height, usually measured at 30 to 48 inches above the floor.
Step 3: Install Power CordRemove the electric junction box cover and tie the wires from your oven into the house wiring. Most installations will require you to match color-coded wires (black-to-black, red-to-red, and white-to-neutral or ground). If a grounding wire is present, attach it properly to the grounding screw. Secure each connection with wire nuts and wrap them in electrical tape as an extra safety measure.
Step 4: Position the OvenLift the oven onto a cart or onto a dolly and roll it into position within the cutout. From here, using pads or a drop cloth, protect the floors and cabinetry underneath the oven. Level it carefully with a leveling tool so as to have the oven sitting level in the space. Next, secure the oven by fastening the mounting screws into the side or bottom brackets per the manufacturer’s instructions. Check that the door has unrestricted opening and closing.
Step 5: Complete Electrical ConnectionsCarefully push the connected wires back inside the junction box to prevent damage. Then securely replace the cover over the junction box. Recheck the power cord installation and the strain relief clamp to ensure that every one of them is tight and in place. Switch the power back on at the circuit breaker and turn on the oven for its function test.
Step 6: Testing and Finalizing the InstallationThis initial test cycle, run as per manufacturer instructions, will confirm that the oven is functioning correctly. Some ovens might demand an initial burn-in period at a particular temperature and time to allow for any residues from production to burn off. Ensure that all controls, heating elements, and lights are working properly. Check the fit of the unit to make sure there are no gaps or uneven edges.
Professional Tip:By following these detailed steps, in accordance with the manufacturer’s guidelines and local codes, one can efficiently accomplish the installation of their wall oven while ensuring safety.
Connecting the Wires: Black, White, and Red
In connecting wires for a wall oven installation, it is necessary to understand the function of the wires and adhere to safety protocols. The typical black and red wires represent “hot” wires, with each carrying 120 volts, combining to form the 240-volt circuit required for the oven. The white wire should be the neutral conductor, completing and maintaining the current flow through the 120-volt load inside the oven, if any. Such components might include the lights or the display panel. Wire connections should be secure, with the black and red wires connected to their respective terminals on the oven’s junction box. The white wire will hold the neutral terminal.
Verify that the ground wire-bare copper or the green-insulated wire-is connected to the grounding screw or terminal. This procedure ensures that the equipment will operate safely, thus preventing electrical shock hazards. Also, examine all connections again for tightness and accordance with the manufacturer’s wiring diagram and local electrical codes before proceeding. Always shut off the power at the breaker box when working with wires to prevent accidental electric shock.
Grounding Your New Oven Safely
Critical Safety Steps
Safe installation is dependent on the proper grounding of a new oven according to prescribed electrical standards. Here’s a valuable compilation of the most essential steps gathered from authoritative sources:
- Turn the Power Off: First and foremost, turn off the power from the breaker panel to avoid any chance of electric shock. An extra precaution would be to verify using a voltage tester that indeed the power is out.
- Allow for the Wiring Setup: 3-Prong: In this type of setup, neutral (white wire) doubles as the grounding wire. 4-Prong: A Separate grounding wire (bare or green) should be brought in from the panel contribution box. Study the supplied wiring diagram from the manufacturer carefully, since oven wiring may differ from model to model.
- Connect the Grounding Wire: Identify the ground terminal inside the oven junction box or terminal block. Connect the green (or bare copper) wire to the grounding screw/terminal. In a 3-wire system, connect the neutral wire (usually white) to the center terminal and tighten the connection securely.
- Secure Connections: Inspect all screws and wires. Confirm that all connections are tight and correctly aligned. A loose connection may cause an electrical malfunction or pose an on-ground safety hazard.
- Testing Circuit: Once installation is complete and before feeding in line voltage to the oven, conduct a continuity test for the grounding to ascertain that the ground is in place and working-ground on the installation.
- Observe Local Electrical Codes: Ensure strict conformity with local building and electrical codes, which may require that your installation be inspected by a licensed electrician.
Grounding offers a possible way for the flow of current in electric fault conditions and largely serves to eliminate shock hazard or the possibility of fire creation. In the event of a local electrician being available for advice, get him to do the inspection or complete the installation properly.
Common Wiring Issues and Solutions
Loose Wiring Issue: Loose wiring causes arcing, which in turn causes heating and gives rise to the hazards of fire.
Solution: Tighten all wire connections securely; no wire should be left exposed outside the terminals or connectors. Use wire nuts or terminal blocks wherever required.
Overload Issue: Overload on any one circuit tripping off the breakers, or if the breakers fail, damaging one or more of the devices in the circuit.
Solution: Distribute the load among several circuits, and if the load is heavy enough, change the circuit to one of a higher rate of amperage.
Under Gauge Issue: A wire too small for the load on it can easily overheat.
Solution: Use the proper gauge wire that is required by the circuit. Usually, 14-gauge wire is used for 15-amp circuits, whereas 12-gauge wire is used for 20-amp circuits.
Reversed Polarity: Wrong wiring connections cause malfunctions and hazards.
Solution: Ensure that the black wire is connected to the brass terminal, and the white wire is connected to the silver terminal.
Improper Grounding: Absence of proper grounding increases the potential for accidental shocks in case of equipment failure.
Solution: Check that all outlets and appliances are grounded in accordance with electrical codes, and if necessary, perform tests for the grounding.
Addressing these common issues will ensure that electrical systems can work efficiently and safely. If there is any doubt about a repair, have a certified electrician properly diagnose and repair the defect.
Troubleshooting Wiring Problems
Again, troubleshooting wiring issues will need some systematic inspection and identification of the problem. Here are common wiring problems and their general solutions, from a reliable source:
Lights Flickering or Dimming
Cause: Loose wiring, circuits that are overloaded, or incompatible bulbs.
Solution: Check the fixtures for loose connections. Make sure the bulb; in short, see to it that the bulb is compatible, and finally check if the circuit itself is loaded with other appliances.
Breaking of Circuit-breaker
Cause: Overload in the circuit, short circuit, or ground fault.
Solution: Turn off the loads and try to redistribute them to the other circuits. Go through the appliances themselves and the wiring for possible shorts and damages; if the problem continues to exist, have a professional electrician check for it.
Dead or Non-Working Outlet
Cause: GFCI outlets have gone off, loose wiring, or are becoming worn out.
Solution: Reset all GFCI outlets that would have tripped in the circuit. Tighten all loose wiring and replace outlets or switches that are faulty.
Burning Smell or Scorch Marks Around Outlets
Cause: It gets very hot due to loose connections or overloading.
Solution: First thing is to switch off trickle power to the outlet, check the wiring for damage, replace any components that are damaged, and tighten all the connections.
Strange Buzzing or Humming Noises
Cause: Loose wiring, defective devices, or breakers.
Solution: Inspect the device or breaker in question. Tighten loose wiring. Replace faulty components.
When troubleshooting begins, always turn off the power at a breaker panel before working on anything electrical. When the problem or cause still isn’t identifiable, for safety reasons, get a licensed electrician to do some advanced diagnosis or work.
When to Call an Electrician
Call a licensed electrician when there appears to be a potential danger to electrical safety or when there is a need for specific expertise. Typical instances include:
- Incessant Circuit Breaker Trips – If breakers keep tripping after having been reset, it could be overloaded circuits, faulty wiring, or even the breakers themselves. The matter needs checking by a duly qualified professional who knows how to deal with it, so that there is no chance that an electrical fire may spark or cause damage.
- Lights Flickering or Dimming – It may be an indication of loose wiring or issues with connectors, or an overloaded system. Immediate attention should be given to these matters to forestall any further complications.
- Burning Smell or Discolored Outlets – Whenever an electrical outlet or switch smells of burning, produces heat, or appears to be scorched, stop using the outlet and call an electrician immediately to preclude hazards.
- Shocks When Plugging in Devices – Electric shocks can signal grounding issues or wiring faults, and these have to be inspected by a professional.
- Old or Outdated Wiring – Any house over 30 years old may have an antiquated electrical system not suited for modern devices; inefficiency and danger may arise therefrom.
- Installation or Upgrades – Whoever had new outlets installed or complicated electrical systems installed-whether EV chargers or anything else, and who upgraded panels-would probably want to ensure that everything is built to safety codes and regulations by that professional.
Taking care of any electrical concerns keeps the property structurally sound, which makes it safe for whoever inhabits it. Always opt for certified electrical contractors. They can properly diagnose the problem and repair it correctly.
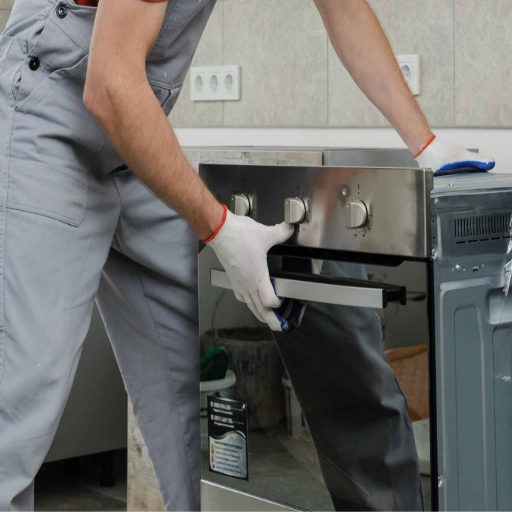
Safety Precautions During Installation
The electric installation process requires safety measures to protect the installer and the property. Below are the precautions that should be taken:
- Power Shutdown – Never start any work without first shutting down electrical power at the main circuit breaker; this eliminates the possibility of an electric shock, extra danger, or a short circuit. This must be confirmed with a voltage tester.
- Personal Protective Equipment (PPE) – Insulated gloves, rubber-soled shoes, and safety goggles should be worn to prevent any accidental injuries from contact with live parts.
- Tools and Equipment – Only tools rated for electrical work should be used, such as insulated screwdrivers, voltage testers, and wire cutters. Tools should be well kept to avoid unexpected failure.
- Installation Compliance – NEC standards or local regulations for safety must be met in order to comply with the system and avert dangers. Incorrect installation may attract fines and can pose serious dangers.
- Work Environment – Keep it clean and dry to avoid unintentional slips and reduce the risk of electric shock due to contact with conductive surfaces.
- Proper Grounding – Ensure all systems and equipment are grounded correctly so that they will be protected against electrical surges and avert any possibility of damage in the circuits or a fire.
When such safety measures are adhered to, installation risks are considerably reduced, and a robust and compliant electrical system can be ensured.
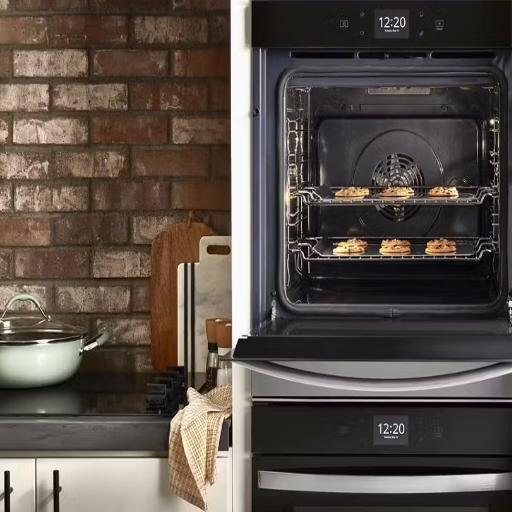
Final Checks and Testing Your Wall Oven
- Proper Installation Check – Make sure the oven is firmly mounted; all screws are to be tightened, and the unit should be perfectly level, lest operational issues arise.
- Inspect Electrical Connections – Make sure the power supply is connected, and the circuit breaker is ON. Recheck the grounding to ensure safety norms are met.
- Calibrate Settings – Set the oven to preheat at a usual temperature (350°F, for instance), and observe whether it is heating efficiently and with full accuracy.
- Testing of All Functions – Testing of baking, broiling, and all other functions must be ensured for their correct functionality.
- Check Alarms or Error Codes – Checking the control panel to ensure that no error warnings or codes are being flashed during operation should be done.
With these final checks, one can be assured that the oven performs safely and according to bridging specifications. In case of any discrepancy, the user manual or a certified technician should be consulted.
Testing Your Wall Oven Connection
Verify the electric outlet connection, sure that the oven is properly wired onto a single circuit breaker. Check the user manual to determine voltage requirements and voltages available in your home. Use a multimeter to measure voltage at the output terminal.
Inspect the power cord and The power cord is inspected for visible damage; for indetectable damage like frayed or burned. Check if the outlet is firmly mounted and free from any obstruction.
Test all functions of the control panelTurn the oven on and interact with the control panel to verify that all buttons, touch screens, or knobs respond properly. Set basic functions to check that the system correctly processes commands.
Check oven heating elementsWith the baking and broiling functions, test heating elements separately. Observe those that heat correctly and without irregular fluctuations in temperature; those that do not.
Monitor the error codesDuring each test, observe the control panel to ensure that no error codes or alarms are triggered. Refer to the troubleshooting section of the oven manual to correctly resolve the possible faults.
Every step above is essential in ensuring that your wall oven is working well and is safe to use. The procedure should be stopped immediately if any anomalies are observed, and the service of a licensed technician should be sought or the manufacturer’s help desk contacted. Proper testing is important for preventing long-term failures that can cause safety issues.
Ensuring Compatibility with Electric Stoves
Electric stove compatibility is ensured by always confirming that the rated voltage and amperage of the stove equate to those available in one’s home. I further ensure that the wiring and outlet configuration correspond with the requirements of the manufacturer. Thus, I try to avoid any workability issues or safety risks that could arise from faulty installation.
Verifying Circuit Breaker Functionality
Check for any visible signs of damage on the breaker-these might be signs of malfunction, such as burns or cracks. Next, test the circuit breaker by switching it off and on again, and watch the electrical devices on the relevant circuit being powered back on. With the help of a multimeter, you can check the voltage readings on the breaker terminals to verify that current flow is being properly regulated. Suspecting a problem? Then, maybe do a continuity test of the internal mechanism. Follow all instructions given by the manufacturer and established safety procedures throughout the whole course of action. Should the breaker fail any of the above-mentioned tests, replacement by a qualified professional must be done immediately.
Installing a wall oven with proper wiring is a crucial task that requires careful attention to safety, compliance with electrical codes, and adherence to manufacturer specifications. By following the comprehensive steps outlined in this guide, you can ensure a safe, efficient, and code-compliant installation. Remember, when in doubt, always consult a licensed electrician to protect your home, your appliance, and most importantly, your safety.
Reference Sources
Frequently Asked Questions (FAQs)
What is the importance of proper wall oven wiring?
Proper wall oven wiring is imperative for safety and efficacy. Proper installation will prevent any electrical hazard that might lead to short circuits or fires. Moreover, with the correct wiring, your new wall oven will run on the voltage it was designed for, which will also prolong the life of the appliance.
How are wires connected in setting up a wall oven?
On setting a wall oven, you usually have three wires to connect: black, white, and green or bare wire. Connect the black wire to the power line of the oven, and the white wire should be connected to the neutral. Green or bare wire is used as a ground for safety from electrical shocks.
What colors are usually used in wall oven wiring?
Few colors are normally used in wall oven wiring: black, white, and green or bare wire. The black wire would usually be for the voltage, the white wire is a neutral, and green or bare wiring ensures safety by grounding during operation.
Should I hire an electrician to wire my wall oven?
Yes, one should seek the help of a licensed electrical contractor or electrician specializing in wall oven wiring. This expert will ensure that the installation will comply with local electrical codes to avoid dangerous wiring mistakes.
What is the difference between a 3-wire and a 4-wire wall oven connection?
The 3-wire connection makes use of two hot wires (black and red) with one neutral wire (white), whereas the 4-wire connection makes use of two hot wires, one neutral, and one ground wire (green or bare). Four-wire connection for enhanced safety is generally required for newer wall ovens.
What if I have an older oven with wiring that is antiquated?
In the case of an old oven with antiquated wiring, wherein installation work must be done to update the wiring according to the present safety codes, consult a licensed electrical contractor. The electrical contractor could determine the condition of your wiring and decide upon the necessary upgrades; for instance, a receptacle might be replaced for better efficiency and safety.
Can I provide a power cord with my wall oven installation?
Yes, a power cord can be provided and used if the power cord is fitted to the appliance. It must be made for the voltage of your oven and should be long enough to reach from the oven to the outlet. It is important to fit and connect the power cord following the instructions in the installation manual.
What type of circuit breaker is required for wiring a wall oven?
Wall oven wiring requires a dedicated circuit breaker. Generally, a double-pole 30-amp breaker is installed for most electrically heated wall ovens. This way, the oven is adequately powered, and the circuit is protected against overload.